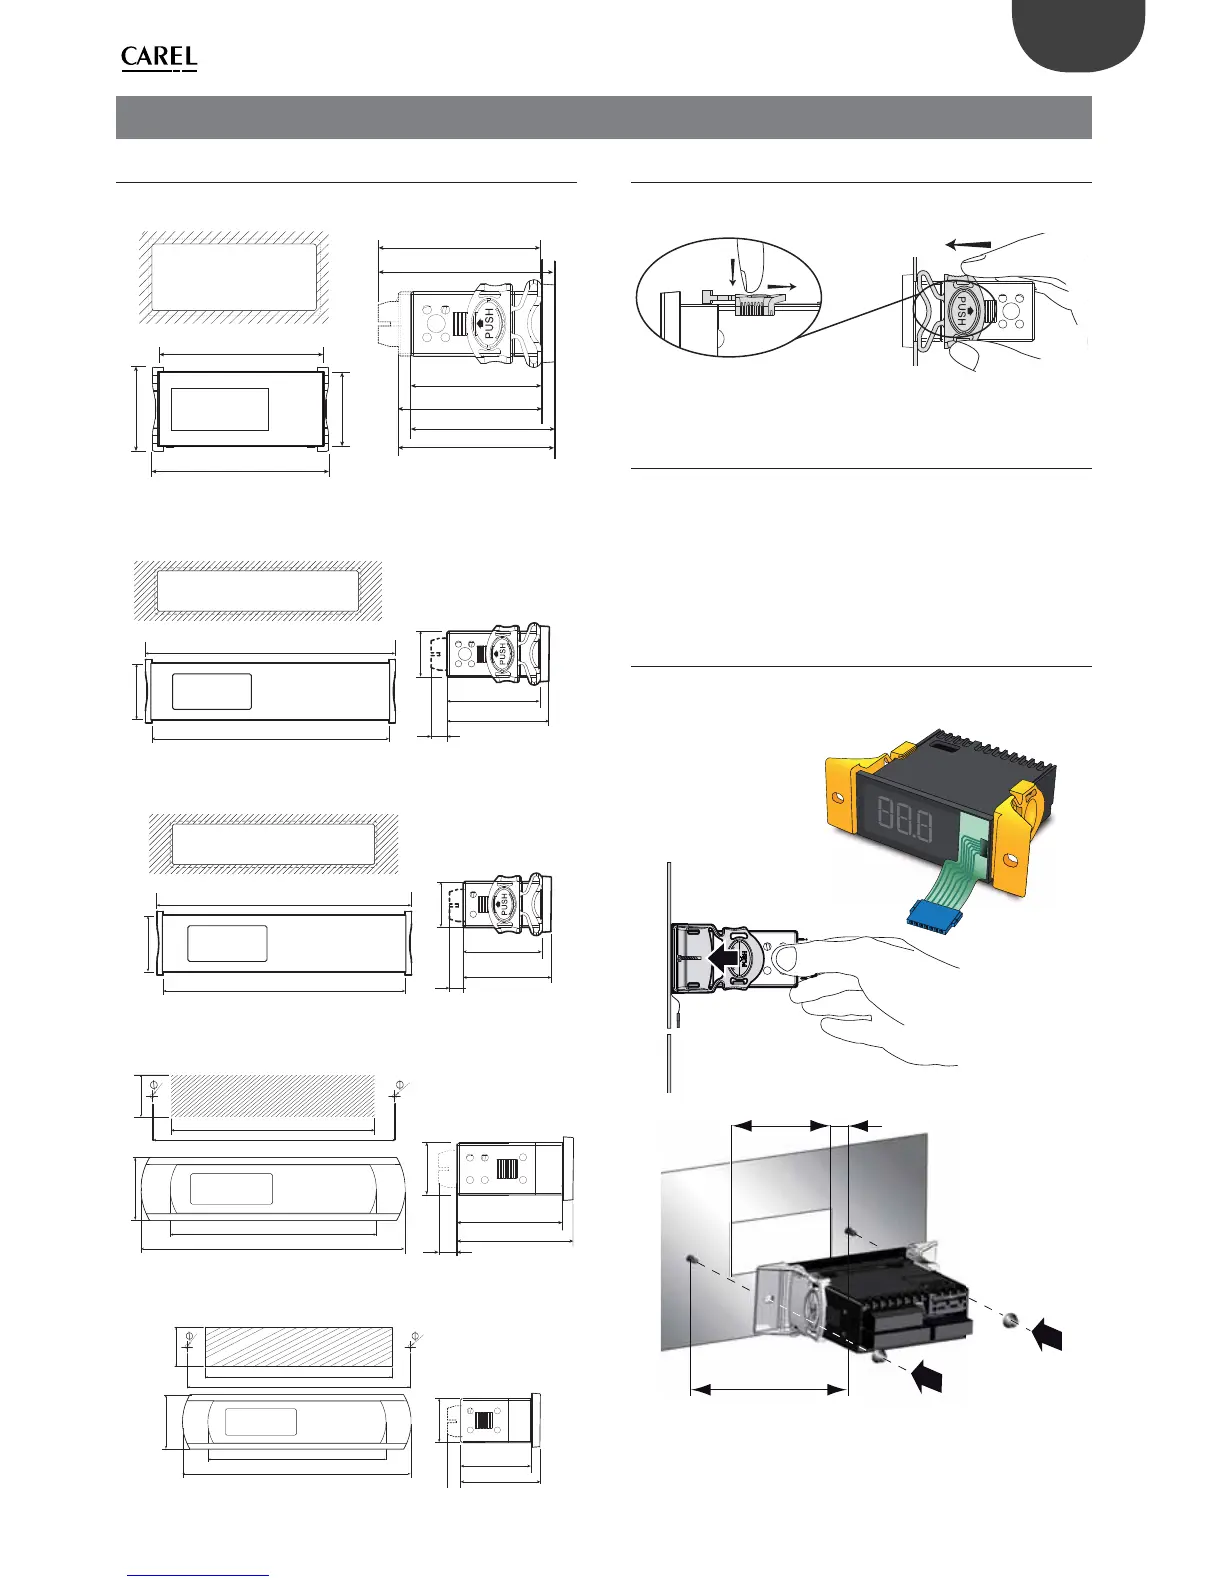
EasyManuals Logo

Carel ir33+wide User Manual

Carel ir33+wide
56 pages
To Next Page IconTo Next Page
To Previous Page IconTo Previous Page
Page #9 background imageLoading...
Page #9 background image
9
ENG
ir33plus +0300028EN rel. 1.1 - 05.05.2017
2. INSTALLATION
2.1 Dimensions
ir33+
dima di foratura
drilling template
71x29 mm
34.7
79.5
82
76.2
80.6
38.6
60
64
Version E, A
65
69
Fig. 2.a
ir33+ wide
dima di foratura
drilling template
138.5 x 29 mm
36
143
147
69
73
10
28
Fig. 2.b
ir33+ small wide
44
47.5
28
10
dima di foratura
drilling template
138.5 x 29 mm
36
143
147
Fig. 2.c
Easy wide
182
140
43
69
73
10
28
3
29.2
138.4
165
3
dima di foratura
drilling template
Fig. 2.d
Easy small wide
182
140
43
44
47.5
28
10
3
drilling template
dima di foratura
29.2
138.4
165
3
Fig. 2.e
2.2 Panel mounting
To install the ir33+, ir33+ wide and ir33+ small wide controllers, use the 2
brackets shown in the  gure.
1
2
Fig. 2.f
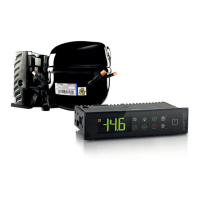
2.3 Rear panel mounting
The models with separate membrane keypad (e.g. keypad part numbers
62C716A084 and 62C716A085) should be rear panel mounted, with
the membrane keypad  tted from the front; electrical connection
is performed using the ribbon cable, sliding it through the opening
provided. ir33+ and +ir33+ wide models require side brackets, inserting
the fastening screws; easy wide and easy small wide models have holes
on the side, accessible after having removed the frame.
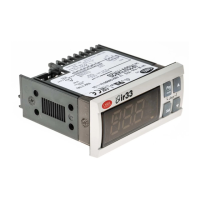
ir33+
STEP 1
Drill the holes (ø 3 mm) with the spacing shown in the  gure and make
the opening for inserting the ribbon cable.
53 mm 14,5 mm
98 mm
Fig. 2.g

Table of Contents

Questions and Answers:

Question and Answer IconNeed help?

Do you have a question about the Carel ir33+wide and is the answer not in the manual?

Carel ir33+wide Specifications

General IconGeneral
BrandCarel
Modelir33+wide
CategoryController
LanguageEnglish

Related product manuals