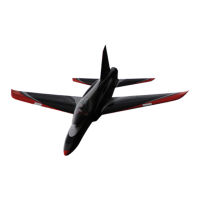
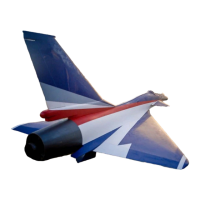
EasyManua.ls Logo

Carf-Models Rebel HOT - User Manual

Carf-Models Rebel HOT
7 pages
Print Icon
To Next Page IconTo Next Page
Loading...
CARF-Models
Rebel HOT / Rebel Classic 2m
Instruction Manual
The Rebel HOT and Rebel Classic 2m are very similar, almost identical in all features and
details. So, this manual will describe the building of both of the aforementioned Rebel
types, if there are specific dierences we will not them especially. "
The Rebels are all very highly prefabricated. There is no actual building to be done. Since
it is only installation work, we kept this manual very brief and don’t necessarily show what
a halfway experienced modeler should know anyway. However, the brief but important
specific information will be very important to be read and understood."
There are not many Sport Jets on the market today who have a similar success story as
the Pirotti Rebels. When CARF Models took over the Rebel design, our philosophy was
not to ride the wave of ever new designs, untested, unproven, either always the same
style reinvented - or plain outright ugly just to be dierent…. No, we decided to go with
one rock solid SportJet in various sizes, which just needed a revitalization in order to
show everybody the lead once more. "
The Pirotti Rebels have received a complete makeover by CARF-Models. All 4 sizes are
now incredibly prefabricated and painted in the molds. All important design and
engineering features have been revisited and some of them improved, not only in terms of
ease of build and construction, but also strength, rigidity and performance. The results
are 4 models which are there to remain in the small group industry leading Sport Jets for
many more years to come. "
This manual is giving a quick and easy description of the critical installation steps for
Rebel HOT and Rebel Classic 2m for you to successfully integrate your Rebel and get it
ready for the first flight in no time. These two versions are nearly identical in design and
build so this manual will work for both of them."
Lets start with the assembly and equipment installation:"
1) Wings
Test fit the Rebel HOT / Classic 2m JP-Gear into the gear mount of the wing. You can
operate the gear with a 1-2 cell Lipo or 5 cell NiCd battery but here a word of caution: BE
VERY CAREFUL not to burn the motors when reaching the end position. Unplug BEFORE
the brass slider reaches its mechanical lock to prevent motor damage. Only with the
controller connected the motors will switch o correctly and automatically by sensing the
peak of current.
If necessary, use thin plywood shims on the wood mount and sand or grind the opening in
the wing so that the wheel and strut fit without hitting the skin.
Question and Answer IconNeed help?

Do you have a question about the Carf-Models Rebel HOT and is the answer not in the manual?

Overview

The CARF-Models Rebel HOT / Rebel Classic 2m is a high-performance RC jet aircraft designed for experienced modelers. It is available in two main versions: the Rebel HOT and the Rebel Classic 2m, with the Classic 2m being a larger version of the HOT. Both models share similar construction and flight characteristics, offering a very similar and impressive flight experience.

Function Description:

The Rebel HOT / Rebel Classic 2m is a radio-controlled jet aircraft intended for sport flying and aerobatics. It is powered by a turbine engine (not included) and features retractable landing gear, flaps, ailerons, elevator, and rudder for full control during flight. The aircraft is designed for speed and agility, providing a thrilling flying experience for advanced pilots. The construction emphasizes durability and precision, utilizing aircraft-grade Finnish birch plywood for critical components.

Important Technical Specifications:

  • Versions: Rebel HOT and Rebel Classic 2m. The Classic 2m is a larger version of the HOT.
  • Engine Compatibility: Designed for turbine engines. The manual mentions "King Tech" in one of the images, indicating compatibility with such brands.
  • Servo Compatibility:
    • 15 mm servos (e.g., SAVOX 1260HV, MacGregor 2810HV): Fit the Rebel HOT.
    • 20 mm servos (e.g., SAVOX 1270, MacGregor 6928): Fit the Rebel Classic 2m.
  • Landing Gear: Retractable landing gear. The main gear is pre-installed in the ARF-Plus service.
  • Fuel System: Features a main tank and a header tank. The main tank has 2 connections (clunk line and vent line) and 3 connections for the clunk/pickup (center of tank and NOT move), one for filling, and one for the bottom inside the tank. The header tank has one connection that falls from top to bottom when the tank is rotated. An overflow tube is also present.
  • Control Throws (starting points):
    • Aileron: 20 mm up/down
    • Elevator: 15 mm up/down
    • Rudder: 40 mm up/down
    • Flaps: 25 mm for Take Off, max deflection for Landing
    • Elevator to Flap mix: Elevator proportional 3mm down at full Flap deflection
  • Center of Gravity: With empty main tank and full header tank, the CG is at the Front Edge of the Wing Tube.
  • Construction Material: Aircraft-grade Finnish birch plywood for gear mounts and other critical structures.
  • Receiver/Gyro Mounting:
    • Rebel HOT: Does not have a level surface in front of the engine bay, requiring careful mounting of gyros/receivers.
    • Rebel Classic 2m: Has a level surface in front of the engine bay, ideal for gyro/receiver installation.
  • Wiring: Requires a 10-pin connection per wing for gear, brake, and servo wires.

Usage Features:

Assembly (ARF-Plus Service):

If the ARF-Plus service is purchased, several steps are pre-completed, including:

  • Main gear installation with self-tapping screws.
  • Fuel tank installation and plumbing.
  • Thrust tube installation.

General Assembly Steps (for non-ARF-Plus or specific components):

  1. Wings:
    • Main Gear: Trial fit and cycle the main gear with a separate battery. Ensure sufficient clearance around the wheel and strut (a few mm). Use white grease if oleos bind. Screw the gear in with included self-tapping screws.
    • Flaps: Install flap servo from the root using a slightly longer screwdriver. Use ONLY the provided 2.9mm self-tapping servo screws. Install linkage with all-thread piece, 2 stainless spring steel clevises, and counter nuts. Adjust flap spar hole carefully if needed.
    • Ailerons: Install aileron servo into the side mount in the wing. Use a drop of silicone on the servo surface to prevent sliding and trim issues. Make up linkage like the flap.
    • Wing Installation: Slide wings onto the fuselage and check wing tube fit. Mark holes for gear, brake, and servo wires. Install one or two pairs of 10-pin connectors per wing.
  2. Stab (Horizontal Stabilizer):
    • Install elevator servos like flap servos and create linkages.
    • Install rudder servo in the fin like aileron servos and create linkage.
    • Slide stabs on and check stab tube fit with fixing bolts.
  3. Fuselage:
    • Nose Gear: Install nose gear. Trial fit and cycle with a separate battery. Trim cutout if necessary. Permanently screw in place with 4 self-tapping screws.
    • Thrust Tube: Install thrust tube. For the Rebel HOT / Classic 2m JP-Gear into the gear mount of the wing. Ensure the gear operates with a 1-2 cell Lipo or 5 cell NiCd battery. BE VERY CAREFUL not to burn the motors when reaching the end position. Unplug BEFORE the brake under-reaches its mechanical lock to prevent motor damage. Only when the controller connected the motors will switch off correctly and automatically by sensing the peak of current.
    • Fuel Tank: Install the main tank and header tank. The header tank should have 2 connections, the clunk line and a vent line ending inside at the top of the fuel tank. The header tank should have 3 connections, one for the clunk/pickup (should be in the center of the tank and NOT move) one for the connection to the main tank, ending at the top inside the fuel tank, and one for the filling, ending at the bottom inside the fuel tank. Make sure to use the included felt clunk and test that it falls from top to bottom when the tank is rotated. Connect an overflow tube to the main tank and feed it out of the fuselage on the bottom side. You can install a clean fitting or simply drill a hole in the bottom fuselage which holds the overflow tube tightly. Mount the header tank to the diagonal surface in front of the engine bay and connect it to the main fuel tank with the clear tube. Always solder the included barbs on to the brass tubing and use some safety wire to secure the fuel tubing on the brass tube.
    • Engine Installation: Install the engine onto the plywood mounting rails. Align the engine so the exhaust cone is exactly in the center of the thrust tube. You might have to shim the engine with thin plywood strips. It is recommended to connect the engine via a shut off valve to the header tank, just to avoid accidental flooding of the engine when you fuel up the tank.
    • Electronics: Install engine ECU, Receiver, Gyro (if used), Gear controller, RC Switch, and batteries. Batteries might need to be moved back slightly depending on engine weight and battery size.
    • Wiring: Extend wires from the wings and tail to the receiver position. Fix these wires carefully to the sides of the fuselage. Use double-sided foam tape or CA glue on foam tape before sticking it against the fuselage sides.

Pre-Flight Setup:

  • CG Check: With empty main tank and full header tank, ensure the CG is at the front edge of the wing tube.
  • Control Throws: Set initial control throws as specified in the manual.
  • Engine Throttle: Teach the engine throttle channel as instructed by the engine manufacturer.
  • Engine Test Run: Perform a good engine test run on the ground, check the fuel system for air and leaks.
  • Radio Check: Verify control surfaces travel the correct way and gyro compensations are correct.
  • Range Check: Perform a range check according to radio manufacturer's advice.
  • Gear Cycle: Cycle the gear a few times to ensure flawless operation.

Flight Characteristics:

  • Both elevator and aileron are described as "quite soft," with "no bad habits and no surprises."
  • Rudder is "very effective."
  • A gyro is recommended for windy and bumpy weather.

Maintenance Features:

  • Oleos: If the spring-loaded oleos bind, use white grease from a spray can to ease them up.
  • Cutouts: Ensure sufficient clearance (a few mm) around the wheel and strut in the wing skin cutouts.
  • Servo Security: Use a drop of silicone on servo surfaces to prevent slight movement in mounts, which can cause trim issues.
  • Fuel System: Regularly check the fuel system for air and fuel leaks during engine test runs.
  • Wiring: Secure all wiring carefully within the fuselage to prevent interference or damage.

Carf-Models Rebel HOT Specifications

General IconGeneral
BrandCarf-Models
ModelRebel HOT
CategoryToy
LanguageEnglish

Related product manuals