Do you have a question about the CAROL BIKE 2.0 and is the answer not in the manual?
Guidance on safely unpacking the CAROL bike delivery.
Crucial advice for a successful and safe assembly process.
Information on how to get assistance with assembly or missing parts.
List of tools provided with the CAROL bike for assembly.
Inventory of components included in the CAROL bike package.
Instructions for attaching the front stabilizer to the bike frame.
Instructions for attaching the rear stabilizer to the bike frame.
Step-by-step guide to correctly attach the pedals to the crank arms.
Detailed instructions for mounting the handlebars onto the bike stem.
Steps to correctly install the bottle holder onto the handlebars.
Guide for securely attaching the tablet to the charging dock.
How to adjust the saddle position for optimal comfort and fit.
Instructions for connecting the bike to its power source.
Information about compatible cleats for the CAROL Bike 2.0 pedals.
Guidelines for cleaning and maintaining the tablet screen.
How to operate the tablet's power button for on/off and sleep modes.
Steps to connect the CAROL bike to a Wi-Fi network.
Overview of initial rides and how CAROL personalizes workouts.
Solutions for common Wi-Fi connection problems.
Steps to resolve issues related to the bike losing power.
Recommendations for correct bike assembly and placement.
How to adjust the bike's levelling feet for stability.
Guidance on adjusting handlebars and seat for optimal riding posture.
Instructions for properly storing the CAROL bike when not in use.
Steps for safely moving the CAROL bike from one location to another.
Detailed steps for setting the correct saddle height.
Detailed steps for setting the correct handlebar height.
How to adjust the fore/aft position of the seat for comfort.
Instructions on securing feet in pedals and using toe straps.
Guidelines and warnings regarding bike repairs and parts.
Importance of not removing labels and how to get replacements.
Importance of preventative maintenance and qualified personnel.
Recommended cleaning and levelling tasks after each workout.
Weekly cleaning procedures for the tablet, frame, and components.
Checks and tightening procedures for the pedals.
Checks and tightening procedures for the saddle.
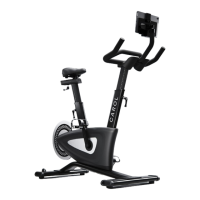
The CAROL Bike 2.0 is a commercial-grade exercise bike designed for high-intensity training in various settings, including corporate offices, homes, and fitness studios. It functions as a standalone exercise bike or can be used in group cycle classes. The bike's operation is controlled by software on an integrated tablet computer.
The CAROL Bike 2.0 is engineered to provide an efficient and effective workout experience. Its core function is to deliver high-intensity interval training (HIIT) through a sophisticated resistance system. The bike features a durable belt drive transmission system with a freewheel clutch that drives the flywheel. This freewheel mechanism allows riders to stop pedaling at any time and safely disembark, even if the flywheel is still turning.
The resistance applied during workouts is precisely controlled by the tablet software. This resistance engages automatically once a user signs in and starts their chosen program. The bike is designed to adapt to the user's fitness level, with on-board sensors collecting data such as age, gender, height, weight, and performance. This data is then used to continuously re-calculate and adjust the resistance, ensuring a personalized and optimal workout experience.
The bike's motor runs through a brief setup procedure when power is first supplied, indicating that it is receiving power and ready for use. The tablet console, which houses the tablet computer and other electronics, is central to the bike's operation, controlling both the bike and its motor. The tablet software automatically updates to ensure users always have access to the latest features and information.
The CAROL Bike 2.0 offers a range of features designed for user comfort, safety, and an optimized workout.
Assembly and Setup: The assembly process for the CAROL Bike 2.0 is designed to be straightforward, typically taking no more than 45 minutes with just 8 steps. It is recommended that two people carry out the unpacking and assembly. Key assembly steps include attaching the front and rear stabilizers, assembling the pedals, fitting the handlebars, installing the bottle holder, and securing the tablet. Proper threading and tightening of screws and bolts are emphasized to ensure stability and prevent disruption.
Power Supply: The bike is powered by a 12V 5A supply. Users need to locate the power socket under the flywheel, near the rear stabilizer, insert the power cable, and plug the power cord into a nearby power outlet. The power supply is designed for 110-240V operation.
Tablet Console and Power Switch: The tablet console is the user interface for the bike. It features a "Momentary Action" power switch. To turn the tablet on, users press and hold the power button gently for 5 seconds until the display turns on, then release. A short touch of the power button puts the tablet to sleep. To shut down, the power button is held until a menu appears, from which "Power Off" is selected. The bike can remain powered to keep the tablet charged, as it automatically goes to sleep after use.
Wi-Fi and Getting Started: Users can access Wi-Fi settings from the tablet home screen or the CAROL app. This involves selecting "Connect Wi-Fi" from the menu, choosing the network, and entering the password. If a password is entered incorrectly, users must "Forget Network" and repeat the process. New users register for a CAROL Account either on the bike or via the website. The first three rides are "ramp-up rides," with shorter sprints, to allow users to practice before exercising at maximum intensity. After these initial rides, full access to all workouts and features is granted. The app remembers user logins with a 'Remember Me' feature.
Positioning the Bike: The bike requires a footprint of 137cm x 53cm. A minimum of 60cm of free area is needed beside the bike for safe mounting and dismounting. If multiple bikes are installed side-by-side, they can share this 60cm free area.
Handlebar and Seat Adjustment: Adjusting the handlebar and seat height is crucial for comfort and performance, minimizing strain on knees and back.
Pedals and Toe Straps: Feet should be securely positioned on the pedals. Users insert their foot as far forward as possible into the toe cover and pull the strap tight. The bike also comes with brackets for cycling shoes compatible with the SPD cleat SM-SH51 system, a common system compatible with many manufacturers' cycling shoes.
Safety Information: Users are advised to read all instructions before operating the bike. It is the owner's responsibility to ensure all users are informed of warnings and precautions. The bike is suitable for individual and commercial use.
Regular maintenance is essential for the smooth operation and longevity of the CAROL Bike 2.0.
Repairs:
Maintain Labels:
Regular Maintenance Schedule: Preventative maintenance is crucial. The bike needs to be inspected at regular intervals, and any person performing adjustments or repairs must be qualified.
After Each Use:
Weekly:
Monthly Check-in:
Warranty: Users should refer to the warranty document provided with their digital receipt or the CAROL Bike website for warranty information.
| Model | CAROL BIKE 2.0 |
|---|---|
| Resistance Type | Magnetic |
| Max User Weight | 330 lbs (150 kg) |
| Connectivity | Bluetooth, Wi-Fi |
| Power Source | AC Adapter |
| Display | 10.1" Touchscreen |
| Warranty | 1 Year |