7. Connect L1 to the black wire and L2 to the red wire using
wire nuts and fix the ground wire between the two washers.
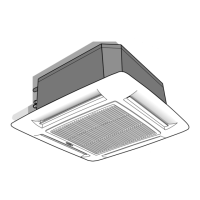
The internal control panel can be accessed by opening the grille
and removing the metal cover attached by four screws.
NOTE: The internal control panel does not need to be accessed
during the installation process unless there is a need for service.
8. If any accessories are being installed, refer to the individual
accessory instructions for guidance on wire routing at this
time.
Install All Power_ Interconnecting Wiring_ Piping and
Drain Hose to Indoor Unit.
1. Run control wiring from the outdoor unit through the access
hole in the wall and make sure you have enough wire to
reach the control box of the unit once hung on the mounting
plate.
2. Complete refrigerant piping connections.
a. cut the extreme end of the tubes and remove any copper
shavings with a de-burring blade.
b. Remove the flare nut from the "Flare" connection body
of the indoor unit and insert them into the pipes.
c. make the flares to the pipe ends with the proper flaring
too. The flare end nmst not have any burrs or imperfec-
tions, the flared walls must be uniform. See Fig. 26
and Fig. 27.
Fig. 26 - Removing Burrs
I
I
i
I
I
I
I
i
I
I
I
Fig. 27 - Flared Walls are Equal
A07199
A07200
d. Lubricate the end of the pipe and thread of the flare
connection with refrigerant oil. Tighten by hand and
then use two wrenches (see Fig. 28) to tighten all con-
nections fully applying the tightening torque shown in
Table 13.
@ Outdoor end n or _orque wrench -_\ &...._
@ Indoor end _ \ "-/
A07201
Fig. 28 - Tightening Connections
Table 13 -TighteningTorque
TUBE DIAMETER (in.) TORQUE fft.-Ib)
3/8 in. 31
5/8 in. 48
3/4 in. 74
3,
_) (f) Indoor unit piping
@ Connection w_ring
@ Drain hose
_--_
r _f_
J
Fig. 29 - Location of Piping, Hose, and Wiring
A08364
Connect condensate drain piping
Observe all local sanitary codes when installing condensate
drains. The condensate may be discharged at a maximum
height of 7-1/8 in, (181 ram) above the unit as long as the
ascending tube is vertical and aligned with drainage flange.
If it is necessary to discharge the condensate from a level
above 7-1/8 in. (181 ram), install an auxiliary water dis-
charge pump and a float valve. A float valve is recommen-
ded to stop the compressor if there is a fault at the auxiliary
pump.
18
 Loading...