Step 6 -- Install Flue Hood and Inlet Hood --
Flue hood (smaller hood), inlet hood (Ireget hood), and screens
are shipped inside the unit in the gas section. To install, open
the heat section dool: The flue hood is attached to the heat
section panel from the outside using file screws provided. See
Fig. 4 and 5.
The inlet hood is installed by inserting the hood through the
back of the heat panel. Attach the hood by inserting file screws
provided through the clearance holes in the heat panel and into
the intake hood.
NOTE: When properly installed, the flue hood will line up
with the combustion fan housing. See Fig. 6.
"_'INLET
HOOD
GAS SECTION FLUE
ACCESS DOOR HOOD
Fig. 4 -- Flue and Inlet Hood Locations
II = _IM
J_
• " i
l/_ _ _
/
HEAT EXCHANGER
SECTION MAIN BURNER SECTION
INDUCED
J DRAFT
MOTOR
-COMBUSTION
FAN HOUSING
"MAIN GAS
VALVE
Fig. 6 -- Typical Gas Heating Section
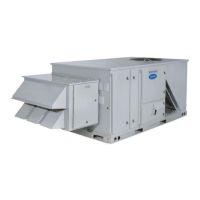
CONTROLBOX
AND COMPRESSOR
ACCESS DOOR
ELECTRICAL
OPTIONS PANEL
INDOOR MOTOR
ACCESS DOOR
OUTDOOR
AIR
SCREEN
(HIDDEN)
CONDENSERCOIL
ACCESS PANEL
ECONOMIZER
HOOD
BAROMETRIC
RELIEF DAMPER
HOOD
FILTER ACCESS DOOR
BABEPAN CONNECTIONS
ACCESS PANEL
Fig. 5 -- Panel and Filter Locations
GAS SECTION
ACCESS DOOR
 Loading...