EasyManua.ls Logo

Carrier 48TJD005-014 User Manual

Carrier 48TJD005-014
8 pages
To Next Page IconTo Next Page
Page #1 background imageLoading...
Page #1 background image
Users Information Manual
NOTE TO INSTALLER
This manual should be left with the equipment owner.
FOR YOUR SAFETY
Do not store or use gasoline or other
flammable vapors and liquids in the vicinity
of this or any other appliance.
Improper installation, adjustment, alteration,
service or maintenance can cause injury or
property damage. Refer to this manual. For
assistance or additional information consult
a qualified installer, service agency, or the
gas supplier.
FOR YOUR SAFETY
WHAT TO DO IF YOU SMELL GAS
Do not try to light any appliance.
Do not touch any electrical switch; do not
use any phone in your building.
Immediately call your gas supplier from
a neighbors phone. Follow the gas
suppliers instructions.
If you cannot reach your gas supplier,
call the fire department.
Before performing recommended maintenance, be sure
main power switch to unit is turned off. Electrical shock
could cause personal injury.
Your rooftop combination heating/cooling unit is equipped
with an automatic direct spark ignition and induced draft com-
bustion blower.
Do not attempt to light by hand; personal injury may
result.
TO LIGHT UNIT
1. Do not turn off the electrical power to unit without
first turning off the gas supply.
2. Before attempting to start the gas heating section, fa-
miliarize yourself with all the procedures that must
be followed.
If you do not follow these instructions exactly, a fire
or explosion may result. Property damage, injury, or loss
of life could occur.
See Fig. 1A and 1B for location of gas valve. Refer to
Fig. 2 while proceeding with the following steps.
Step 1 Set room thermostat to the lowest temperature
setting and set SYSTEM switch to HEAT or AUTO.
position.
Step 2 Close the manual gas valve.
Step 3 Turn off the electrical supply to the unit.
Step 4 Remove the burner access panel.
Step 5 Move the control on the gas valve to the OFF
position and wait 5 minutes.
Step 6 Move control on gas valve to ON position.
Step 7 Replace the burner access panel.
Fig. 1A Gas Valve Location (Sizes 004-007)
Fig. 1B Gas Valve Location (Sizes 008-014)
BURNER
ACCESS
PANEL
FLUE VENT
INTAKE LOUVERS
GAS
VALVE
48TJD005-014
48TJE004-014
48TJF004-012
Single-Package Rooftop Heating/Cooling Units
Manufacturer reserves the right to discontinue, or change at any time, specifications or designs without notice and without incurring obligations.
Book 1 4
Tab 1a 6a
PC 111 Catalog No. 564-991 Printed in U.S.A. Form 48TJ-3SO Pg 1 5-98 Replaces: 48TJ-2SO
Question and Answer IconNeed help?

Do you have a question about the Carrier 48TJD005-014 and is the answer not in the manual?

Carrier 48TJD005-014 Specifications

General IconGeneral
Model48TJD005-014
TypePackaged Rooftop Unit
CategoryAir Conditioner
Energy Efficiency Ratio (EER)11.0
RefrigerantR-410A
Voltage208/230V
Phase1
Compressor TypeScroll
Cooling Capacity5 Tons

Summary

General Safety Information

Fuel and Vapor Storage Safety

Do not store or use gasoline or other flammable vapors and liquids near the appliance.

Installation and Maintenance Hazards

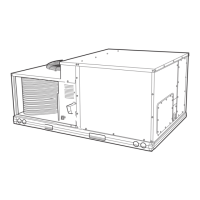
Improper installation, adjustment, or service can cause injury or property damage. Refer to this manual.

Gas Leak Response Procedure

If you smell gas: do not light appliances, avoid electrical switches/phones, call gas supplier from neighbor's.

Electrical Shock Prevention

Turn off main power switch before maintenance. Electrical shock could cause personal injury.

Unit Operation Procedures

Lighting the Unit

Follow 11 step-by-step instructions for setting thermostat, valves, and power for ignition.

Burner Failure Handling

If burners fail to light or blower fails, shut down and call dealer for service. Serious personal injury may result.

Shutting Down the Unit

Follow 6 step-by-step instructions to turn off thermostat, gas valve, and electrical power.

Emergency Shut-off

If overheating or gas failure, shut off manual gas valve before electrical supply.

Unit Maintenance and Care

General Maintenance Requirements

All maintenance by skilled personnel. Keep area clear of combustibles. Ensure proper airflow.

Air Filter Servicing

Check/clean/replace filters regularly. Table 1 shows sizes. Never operate without filters.

Heat Exchanger and Coil Cleaning

Heat exchanger checked/cleaned by qualified person. Coils and drain cleaned by qualified personnel.

Fan, Motor, and Electrical Checks

Inspect fan wheels, motors, belts. Electrical controls/wiring checked by dealer.

Troubleshooting and Service

Combustion Area and Vent System Inspection

Inspect combustion area and vent system for dirt, soot, rust, or scale before heating season.

Regular Dealer Maintenance Checklist

Annual inspection includes flue passages, combustion air, gas pipes, coils, drain pan, blower, ducts, casing, wiring.

Basic Troubleshooting Steps

Check airflow, thermostat settings, electrical supply, and gas valve position before calling dealer.

Contacting Service

If problems persist, call dealer. Provide model and serial numbers for efficient service.

Limited Warranty Information

One-Year Product Warranty

Covers defects in material/workmanship for one year from installation. Excludes labor costs.

Extended Compressor Warranty

Covers compressor defects for years 2-5. Excludes labor costs.

Extended Heat Exchanger Warranty

Covers gas-fired heat exchanger defects for years 2-5. Excludes labor costs.

Warranty Exclusions and Limitations

Excludes normal maintenance, damage from misapplication, installation, electrical issues, or consequential damages.

Related product manuals