EasyManua.ls Logo

Carrier 50HJQ014 - User Manual

Carrier 50HJQ014
48 pages
Print Icon
To Next Page IconTo Next Page
Loading...
Manufacturer reserves the right to discontinue, or change at any time, specifications or designs without notice and without incurring obligations.
Catalog No. 535-00127 Printed in U.S.A. Form 50HJQ-15SI Pg 1 3-06 Replaces: 50HJQ-8SI
Book 1 4
Tab 5a 5a
Installation, Start-Up
and Service Instructions
CONTENTS
Page
SAFETY CONSIDERATIONS......................1
INSTALLATION ................................ 1-24
Step 1 Provide Unit Support...................1
ROOF CURB
ALTERNATE UNIT SUPPORT
Step 2 Rig and Place Unit .....................1
POSITIONING
ROOF MOUNT
Step 3 Field Fabricate Ductwork...............3
Step 4 Make Unit Duct Connections ...........7
Step 5 Trap Condensate Drain.................7
Step 6 Make Electrical Connections ...........7
FIELD POWER SUPPLY
FIELD CONTROL WIRING
OPTIONAL NON-FUSED DISCONNECT
OPTIONAL CONVENIENCE OUTLET
Step 7 Make Outdoor-Air Inlet Adjustments ..10
MANUAL OUTDOOR-AIR DAMPER
Step 8 Install Outdoor-Air Hood ..............10
Step 9 Install All Accessories.................10
MOTORMASTER® I CONTROL INSTALLATION
Step 10 Adjust Factory-Installed Options.....12
PREMIERLINK™ CONTROL
ENTHALPY SWITCH/RECEIVER
OUTDOOR ENTHALPY CONTROL
DIFFERENTIAL ENTHALPY CONTROL
ENTHALPY SENSORS AND CONTROL
OPTIONAL ECONOMI$ERIV AND ECONOMI$ER2
ECONOMI$ERIV STANDARD SENSORS
ECONOMI$ERIV CONTROL MODES
Step 11 Set Defrost Cycle ....................24
START-UP .................................... 24-31
SERVICE ..................................... 31-37
TROUBLESHOOTING......................... 38-43
INDEX...........................................44
START-UP CHECKLIST ........................CL-1
SAFETY CONSIDERATIONS
Installation and servicing of air-conditioning equipment can
be hazardous due to system pressure and electrical compo-
nents. Only trained and qualified service personnel should
install, repair, or service air-conditioning equipment.
Untrained personnel can perform basic maintenance func-
tions of cleaning coils and filters and replacing filters. All other
operations should be performed by trained service personnel.
When working on air-conditioning equipment, observe precau-
tions in the literature, tags and labels attached to the unit, and
other safety precautions that may apply.
Follow all safety codes. Wear safety glasses and work
gloves. Use quenching cloth for unbrazing operations. Have
fire extinguisher available for all brazing operations.
INSTALLATION
Step 1 Provide Unit Support
ROOF CURB Assemble and install accessory roof curb in
accordance with instructions shipped with the curb. Accessory
roof curb and information required to field fabricate a roof curb
are shown in Fig. 1 and 2. Install insulation, cant strips, roofing,
and counter flashing as shown. Ductwork can be secured to
roof curb before unit is set in place. Horizontal adapter installa-
tion is shown in Fig. 2.
Curb should be level. This is necessary to permit unit drain
to function properly. Unit leveling tolerances is ±
1
/
16
in. per
linear ft in any direction. Refer to Accessory Roof Curb Instal-
lation Instructions for additional information as required.
ALTERNATE UNIT SUPPORT When the curb cannot be
used, support unit with sleepers using unit curb support area. If
sleepers cannot be used, support long sides of unit with a mini-
mum of 3 equally spaced 4-in. x 4-in. pads on each side.
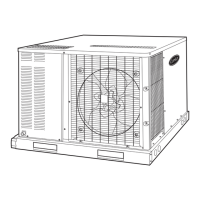
Step 2 Rig and Place Unit Inspect unit for trans-
portation damage. File any claim with transportation agency.
Keep unit upright, and do not drop. Use spreader bars over unit
to prevent sling or cable damage. Rollers may be used to move
unit across a roof. Level by using unit frame as a reference;
leveling tolerance is ±
1
/
16
in. per linear ft in any direction.
See Fig. 1 for additional leveling tolerance information. Unit
weight is shown in Table 1.
Four lifting holes are provided in ends of unit base rails as
shown in Fig. 3. Refer to rigging instructions on unit.
Before performing service or maintenance operations on
unit, turn off main power switch to unit. Electrical shock
could cause personal injury.
IMPORTANT: Units have high ambient operating limits. If
limits are exceeded, the unit will automatically lock the
compressor out of operation. Manual reset will be required
to restart the compressor.
IMPORTANT: The gasketing of the unit to the roof curb is
critical for watertight seal. Install gasket supplied with the
roof curb as shown in Fig. 1. Improperly applied gasket can
result in air leaks and poor unit performance.
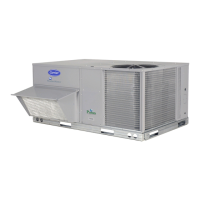
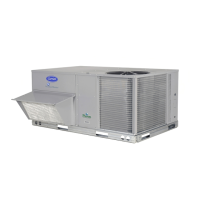
50HJQ014,016
Single-Package Rooftop
Heat Pump Units

Questions and Answers

  • N
    Natalie CurryAug 6, 2025
    How to check the DCV minimum and maximum position on a Carrier 50HJQ014?
    • S
      sherry65Aug 6, 2025
      To check the DCV minimum and maximum position on your Carrier Heat Pump, first ensure that the EconoMi$erIV preparation procedure has been performed. Connect a 9-v battery to AQ (positive node) and AQ1 (negative node). The DCV LED should turn on, and the actuator should drive to between 90 and 95% open. Turn the DCV Maximum Position potentiometer to midpoint; the actuator should drive to between 20 and 80% open. Turn the DCV Maximum Position potentiometer to fully CCW; the actuator should drive fully closed. Turn the Minimum Position potentiometer to midpoint; the actuator should drive to between 20 and 80% open. Turn the Minimum Position Potentiometer fully CW; the actuator should drive fully open. Finally, remove the jumper from TR and N; the actuator should drive fully closed.
  • J
    Jeffrey ThomasAug 13, 2025
    How to check supply-air input on a Carrier 50HJQ014 Heat Pump?
    • Y
      ylewisAug 13, 2025
      To check the supply-air input on your Carrier Heat Pump, first ensure that the EconoMi$erIV preparation procedure has been performed. Set the Enthalpy potentiometer to A. The Free Cool LED should turn on, and the actuator should drive to between 20 and 80% open. Remove the 5.6 kilo-ohm resistor and jumper T to T1. The actuator should drive fully open. Remove the jumper across T and T1. The actuator should drive fully closed.
  • J
    Jessica PrattAug 19, 2025
    How to check differential enthalpy on a Carrier 50HJQ014?
    • C
      Charles WilliamsSep 12, 2025
      To check differential enthalpy on your Carrier Heat Pump: * Make sure the EconoMi$erIV preparation procedure has been performed. * Place a 620-ohm resistor across SO and +. * Place a 1.2 kilo-ohm resistor across SR and +. The Free Cool LED should be lit. * Remove the 620-ohm resistor across SO and +. The Free Cool LED should turn off.
  • M
    Michael CarrAug 25, 2025
    How to check single enthalpy on a Carrier Heat Pump?
    • N
      Nicole CookAug 26, 2025
      To check single enthalpy on your Carrier Heat Pump: * Make sure the EconoMi$erIV preparation procedure has been performed. * Set the enthalpy potentiometer to A (fully CCW). The Free Cool LED should be lit. * Set the enthalpy potentiometer to D (fully CW). The Free Cool LED should turn off.
  • A
    Andrew CraneOct 30, 2025
    How to check DCV and Power Exhaust on a Carrier Heat Pump?
    • J
      John HullOct 31, 2025
      To check the DCV and Power Exhaust on your Carrier Heat Pump, first ensure the EconoMi$erIV preparation procedure has been performed. Make sure that terminals AQ and AQ1 are open; the LED for both DCV and Exhaust should be off, and the actuator should be fully closed. Next, connect a 9-v battery to AQ (positive node) and AQ1 (negative node). The LED for both DCV and Exhaust should then light up. Turn the Exhaust potentiometer CW until the Exhaust LED turns off (this should occur when the potentiometer is approximately 90%), and the actuator should remain in position. Then, turn the DCV set point potentiometer CW until the DCV LED turns off (this should occur when the potentiometer is approximately 9-v), and the actuator should drive fully closed. Finally, turn the DCV and Exhaust potentiom...

Summary

SAFETY CONSIDERATIONS

General Safety Guidelines

Essential safety guidelines to follow before, during, and after unit installation and servicing.

Electrical Safety

Specific warnings about electrical shock hazards and proper procedures for electrical work.

Operating Limits

Information regarding unit operating limits and automatic compressor lockout when limits are exceeded.

INSTALLATION

Unit Support and Rigging

Procedures for providing unit support, including roof curbs, alternate supports, and safe rigging practices.

Ductwork and Connections

Instructions for fabricating and connecting ductwork, including condensate drain and electrical connections.

Outdoor-Air Inlet and Accessories

Steps for adjusting the outdoor-air inlet, installing the hood, and fitting all accessories.

Factory-Installed Options Adjustment

Guidance on adjusting factory settings for options like PremierLink control and economizer.

Defrost Cycle Setup

Instructions for setting the defrost timer cycle and ensuring proper defrost operation.

START-UP

Pre-Start-Up Checks

Verification of unit preparation, packing material removal, and component checks before initial power-up.

Electrical Verification

Checking supply voltage, current draws for compressors and fans, and electrical connections.

Temperature and Pressure Readings

Measuring and recording critical temperature and pressure parameters during the start-up process.

General Start-Up Settings

Setting economizer minimum vent and changeover parameters to meet job requirements.

SERVICE

Cleaning Procedures

Instructions for cleaning the unit interior, indoor coil, and outdoor coil for optimal performance.

Lubrication Requirements

Guidance on lubricating compressor sight glass oil levels and fan shaft bearings as needed.

Fan Motor Adjustment and Service

Procedures for adjusting fan speeds, alignment, and servicing fan motors for 50HJQ units.

TROUBLESHOOTING

EconoMi$erIV Troubleshooting

Detailed procedures for preparing and troubleshooting EconoMi$erIV unit functions and controls.

Control System Checks

Tests for differential enthalpy, single enthalpy, DCV, and power exhaust system operations.

EconoMi$erIV Completion

Steps to return the EconoMi$erIV system to its normal operating configuration after troubleshooting.

INDEX

Alphabetical Topic Reference

An alphabetical listing of all topics and terms covered in the manual for efficient information retrieval.

START-UP CHECKLIST

Pre-Start-Up Verification

Checklist items for verifying unit preparation and removal of packing materials before start-up.

Electrical and Mechanical Checks

Verification of electrical connections, fan alignment, belt tension, and unit leveling.

Operational Parameter Recording

Recording of supply voltage, current draws, temperatures, and refrigerant pressures during start-up.

Carrier 50HJQ014 Specifications

General IconGeneral
Voltage208/230V
RefrigerantR-410A
Phase1
Compressor TypeScroll
Cooling Capacity14000 BTU/h
Heating Capacity14000 BTU/h

Related product manuals