32
To align fan and motor pulleys:
1. Loosen fan pulley setscrews.
2. Slide fan pulley along fan shaft.
3. Make angular alignment by loosening motor from
mounting plate.
SERVICE AND REPLACEMENT (see Fig. 46)
NOTE: To remove belts only, follow Steps 1-7.
1. Remove filter and supply-air section panels.
2. Remove unit top panel.
3. Remove coil guard.
4. Loosen screws A and B on both sides of motor mount
assembly.
5. Loosen screw C.
6. Rotate motor mount assembly (with motor attached) as
far as possible away from indoor coil.
7. Remove belt.
8. Rotate motor mount assembly back past original position
toward indoor coil.
9. Remove motor mounting nuts D and E (both sides).
10. Lift motor up through top of unit.
11. Reverse Steps 1-10 to install new motor.
12. Check and adjust belt tension as necessary.
Indoor Fan, 50HJQ016 Units
PERFORMANCE ADJUSTMENT — Fan motor pulleys are
factory set for speed shown in Table 1.
To change fan speeds:
1. Shut off unit power supply.
2. Loosen nuts on the 2 carriage bolts in the mounting base.
Install jacking bolt and plate under motor base (bolt and
plate are shipped in installer’s packet). Using bolt and
plate, raise motor to top of slide and remove belt. Secure
motor in this position by tightening the nuts on the car-
riage bolts.
3. Loosen movable-pulley flange setscrew (See Fig. 45).
SERVICE AND REPLACEMENT (See Fig. 47) — The
50HJQ016 units use a fan motor mounting system that features
a slide-out motor mounting plate. To replace or service the
motor, slide out the bracket.
1. Remove the indoor-fan access panel and the heating con-
trol access panel.
2. Remove the center post (located between the indoor fan
and heating control access panels) and all screws securing
it.
3. Loosen nuts on the two carriage bolts in the motor mount-
ing base.
Fig. 45 — Indoor-Fan Pulley Alignment
and Adjustment
Fig. 46 — 50HJQ014 Indoor-Fan Motor Section
NOTE: A 3
1
/
2
-in. bolt and threaded plate are included in the
installer’s packet. They can be added to the motor support channel
below the motor mounting plate to aid in raising the motor.
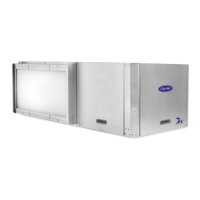
Fig. 47 — 50HJQ016 Indoor-Fan Motor Section
 Loading...