EasyManua.ls Logo

Carrier FED003612 - User Manual

Carrier FED003612
11 pages
Print Icon
To Next Page IconTo Next Page
Loading...
Installation Instructions & Homeowner’s Information
Approved for use in manufactured homes.
NOTE: Read the entire instruction manual before starting the
installation.
Table of Contents
Table of Contents . . . . . . . . . . . . . . . . . . . . . . . . . . . . . . . . . . . . . . . . 1
SAFETY CONSIDERATIONS . . . . . . . . . . . . . . . . . . . . . . . . . . . . . 1
INTRODUCTION . . . . . . . . . . . . . . . . . . . . . . . . . . . . . . . . . . . . . . . 1
LOCATION . . . . . . . . . . . . . . . . . . . . . . . . . . . . . . . . . . . . . . . . . . . . 1
POSITION UNIT . . . . . . . . . . . . . . . . . . . . . . . . . . . . . . . . . . . . . . . . 2
ELECTRICAL CONNECTIONS. . . . . . . . . . . . . . . . . . . . . . . . . . . . 3
Line Voltage Connections . . . . . . . . . . . . . . . . . . . . . . . . . . . . . . . 3
Thermostat Wiring . . . . . . . . . . . . . . . . . . . . . . . . . . . . . . . . . . . . . 3
Thermostat Wiring Connections . . . . . . . . . . . . . . . . . . . . . . . . . . 4
Transformer Information
(applicable to on-site HVAC contractor) . . . . . . . . . . . . . . . . . . . . 4
Ground Connections . . . . . . . . . . . . . . . . . . . . . . . . . . . . . . . . . . . 4
Filtered Grille Applications . . . . . . . . . . . . . . . . . . . . . . . . . . . . . . 5
Minimum CFM and Motor Speed Selection
(applicable to on-site HVAC contractor) . . . . . . . . . . . . . . . . . . . . 5
Sequence of operations . . . . . . . . . . . . . . . . . . . . . . . . . . . . . . . . . . . . 5
Continuous Fan (Whole House Ventilation) . . . . . . . . . . . . . . . . . 5
Electric Heat or Emergency Heat Mode . . . . . . . . . . . . . . . . . . . . 5
HOMEOWNER’S INFORMATION . . . . . . . . . . . . . . . . . . . . . . . . 11
THERMOSTAT . . . . . . . . . . . . . . . . . . . . . . . . . . . . . . . . . . . . . . . . 11
Heating Mode. . . . . . . . . . . . . . . . . . . . . . . . . . . . . . . . . . . . . . . . 11
Cooling Mode . . . . . . . . . . . . . . . . . . . . . . . . . . . . . . . . . . . . . . . 11
Temperature Control . . . . . . . . . . . . . . . . . . . . . . . . . . . . . . . . . . 11
Fan Control (Whole House Ventilation) . . . . . . . . . . . . . . . . . . . 11
WHAT TO DO IF YOUR SYSTEM DOES NOT WORK . . . . . . . 11
Before Requesting a Service Call: . . . . . . . . . . . . . . . . . . . . . . . . 11
REGULAR MAINTENANCE REQUIREMENTS . . . . . . . . . . . . . 11
Indoor Unit Air Filter . . . . . . . . . . . . . . . . . . . . . . . . . . . . . . . . . . 11
Condensate Drain. . . . . . . . . . . . . . . . . . . . . . . . . . . . . . . . . . . . . 11
Outdoor Unit Coils. . . . . . . . . . . . . . . . . . . . . . . . . . . . . . . . . . . . 11
Painted Surfaces. . . . . . . . . . . . . . . . . . . . . . . . . . . . . . . . . . . . . . 11
SAFETY CONSIDERATIONS
Improper installation, adjustment, alteration, service, maintenance, or
use can cause explosion, fire, electrical shock or other conditions which
may cause death, personal injury or property damage. Consult a
qualified installer, service agency, or your distributor or branch for
information or assistance. The qualified installer or agency must use
factory-authorized kits or accessories when modifying this product.
Refer to the individual instructions packaged with the kits or accessories
when installing.
Follow all safety codes. Wear safety glasses, protective clothing and
work gloves. Use quenching cloths for brazing operations. Have fire
extinguisher available. Read these instructions thoroughly and follow all
warnings or cautions attached to the unit. Consult local building codes
and the applicable editions of the National Electrical Codes (NEC)
NFPA 70.
In Canada, refer to the current editions of the Canadian Electrical Code
CSA C22.1.
Recognize safety information. This is the safety-alert symbol . When
you see this symbol on the unit and in instructions or manuals, be alert to
the potential for personal injury.
Understand the signal words DANGER, WARNING and CAUTION.
These words are used with the safety-alert symbol. DANGER identifies
the most serious hazards which will result in severe personal injury or
death. WARNING signifies hazards which could result in personal
injury or death. CAUTION is used to identify unsafe practices, which
may result in minor personal injury or product and property damage.
NOTE is used to highlight suggestions which will result in enhanced
installation, reliability, or operation.
INTRODUCTION
Model FED has been designed for downflow applications. Models are
available for electric heat sizes 10 kW – 20 kW. All models use an ECM
motor.
FED models contain a factory supplied replaceable air filter.
LOCATION
Select the best position which suits the installation site conditions. The
location should provide adequate structural support, space in the front of
the unit for service access, clearance for return air and supply duct
connections, space for refrigerant piping connections and condensate
drain line connections.
NOTE: Internal filter can be accessed from a separate filter door.
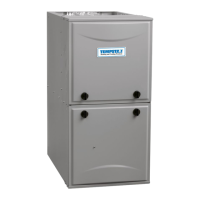
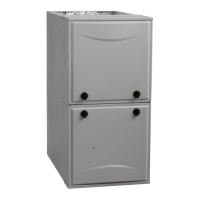
FED “B” Series
Downflow Electric Furnace
WARNING
!
ELECTRICAL SHOCK HAZARD
Failure to follow this warning could result in personal injury or death.
Before installing, modifying or servicing system, always turn off main
power to system. There may be more than one disconnect switch. Lock
out and tag switch with a suitable warning label.
CAUTION
!
CUT HAZARD
Failure to follow this caution may result in personal injury.
Sheet metal parts may have sharp edges or burrs. Use care and wear
appropriate protective clothing and gloves when handling parts.
Question and Answer IconNeed help?

Do you have a question about the Carrier FED003612 and is the answer not in the manual?

Summary

SAFETY CONSIDERATIONS

General Safety Precautions

General safety precautions and symbols for personal injury and property damage.

Electrical Shock Hazard

Electrical shock hazard warning before installation, modification, or servicing.

Cut Hazard

Caution regarding sharp edges on sheet metal parts during handling.

PROPERTY DAMAGE HAZARD

Filter Operation Hazard

Hazard warning regarding operating the unit without a filter or using a field-supplied filter improperly.

FIRE HAZARD

POSITION UNIT

ELECTRICAL CONNECTIONS

Electrical Shock Safety

Warning about electrical shock hazard when working with incoming field wiring.

THERMOSTAT WIRING

GROUND CONNECTIONS

Grounding Safety

Warning about electrical shock hazard due to failure to establish an uninterrupted ground.

Grounding Procedure

Procedures for grounding the unit to ensure safety and minimize electrical fault risks.

MINIMUM CFM AND MOTOR SPEED SELECTION

10 kW WIRING DIAGRAM

12 kW; 15 kW WIRING DIAGRAM

20 kW WIRING DIAGRAM

HOMEOWNERS INFORMATION

Electrical Safety During Maintenance

Crucial warning to turn off power before performing any maintenance.

Overview

The FED "B" Series Downflow Electric Furnace is designed for downflow applications, suitable for use in manufactured homes. It provides electric heating and can be integrated with add-on cooling or heat pump systems.

Function Description

The furnace's primary function is to provide electric heating for residential spaces. It utilizes an ECM (Electronically Commutated Motor) for efficient airflow management. The unit is controlled by a wall-mounted thermostat, allowing users to set desired temperatures for heating and, if a cooling system is installed, for cooling. The fan can operate continuously for whole-house ventilation or cycle automatically with the heating or cooling system.

Important Technical Specifications

  • Heating Capacity: Available in electric heat sizes ranging from 10 kW to 20 kW.
  • Motor Type: All models use an ECM motor.
  • Airflow Performance: Detailed airflow performance tables (Table 3 and Table 4) are provided for various models (FED002410*, FED003610*, FED003612*, FED003615*, FED004815*, FED006020*) across different blower speeds (Tap 1 to Tap 5) and total static pressures (0.10 to 0.60 inches water column), both with and without an accessory cooling coil.
    • For example, a FED002410* at Tap 5 without a cooling coil can deliver 1123 CFM at 0.10 static pressure, while with a cooling coil, it delivers 976 CFM at the same settings.
    • Airflow values are calculated at 230V with a dry coil, factory-approved filter, and electric heater. Airflow at 208V is approximately the same due to the constant torque ECM motor.
    • Return static pressure must be less than 0.40 in. wc to avoid condensate blowing out of the drain pan.
    • Airflow above 400 cfm/ton on 4800 - 6000 size units could lead to condensate blowing off the coil or splashing out of the drain pan.
  • Electrical Data (Fan Coil Only, with Electric Heat): (Table 5)
    • Voltage: All values are calculated at 230 volts. The transformer is factory wired for 230V operation but can be reconfigured for 208V by disconnecting the black wire from the 230V terminal and connecting it to the 208V terminal.
    • Circuit Breakers: Series B units have circuit breakers mounted horizontally and factory-supplied in the OFF position. For downflow installation, the circuit breaker switch should be slid to the right to power the unit.
    • Wiring: Requires copper wire (75°C min.) only. Wire size must comply with NEC and local codes. Low voltage fuse should not exceed 5 amps.
    • Examples:
      • FED002410* (10 KW): Single circuit, 2.8 Motor Amps, 40 Heater Amps, 53.6 Min Circuit Amps, 60 Breaker Size.
      • FED003612* (12 KW): Dual circuit (A and B), 4.1 Motor Amps, 31.7 (A) and 15.8 (B) Heater Amps, 44.8 (A) and 19.8 (B) Min Circuit Amps, 50 (A) and 20 (B) Breaker Size.
      • FED006020* (20 KW): Dual circuit (A and B), 6 Motor Amps, 40 (A) and 40 (B) Heater Amps, 57.5 (A) and 50 (B) Min Circuit Amps, 60 (A) and 50 (B) Breaker Size.
  • Thermostat Wiring: Uses minimum 22 AWG color-coded, insulated (35°C minimum) wire for low-voltage connections. If the thermostat is over 100 feet from the unit, 18 AWG wire is recommended.
  • Clearances: Maintain 0" clearance for back and sides, 0" for ducts. For front access, 6" in a closet (to closet door) and 24" in an alcove.
  • Floor Cutout Dimensions:
    • FED002410* thru FED004815*: 14.5" x 14.5"
    • FED006020*: 17.5" x 17.5"
  • Safety: Designed with safety-alert symbols (DANGER, WARNING, CAUTION) to indicate potential hazards. Electrical shock hazard warnings emphasize turning off main power before servicing. Cut hazard warnings advise wearing protective clothing and gloves when handling sheet metal parts.

Usage Features

  • Installation: The unit is shipped with the supply air side UP. Installation involves cutting a hole in the floor, applying UL 181 rated caulk or duct mastic, installing the plenum and floor base, and then inverting the unit onto the base. Electrical knockouts must be removed, and the filter and its access door removed before inversion. The unit flanges fit into the base opening, and it slides to the back, ensuring tabs engage with casing slots.
  • Thermostat Control:
    • Heating Mode: Set system selector to HEAT and temperature above current room temperature.
    • Cooling Mode (if installed): Set system selector to COOL and temperature below current room temperature.
    • Fan Control (Whole House Ventilation): Selector switch can be set to ON for continuous operation or AUTO for automatic cycling with heating/cooling. Continuous fan operation is recommended for maximum comfort.
  • Motor Speed Selection: Fan speed is selected at the fan motor by repositioning wires at terminals labeled 1-2-3. Speed taps 1, 2, and 3 have a 90-second blower off time delay. Tap 2 (WHITE wire) is used for electric heat only. Tap 5 is NOT used for electric heating.
  • Filtered Grille Applications: If the unit is in a closet, a filtered return air grille can be used as a door or through an adjacent wall. In this case, the internal filter must be removed.
  • Sequence of Operations:
    • Continuous Fan: Thermostat closes R to G, signaling the motor for continuous indoor blower operation. A 90-second off delay occurs after G is de-energized.
    • Electric Heat/Emergency Heat: Thermostat closes R to W, energizing electric heat relay(s) and the indoor blower motor. When W is de-energized, relays open, and the motor stops.

Maintenance Features

  • Regular Inspections: The system should be regularly inspected by a qualified service technician.
  • Indoor Unit Air Filter: Inspect monthly and replace disposable filters or clean reusable filters as required. Dirty filters are a common cause of poor performance and compressor failures. Filters should be installed with arrows pointing in the direction of airflow.
  • Condensate Drain: If a cooling system is installed, check the condensate drain at least monthly during the cooling season for free flow and clean if necessary.
  • Outdoor Unit Coils: Clean debris (grass clippings, leaves, dirt, dust, lint) from outdoor coils to maintain efficiency and prevent compressor damage. Use a soft bristle brush with light pressure to avoid damaging coil fins.
  • Painted Surfaces: In areas with high mineral concentrations in water, avoid spraying the unit with lawn sprinklers to prevent premature deterioration of paint and metal components.
  • Troubleshooting (Before Service Call):
    1. Check thermostat settings (HEAT/COOL, desired temperature).
    2. Inspect and replace/clean the return air filter.
    3. Check and reset circuit breakers or replace fuses.
    4. Inspect outdoor unit coils and fins for obstructions and debris. Ensure the fan blade is not obstructed.
  • Access: The internal filter can be accessed from a separate filter door. The control box provides grounding lugs. The wiring protection plate should be connected to the downflow base after wiring is complete and before attaching the front base of the cabinet to the floor.

Carrier FED003612 Specifications

General IconGeneral
AFUE Rating80%
Ignition TypeHot Surface Ignition
Heat Exchanger MaterialAluminized Steel
Weight120 lbs
Stages1

Related product manuals