1-9
has been made, you should not need to again touch this control through the rest
of the mix. You may wish to experiment with this control a little bit to become
familiar with its feel and operation. It is an exellent tool for properly matching
the different gains of various microphones to your console and achieving the
best signal-to-noise ratio.
22
22
))
))
PP
PP
aa
aa
rr
rr
aa
aa
mm
mm
ee
ee
tt
tt
rr
rr
ii
ii
cc
cc
CC
CC
hh
hh
aa
aa
nn
nn
nn
nn
ee
ee
ll
ll
EE
EE
qq
qq
uu
uu
ii
ii
ll
ll
ii
ii
zz
zz
ee
ee
rr
rr
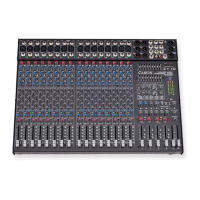
* The channel (parametric) equalizer on the MX2488 console is a very
precise tone control. The top control is the high frequency (treble) control, the
midrange control is in the center and the low frequency or (bass) is at the bottom
of this array. How tone controls work is basically similar to a volume control. The
difference being that a tone control litterally controls the volume of a specified
frequency range. So, when you are "Boosting" or "Cutting" with a tone control
you are litterally changing the volume of those frequencies at whatever their
range is defined to be. The general high, mid, and low frequency ranges of the
MX2488 are:
SS
SS
EE
EE
CC
CC
TT
TT
II
II
OO
OO
NN
NN
##
##
33
33
--
--
44
44
HH
HH
ii
ii
gg
gg
hh
hh
FF
FF
rr
rr
ee
ee
qq
qq
- 1kHz to 16kHz
MM
MM
ii
ii
dd
dd
FF
FF
rr
rr
ee
ee
qq
qq
- 200Hz to 4kHz
LL
LL
oo
oo
ww
ww
FF
FF
rr
rr
ee
ee
qq
qq
- 40Hz to 800Hz
With a "Parametric" equalizer such as included in the MX2488 a small band
of frequencies within the range of the specific filter (high, mid or low) are able
to be adjusted, This means that you have the ability to "zero in" on a particular
frequency within a particular band and boost or cut its volume. For example, if
you wished to boost the volume of a frequency centered at 2kHz, you would use the
midrange control. Using the midrange "Frequency control adjustment" (lower
knob) you would rotate it to the "2k" setting. Then you would use the upper knob,
rotating it clockwise until the desired boost at that frequenct is attained. (Counter-
clockwise from the center detent position would produce a "cut" or lowered
volume at that frequency).
Using a parametric equalizer is quite easy and gives excellent control over
the tone of the various instruments. It is good to note that radical adjustments of
your tone controls should never have to be made. Usually these controls are used
as a means of compensating the response of the various microphones in order to
achieve the most natural response of the instuments you are mixing.
In the upper right of the EQ section you will find an EQ/Bypass switch. This
switch allows you to remove the (3) band parametric equalizer from the signal
path in a channel. It is an excellent tool to use when determining how little, or
how much equalization has been added to a particular instrument (when
compared to its non-equalized sound). And, if you find that a particular
instrument requires no equalization you may simply remove the equalizer from
the circuit by leaving the switch in the "Up" position.
NN
NN
oo
oo
tt
tt
ee
ee
::
::
If you determine that no equalization is necessary it is prefered to
bypass the equalizer, thus ensuring the most direct signal path
and best overall signal-to-noise performance.
 Loading...