EasyManua.ls Logo

Casio 2307

Casio 2307
6 pages
To Next Page IconTo Next Page
Loading...
2307/2335-1
Module No. 2307/2335
GENERAL GUIDE
Press C to change from mode to mode.
Holding down C in any mode for about one second returns to the normal
timekeeping screen.
Pressing C after performing some operation in the Recall Mode, Alarm
Mode, or Countdown Alarm Mode returns to the normal timekeeping
screen.
0
1
08
D
A
B
C
630
630
Timekeeping Mode
Pressing B in any mode besides the Countdown Alarm Mode or
Stopwatch Mode illuminates the display for about 1.5 second. The backlight
is disabled while a setting screen is on the display.
The backlight of Module 2307 illuminates both the digital display and analog
face. The backlight of Module 2335 illuminates the digital display only.
If you do not perform any operation for a few minutes while a setting screen
(with flashing digits) is on the display, the watch automatically exits the
setting screen.
If you do not perform any operation for about 10 hours in the Barometer
Mode, Altimeter Mode, or Thermometer Mode, the watch automatically
reverts to the Timekeeping Mode screen.
A
L
7OO
Press D.
Press D.
A
8
A0
0
1
13
Barometer Mode
L
A
2
1
50
Altimeter Mode
E NP
8
1
5
Thermometer Mode
S
0
0
OO
Stopwatch Mode
A
0
0
OO
Countdown Alarm Mode
Press
C.
Press C.
Press C.
Press C.
Press
C.
Press C.
Press C.
Press C.
Press D.
E
A
C
2
1
5
0
Recall Mode
Alarm Mode
TIMEKEEPING MODE
Pressing D changes the display in the sequence shown below.
The display type you select is used until you change it.
To set the time and date
1. While in the Timekeeping Mode, hold down A until the seconds digits
flash on the display.
2. Press C to move the selection (flashing) in the following sequence.
Seconds
Hour
Minutes
12/24
YearMonthDay
3. While the seconds setting is selected (flashing), press D to reset it to 00.
If you press D while the seconds setting is in the range of 30 to 59, the
seconds are reset to 00 and 1 is added to the minutes. If the seconds
setting is in the range of 00 to 29, the minutes count is unchanged.
While the 12/24-hour format setting is selected, press D to toggle it
between 12 and 24.
Day of week
Month – Day
When the 12-hour format is selected, the indicator P appears on the diaplay
to indicate “p.m.” times. There is no indicator for “a.m.” times. Selecting the
24-hour format causes the 24 to appear on the display.
While any other setting is selected (flashing), press D to increase the
number or B to decrease it.
Holding down either button changes the setting at high speed.
4. After you set the time and date, press A to change to the contrast setting
screen.
The indicator CNT appears on the left of the screen, and the value
indicating the current contrast setting flashes on the right.
You can set the contrast to one of 11 levels in the range of –5 to +5.
5. Press D to make the display darker, or B to make it lighter.
6. After the contrast is the setting you want, press A to return to the normal
timekeeping screen.
The day of the week is automatically set in accordance with the date.
The date can be set within the range of January 1, 1995 to December 31,
2039.
The watch’s built-in full automatic calendar automatically makes allowances
for different month lengths and leap years. Once you set the date, there
should be no reason to change it except after the replacement of the
watch’s battery.
To set the analog time
1. Pull the crown out to stop the second hand.
If you plan to restart analog timekeeping on some time signal (from the
radio or television), pull the crown out when the second hand is at the 12
o’clock position.
2. Set the hands by turning the crown.
3. Push the crown back in to restart timekeeping.
Analog time is kept by a mechanical timepiece. Because of this, the second
hand may not start to move exactly when you push the crown back in.
Press D.
Press D.
Crown
Press D.
0
1
08
D
A
B
C
630
630
Seconds
Hour : Minutes
PM indicator
Barometric pressure graph
*See “BAROMETER MODE”.
Month – Day
Question and Answer IconNeed help?

Do you have a question about the Casio 2307 and is the answer not in the manual?

Casio 2307 Specifications

General IconGeneral
Display TypeDigital
BrandCasio
CategoryWatch
Water Resistance50 meters
AlarmYes
StopwatchYes
BacklightYes
CalendarYes

Summary

General Guide

Switching Modes & Backlight

Explains how to switch between watch modes and use the backlight.

Setting Time and Date

Detailed steps for setting the watch's time, date, and 12/24-hour format.

Setting Analog Time

Instructions on how to set the analog hands of the watch using the crown.

Backlight Features

Manual Backlight Control

How to manually activate the watch's backlight for illumination.

Auto Backlight Operation

Details on the automatic backlight activation and its conditions.

Backlight Safety Precautions

Crucial safety warnings regarding backlight use during activities.

Barometer Mode Usage

Barometer Mode Applications

Examples of how the barometer function can be used for weather prediction.

Barometric Pressure Readings

How the watch takes and displays barometric pressure readings.

Barometric Pressure Graph

Interpreting Pressure Graphs

How to interpret rising or falling graphs for weather trends.

Handling Skipped Graph Points

Explains reasons for blank points on the barometric pressure graph.

Barometer Unit Selection

Changing Barometric Units

Steps to select units like hPa, mb, or inHg for pressure.

Calibrating Barometer

Barometer Calibration Steps

How to adjust the barometric pressure sensor for accuracy.

Altimeter Mode Guide

Altitude Measurement Principles

How the watch estimates altitude using barometric pressure.

Altitude Measurement Warnings

Important warnings about altitude reading accuracy and limitations.

Altitude Measurement Uses

How to use the altimeter for approximate altitude readings and differences.

Altimeter Unit Selection

Changing Altitude Units

Steps to select units like meters (m) or feet (FT) for altitude.

Setting Altimeter Reference

Adjusting Reference Altitude

How to set a starting altitude for relative altitude measurements.

Thermometer Mode Guide

Temperature Accuracy Factors

Factors affecting temperature readings and how to improve accuracy.

Calibrating Thermometer

Steps to adjust the thermometer sensor for accurate readings.

Thermometer Unit Selection

Steps to select units like Celsius (°C) or Fahrenheit (°F).

Data Recall and Management

Recalling Stored Measurement Data

How to view previously stored barometric, altitude, and temperature data.

Deleting All Stored Data

Procedure to clear all measurement data stored in memory.

Alarm and Signal Settings

Setting Daily Alarm and Hourly Signal

How to set the daily alarm time and hourly time signal.

EnablingDisabling Alarm and Signal

How to turn the daily alarm and hourly time signal on and off.

Countdown Alarm Operations

Setting Countdown Duration

How to set the duration for the countdown alarm.

Operating the Countdown Alarm

Instructions on starting, stopping, and resetting the countdown alarm.

Stopwatch Functionality

Stopwatch Measurement Methods

Explains how to measure elapsed time, split times, and two finishes.

Battery Replacement Guide

Battery Replacement Warnings

Important advice for dealers and users regarding battery replacement.

Battery Replacement Procedure

Detailed steps for replacing the watch battery.

Watch Warning Indicators

Sensor Malfunction (Err) Display

Explains the "Err" display for sensor malfunctions.

Low Power Warning Indicators

How to interpret temporary and general low power warnings.

Altitude & Barometric Pressure Data

Altimeter Data Table

Table showing altitude vs. barometric pressure and temperature values.

Barometric Pressure Interpretation

How barometric pressure relates to weather conditions and sea level.
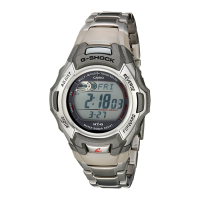
Related product manuals