EasyManua.ls Logo

Casio 5176 - User Manual

Casio 5176
7 pages
Print Icon
To Next Page IconTo Next Page
Loading...
Operation Guide 5176
MO1011-EA
E-1
ENGLISH
Congratulations upon your selection of this CASIO watch.
Applications
The built-in sensors of this watch measure barometric pressure, temperature and
altitude. Measured values are then shown on the display. Such features make this
watch useful when hiking, mountain climbing, or when engaging in other such outdoor
activities.
E-2
Warning !
The measurement functions built into this watch are not intended for taking
measurements that require professional or industrial precision. Values produced
by this watch should be considered as reasonable representations only.
Note that CASIO COMPUTER CO., LTD. assumes no responsibility for any
damage or loss suffered by you or any third party arising through the use of
this product or its malfunction.
E-3
About This Manual
Depending on the model of your watch, display text
appears either as dark fi gures on a light background, or
light fi gures on a dark background. All sample displays
in this manual are shown using dark fi gures on a light
background.
Button operations are indicated using the letters shown
in the illustration.
Note that the product illustrations in this manual are
intended for reference only, and so the actual product
may appear somewhat different than depicted by an
illustration.
E-4
Things to check before using the watch
1. Check the Home City and the daylight saving time (DST) setting.
Use the procedure under “To confi gure Home City settings” (page E-14) to confi gure
your Home City and daylight saving time settings.
Important!
Proper World Time Mode data depend on correct Home City, time, and date settings
in the Timekeeping Mode. Make sure you confi gure these settings correctly.
2. Set the current time.
See “Confi guring Current Time and Date Settings” (page E-17).
The watch is now ready for use.
E-5
Contents
E-3 About This Manual
E-4 Things to check before using the watch
E-9 Mode Reference Guide
E-13 Timekeeping
E-14 Confi guring Home City Settings
E-14 To confi gure Home City settings
E-16 To change the Daylight Saving Time (summer time) setting
E-17 Confi guring Current Time and Date Settings
E-18 To change the current time and date settings
E-22 Hand Home Position Correction
E-22 To adjust home positions
E-6
E-23 Barometer/Thermometer
E-23 To enter and exit the Barometer/Thermometer Mode
E-28 To calibrate the pressure sensor and the temperature sensor
E-30 Altimeter
E-31 To take an altimeter reading
E-34 To specify a reference altitude value
E-39 Specifying Temperature, Barometric Pressure, and Altitude Units
E-39 To specify temperature, barometric pressure, and altitude units
E-41
Precautions Concerning Simultaneous Measurement of Altitude and
Temperature
E-42 Checking the Current Time in a Different Time Zone
E-42 To enter the World Time Mode
E-42 To view the time in another time zone
E-43 To specify standard time or daylight saving time (DST) for a city
E-7
E-44 Using the Stopwatch
E-44 To enter the Stopwatch Mode
E-44 To perform an elapsed time operation
E-44 To pause at a split time
E-45 To measure two fi nishes
E-46 Using the Countdown Timer
E-46 To enter the Countdown Timer Mode
E-46 To specify the countdown start time
E-48 To perform a countdown timer operation
E-48 To stop the alarm
E-49 Using the Alarm
E-49 To enter the Alarm Mode
E-50 To set an alarm time
E-51 To test the alarm
E-52 To turn an alarm and the Hourly Time Signal on and off
E-52 To stop the alarm
E-8
E-53 Illumination
E-53 To turn on illumination
E-53 To change the illumination duration
E-55 Button Operation Tone
E-55 To turn the button operation tone on and off
E-57 Troubleshooting
E-61 Specifi cations
E-9
Mode Reference Guide
Your watch has 7 “modes”. The mode you should select depends on what you want to do.
To do this: Enter this mode: See:
View the current time and date in the Home City
Confi gure Home City and daylight saving time (DST) settings
Confi gure time and date settings
Timekeeping Mode E-13
View the barometric pressure and temperature at your
current location
Barometer/
Thermometer Mode
E-23
View the altitude at your current location
Determine the altitude differential between two locations
(reference point and current location)
Altimeter Mode E-30
View the current time in one of 48 cities (31 time zones)
around the globe
World Time Mode E-42
Use the stopwatch to measure elapsed time Stopwatch Mode E-44
Use the countdown timer
Countdown Timer Mode
E-46
Set an alarm time Alarm Mode E-49
Question and Answer IconNeed help?

Do you have a question about the Casio 5176 and is the answer not in the manual?

Summary

Warning and Introduction

Important Safety Warnings

Notes on the limitations and responsibilities regarding the watch's measurement functions.

Configuration and Settings

Configuring Home City and DST Settings

Procedure to set the Home City and toggle Daylight Saving Time (DST).

Configuring Current Time and Date Settings

Procedure to adjust the current time, date, and time format settings.

Hand Home Position Correction

Procedure to manually adjust the position of the hour and minute hands.

Sensor Functions

Barometer;Thermometer Operation

How to enter/exit the mode, view pressure/temperature, and set display units.

Pressure and Temperature Sensor Calibration

Information and procedure for calibrating the watch's pressure and temperature sensors.

Altimeter Functions

Specifying Reference Altitude and Units

How to specify a reference altitude and select measurement units for altitude and pressure.

World Time Mode

Checking Current Time in Different Time Zones

How to view times in other time zones using World Time Mode.

Stopwatch and Countdown Timer

Alarm Functions

Operation Tones and Troubleshooting

Troubleshooting Common Issues

Guidance for resolving common issues like time setting errors, sensor problems, and battery indicators.

Overview

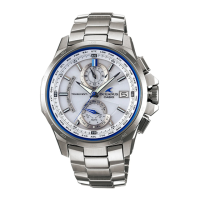
This document describes the operation of a CASIO watch, model 5176, which integrates various sensors and timekeeping functions. The watch is designed for outdoor activities like hiking and mountain climbing, providing measurements for barometric pressure, temperature, and altitude.

General Functions

The watch features seven distinct modes: Timekeeping, World Time, Barometer/Thermometer, Altimeter, Stopwatch, Countdown Timer, and Alarm. Navigation between these modes is typically done by pressing button C. The display can show either dark figures on a light background or light figures on a dark background, with all examples in the manual using dark figures on a light background. Button operations are indicated by letters A, B, C, and D.

Auto Return Features: The watch automatically returns to the Timekeeping Mode if no button operation is performed for two or three minutes in the Alarm Mode, or for about one hour after entering the Barometer/Thermometer Mode. If a setting screen with flashing digits is left unattended for two or three minutes, the watch exits the setting screen automatically.

Initial Screens: When entering the World Time Mode or Alarm Mode, the data viewed during the last exit from that mode will be displayed first.

Scrolling: Buttons B and D are used to scroll through data on setting screens. Holding these buttons down during a scroll operation will scroll through data at high speed.

Timekeeping Mode

The Timekeeping Mode is used to set and view the current time and date. The graphic in the center of the display indicates the passage of seconds.

Configuring Home City Settings: There are two Home City settings: selecting the Home City and choosing between standard time or daylight saving time (DST). To configure Home City settings:

  1. In Timekeeping Mode, hold down A until the currently selected city code starts to flash. The message "SET Hold" will appear before flashing begins.
  2. Use B (West) and D (East) to select the desired Home City code.
  3. Press C to display the DST setting screen.
  4. Press D to toggle between Daylight Saving Time (On) and Standard Time (OFF). Note that DST cannot be switched while UTC is selected.
  5. Press A to return to Timekeeping Mode. The DST indicator will appear if Daylight Saving Time is turned on. After specifying a city code, the watch uses UTC offsets in World Time Mode to calculate times for other time zones based on the Home City time.

Configuring Current Time and Date Settings: This procedure adjusts the current time and date settings. Changing the digital Home City data should cause the analog time setting to change accordingly. If the analog time does not match the digital time, the home positions of the hands may need adjustment. To change current time and date settings:

  1. In Timekeeping Mode, hold down A until the city code starts to flash.
  2. Use B and D to select the Home City code.
  3. Press C to move the flashing selection through the sequence: City Code, DST, 12/24-Hour Format, Seconds, Hour, Minute, Year, Month, Day, Barometer unit, Altitude unit, Temperature unit, Illumination Duration, Button Operation Tone On/Off.
  4. When the desired setting is flashing, use B (+) and D (-) to change it.
    • For 12-hour/24-hour format, press D to toggle.
    • For seconds, press D to reset to 00.
    • For hour, minute, year, month, or day, use B (+) and D (-).
  5. Press A to exit the setting screen. While 12-hour format is selected, a P (PM) indicator appears for times from noon to 11:59 p.m. No indicator appears for a.m. times. In 24-hour format, time is displayed from 0:00 to 23:59 without any indicator. The watch's full automatic calendar accounts for different month lengths and leap years.

Hand Home Position Correction: The hour and minute hands can be misaligned due to strong magnetism or impact. This can be corrected manually in the Hand Setting Mode. To adjust home positions:

  1. In Hand Setting Mode, hold down A for about two seconds until 0:00 appears on the display. This is the home position adjustment mode.
  2. Check if the hands are pointed at 12 o'clock. If not, use B (counterclockwise) and D (clockwise) to adjust their positions.
  3. Press A to exit the setting screen. The hands will then move to the current Timekeeping Mode time.

Barometer/Thermometer Mode

This mode uses a pressure sensor to measure air pressure (barometric pressure) and a temperature sensor to measure temperature. To enter and exit Barometer/Thermometer Mode:

  1. From Timekeeping Mode, press C to enter Barometer/Thermometer Mode.
  2. "BARO" will appear, indicating measurements are in progress. Results appear after about five seconds.
  3. Readings are taken every five seconds for the first three minutes, then every two minutes. Barometric pressure is displayed in units of 1 hPa (or 0.05 inHg). Values outside the range of 260 hPa to 1,100 hPa (7.65 inHg to 32.45 inHg) will display as "----". Temperature is displayed in units of 0.1°C (or 0.2°F). Values outside the range of -10.0°C to 60.0°C (14.0°F to 140.0°F) will display as "--.-".

Display Units: Users can select hectopascals (hPa) or inchesHg (inHg) for barometric pressure, and Celsius (°C) or Fahrenheit (°F) for temperature. This is done in the unit specification settings.

Barometric Pressure Differential Pointer: This pointer indicates the relative difference between the most recent barometric pressure reading and the current barometric pressure value displayed in Barometer/Thermometer Mode. It indicates pressure changes in the range of ±5 hPa, in 1-hPa units.

  • If the pointer is in the "CLOUDY (-)" area, pressure is falling, indicating deteriorating weather.
  • If the pointer is in the "FINE (+)" area, pressure is rising, indicating improving weather. Barometric pressure is calculated and displayed using hPa as the standard, but can also be read in inHg units (1 hPa ≈ 0.03 inHg).

Pressure Sensor and Temperature Sensor Calibration: The sensors are factory-calibrated but can be adjusted if serious errors are noticed. Important: Incorrect calibration can lead to incorrect readings. Compare watch readings with a reliable thermometer. If adjustment is needed, remove the watch from your wrist and wait 20-30 minutes for its temperature to stabilize. To calibrate the pressure sensor and temperature sensor:

  1. Take a reading with another device for current barometric pressure or temperature.
  2. In Timekeeping Mode, press C to enter Barometer/Thermometer Mode.
  3. Hold down A until the current temperature value starts to flash. "SET Hold" will appear before flashing.
  4. Press C to move the flashing between temperature and barometric pressure values.
  5. Use B (+) and D (-) to adjust the calibration value. To return to factory default, press B and D simultaneously.
  6. Press A to return to Barometer/Thermometer Mode.

Barometer and Thermometer Precautions: The pressure sensor measures air pressure changes for weather predictions, not for precision. Sudden temperature changes can affect readings. Temperature measurements are affected by body temperature, direct sunlight, and moisture. For accuracy, remove the watch from your wrist, place it in a well-ventilated, shaded area, and wipe off moisture. Allow 20-30 minutes for stabilization.

Altimeter Mode

The watch displays altitude values based on air pressure readings from a built-in pressure sensor. Altitude can be measured based on preset values (International Standard Atmosphere conversion values) or a user-specified reference altitude. To take an altimeter reading:

  1. Ensure the watch is in Timekeeping Mode.
  2. Press C to start Altimeter measurement. "ALTI" will appear, and the first reading will appear after 4-5 seconds.
  3. The current altitude is displayed in units of 5 meters (20 feet).
  4. After the first reading, measurements continue automatically every five seconds for three minutes, then every two minutes. If left in Altimeter Mode, the displayed altitude value will update regularly. Temperature is also measured in this mode. To stop auto measurement and return to Timekeeping Mode, press C. The watch will return automatically after 10 hours if no operation is performed. The measurement range for altitude is -700 to 10,000 meters (-2,300 to 32,800 feet). Values outside this range will display as "----". Displayed altitude values are normally based on preset conversion values, but a reference altitude can be specified for greater accuracy, especially when climbing. The unit for displayed altitude values can be changed to meters (m) or feet (ft).

Specifying a Reference Altitude Value: Altitude readings are subject to error from air pressure changes. It is recommended to update the reference altitude value whenever accurate information is available. To specify a reference altitude value:

  1. In Altimeter Mode, hold down A until the current reference altitude value starts to flash. "SET Hold" will appear before flashing.
  2. Use B (+) or D (-) to change the reference altitude value by 5 meters (or 20 feet). This value can be set within -10,000 to 10,000 meters (-32,800 to 32,800 feet). Pressing B and D simultaneously returns to OFF (no reference altitude value).
  3. Press A to exit the setting screen.

How the Altimeter Works: The altimeter bases its measurements on International Standard Atmosphere (ISA) values, which define relationships between altitude, air pressure, and temperature. Generally, air pressure and temperature decrease as altitude increases. There are two standard methods of expressing altitude: Absolute altitude (height above sea level) and relative altitude (difference between two places).

Altimeter Precautions: Altitude estimates are based on air pressure, so readings may vary with pressure changes. The sensor is also affected by temperature, so avoid temperature changes during measurements. Do not rely on this watch for professional or industrial precision, or during activities with sudden altitude changes (e.g., skydiving). Commercial aircraft cabins are pressurized, so watch readings will not match flight crew indications.

Specifying Temperature, Barometric Pressure, and Altitude Units

This procedure specifies the units for Barometer/Thermometer Mode and Altimeter Mode. Important: When TYO (Tokyo) is selected as the Home City, the altitude unit is automatically set to meters (m), barometric pressure to hectopascals (hPa), and temperature to Celsius (°C). These settings cannot be changed. To specify units:

  1. In Timekeeping Mode, hold down A until the city code starts to flash.
  2. Keep pressing C until "TEMP" (temperature), "ALTI" (altitude), or "BARO" (barometric pressure) appears.
  3. For each unit, press D to toggle between the settings:
    • Temperature: °C (Celsius) and °F (Fahrenheit)
    • Altitude: m (meters) and ft (feet)
    • Barometric Pressure: hPa (hectopascals) and inHg (inches of mercury)
  4. Press A to exit the setting screen.

Precautions Concerning Simultaneous Measurement of Altitude and Temperature: While both measurements can be performed simultaneously, each requires different conditions for optimal results. For temperature accuracy, remove the watch from your wrist to eliminate body heat. For altitude accuracy, keep the watch on your wrist or at a constant temperature. Removing the watch from your wrist can affect pressure sensor readings momentarily.

World Time Mode

This mode allows viewing the current time in 31 time zones (48 cities) around the globe. The selected city is called the "World Time City". To enter World Time Mode:

  1. Use C to select World Time Mode (WT). "WT" will appear briefly, then the city code of the selected World Time City. To view time in another time zone:
  2. In World Time Mode, use D (East) to scroll through city codes.

Specifying Standard Time or Daylight Saving Time (DST) for a City:

  1. In World Time Mode, use D (East) to display the city code (time zone) whose DST setting you want to change.
  2. Hold down A until "DST Hold" appears and disappears. This toggles the city code between Daylight Saving Time (DST indicator displayed) and standard time (DST indicator not displayed). You cannot change the Home City's DST setting in World Time Mode, nor can you switch DST while UTC is selected. The DST setting only affects the selected time zone.

Stopwatch Mode

The stopwatch measures elapsed time, split times, and two finishes. To enter Stopwatch Mode:

  1. Use C to select Stopwatch Mode (STW). "STW" will appear briefly, then the stopwatch hours. To perform an elapsed time operation:
  2. Press D to Start.
  3. Press D to Stop.
  4. Press D to Restart.
  5. Press A to Reset. To pause at a split time:
  6. Press D to Start.
  7. Press A for Split (SPL displayed).
  8. Press A for Split release.
  9. Press D to Stop.
  10. Press A to Reset. To measure two finishes:
  11. Press D to Start.
  12. Press A when the first runner finishes (displaying time of first runner).
  13. Press D when the second runner finishes (displaying time of second runner).
  14. Press A to Reset. The stopwatch can measure up to 23 hours, 59 minutes, 59.99 seconds. Timing continues even if you exit Stopwatch Mode. Exiting Stopwatch Mode while a split time is frozen clears the split time.

Countdown Timer Mode

The countdown timer can be set to a preset time and sounds an alarm when it reaches zero. To enter Countdown Timer Mode:

  1. Use C to select Countdown Timer Mode (TMR). "TMR" will appear briefly, then the countdown time hours. To specify the countdown start time:
  2. Enter Countdown Timer Mode. If a countdown is in progress, press D to stop it, then A to reset. If paused, press A to reset.
  3. Hold down A until the hour setting starts to flash. "SET Hold" will appear before flashing.
  4. Press C to move the flashing between hour and minute settings.
  5. Use B (+) and D (-) to change the flashing item. To set 24 hours, set "0H 00'00".
  6. Press A to exit the setting screen. To perform a countdown timer operation:
  7. Press D to Start.
  8. Press D to Stop.
  9. Press D to Restart.
  10. Press A to Reset. An alarm sounds for five seconds when the countdown ends, even in other modes. The countdown time automatically resets to its starting value. To stop the alarm, press any button.

Alarm Mode

The watch has five independent daily alarms and an Hourly Time Signal. When an alarm is on, an alarm tone sounds for about 10 seconds daily at the preset time. The Hourly Time Signal causes the watch to beep twice every hour on the hour. To enter Alarm Mode:

  1. Use C to select Alarm Mode (ALM). "ALM" will appear briefly, then an alarm number (AL1-AL5) or the SIG indicator. To set an alarm time:
  2. In Alarm Mode, use D to scroll through alarm screens until the desired alarm (AL1-AL5) is displayed.
  3. Hold down A until the alarm time starts to flash. "SET Hold" will appear before flashing.
  4. Press C to move the flashing between hour and minute settings.
  5. Use B (+) and D (-) to change the flashing item. For 12-hour format, set a.m. (no indicator) or p.m. (P indicator) correctly.
  6. Press A to exit the setting screen. To test the alarm, hold down D in Alarm Mode.

To turn an alarm and the Hourly Time Signal on and off:

  1. In Alarm Mode, use D to select an alarm or the Hourly Time Signal.
  2. Press A to toggle it between on and off. The alarm on indicator and Hourly Time Signal on indicator are shown on the display in all modes. To stop the alarm, press any button.

Illumination

The display is illuminated for easy reading in the dark. To turn on illumination:

  1. In any mode (except a setting screen), press B to illuminate the display. The illumination duration can be set to one or three seconds. To change the illumination duration:
  2. In Timekeeping Mode, hold down A until the city code starts to flash. "SET Hold" will appear before flashing.
  3. Keep pressing C until "LT1" or "LT3" is displayed.
  4. Press D to toggle between three seconds (LT3) and one second (LT1).
  5. Press A to exit the setting screen.

Illumination Precautions: Illumination may be hard to see under direct sunlight. It turns off automatically when an alarm sounds. Frequent use runs down the battery. The watch may emit an audible sound due to EL panel vibration, which is not a malfunction.

Button Operation Tone

The button operation tone sounds with each button press. It can be turned on or off. Even if off, alarms, Hourly Time Signal, and Countdown Timer Mode alarm still operate normally. To turn the button operation tone on and off:

  1. In Timekeeping Mode, hold down A until the city code starts to flash. "SET Hold" will appear before flashing.
  2. Keep pressing C until "MUTE" or "KEY" is displayed.
  3. Press D to toggle between on (KEY) and off (MUTE).
  4. Press A to exit the setting screen. The mute indicator is displayed in all modes when the button operation tone is turned off.

Troubleshooting

Time Setting:

  • If the current time setting is off by hours, check your Home City setting (page E-14).
  • If the current time setting is off by one hour, adjust your Home City's standard time/daylight saving time (DST) setting (page E-18).

Sensor Modes:

  • If you cannot change temperature, barometric pressure, and altitude units, it's because TYO (Tokyo) is selected as the Home City, which automatically sets these units.
  • If the battery indicator appears during a sensor operation, it means there is not enough battery power. Normal operation should resume after battery power recovers.
  • If "ERR" appears during a sensor operation, it indicates a sensor malfunction or improper contact. Restart the measurement. If "ERR" persists, there may be a problem with the sensor. Take the watch to an authorized CASIO distributor.
  • If the barometric pressure differential pointer does not appear, it could indicate a sensor error or that the displayed current barometric value is outside the allowable measurement range.

World Time Mode:

  • If the time for your World Time City is off, check the standard time/daylight saving time (DST) setting for that city (page E-43).

Casio 5176 Specifications

General IconGeneral
BrandCasio
Model5176
CategoryWatch
LanguageEnglish

Related product manuals