Using the Song Sequencer
E-69
2.
Press the C-3 (RECORD) button.
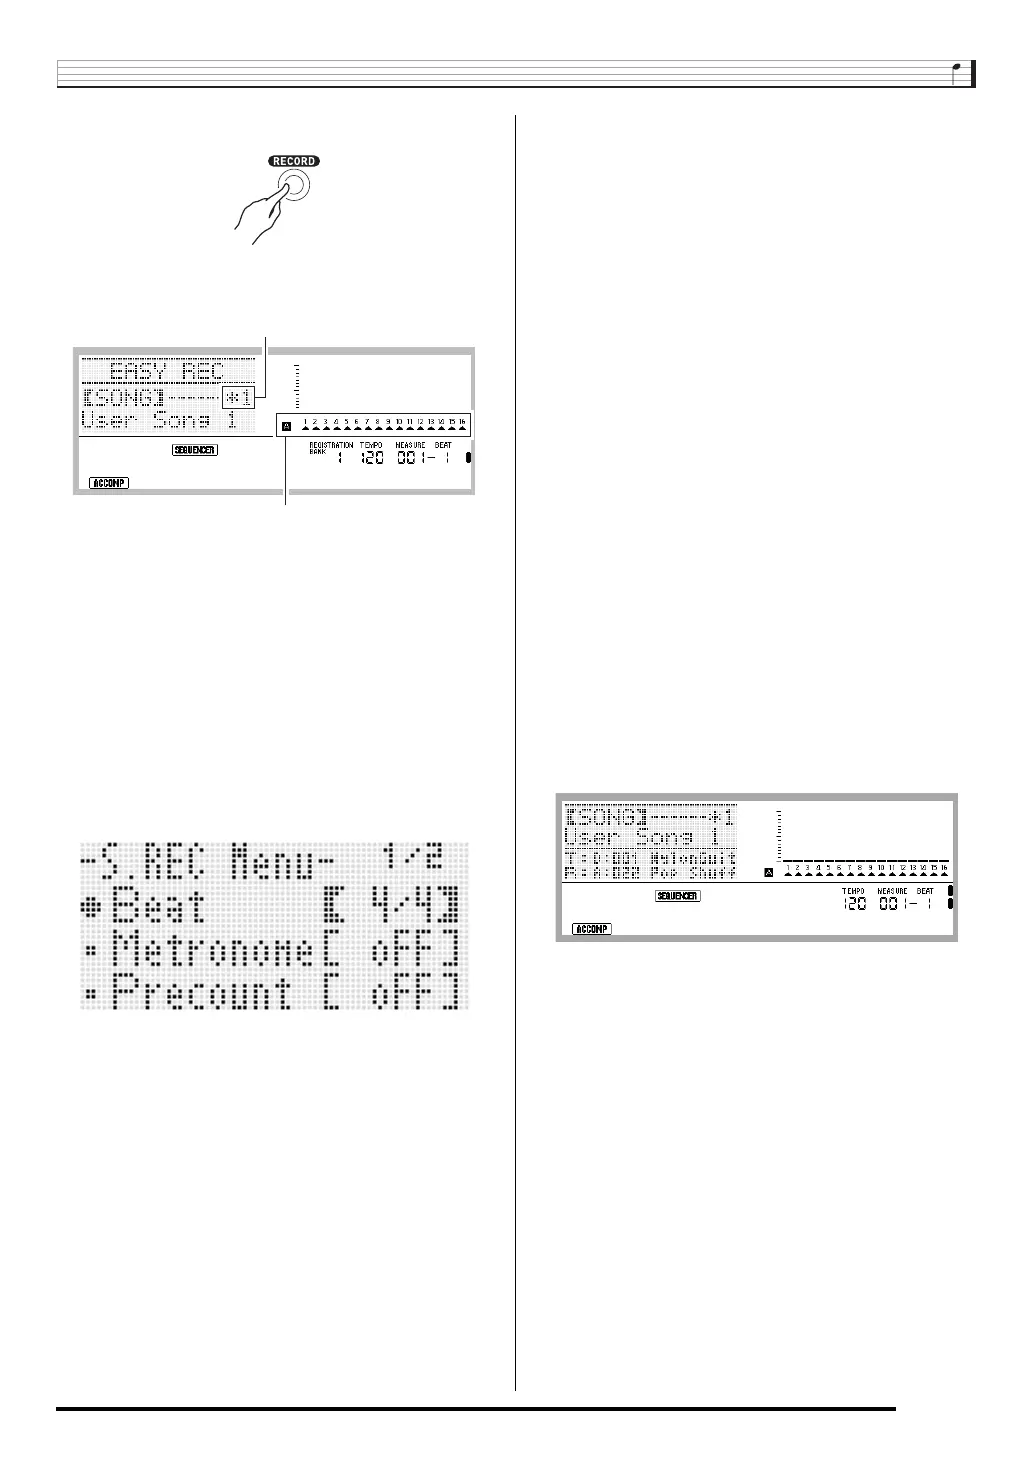
• The button will start flashing and the EASY REC screen
shown below will appear on the display.
• An asterisk (*) next to a song area number indicates
that there is already data recorded in that area.
Selecting a song area that already contains recorded
data and starting a new recording will cause the
existing system track data to be deleted.
3.
Perform the following steps to configure beat
and other settings.
4.
Start playing something on the keyboard.
• Recording starts automatically when you perform any
one of the following operations.
• Starting recording will cause the C-3 (RECORD) button
to change from flashing to lit. During recording, the
display will show the current measure (MEASURE) and
beat (BEAT).
• PITCH BEND wheel (S-1) and pedal operations are
also recorded.
• When recording reaches a point where there is less
than 100 notes of remaining memory capacity, the
current measure (MEASURE) and beat (BEAT) values
will start flashing.
5.
To stop recording, press the L-16 (START/
STOP) button.
• After recording stops, the initial song sequencer mode
screen appears on the display.
• At this time you can press the L-16 (START/STOP)
button to replay what you have just recorded. For
details about playing back recorded content, see
“Playing a Recorded Song” (page E-79).
6.
To exit the song sequencer, press the C-4
(SONG SEQUENCER) button or the R-15 (EXIT)
button.
(1) While holding down the R-13 (FUNCTION) button,
press the C-17 (MENU) button.
This will display a menu like the one shown below,
with the 0 next to “Beat” (beat).
(2) Use the dial or R-14 (–, +) buttons to configure the
beat setting.
You can specify a beat setting of 2/4 to 8/4, 2/8 to
16/8.
(3) Use the R-17 (y) button to move the 0 to
“Metronome” and then use the R-14 (–, +) buttons to
turn the metronome on or off.
Turning on the metronome causes it to sound a count
during recording, but not during playback.
Song area number
Arrows (e) will indicate all the parts in Group A. This indicates the
Digital Keyboard is currently in system track (page E-70) record
standby.
(4) Use the R-17 (y) button to move the 0 to “Precount”
and then use the R-14 (–, +) buttons to turn the
precount on or off.
Turing on the precount inserts a one-measure count
before the start of recording when you press the L-16
(START/STOP) button in step 4.
(5) Press the R-15 (EXIT) button to exit the menu.
– Playing on the keyboard
– Pressing the L-12 (INTRO), L-13 (NORMAL/
FILL-IN), or L-14 (VARIATION/FILL-IN) button
– Pressing the L-16 (START/STOP) button. To input
one or more rests before starting recording, press the
L-16 (START/STOP) button to start recording, and
then start keyboard play at the point you want.
CTK7300IN_e.book 69 ページ 2013年7月19日 金曜日 午後12時1分
 Loading...