Power Supply
The type
of
battery
you should use
depends
on
the model
number
of
your
calculator.
< fx-85
W/fx-85
WA
/
fx-300
W/fx-91
1
W
>
The TWO
WAY
POWER
system
actually has two
power
supplies:
a solar
cell
and
a G13 Type
(LR44) button bat-
tery.
Normally,
calculators equipped with
a
solar
ceil alone
can
operate
only
when relatively
bright light is present.
The TWO
WAY
POWER
system, however, lets you
con-
tinue to use
the
calculator
as
long
as
there is enough
light
to
read the
display.
•
Replacing
the
Battery
Either of
the
following
symptoms indicates
battery power
is low,
and that
the
battery
should
be
replaced.
•
Display
figures
are dim
and difficult
to read in areas
where
there
is
little light
available.
•
Nothing
appears on the
display
when
you press
the
G»Qkey.
•
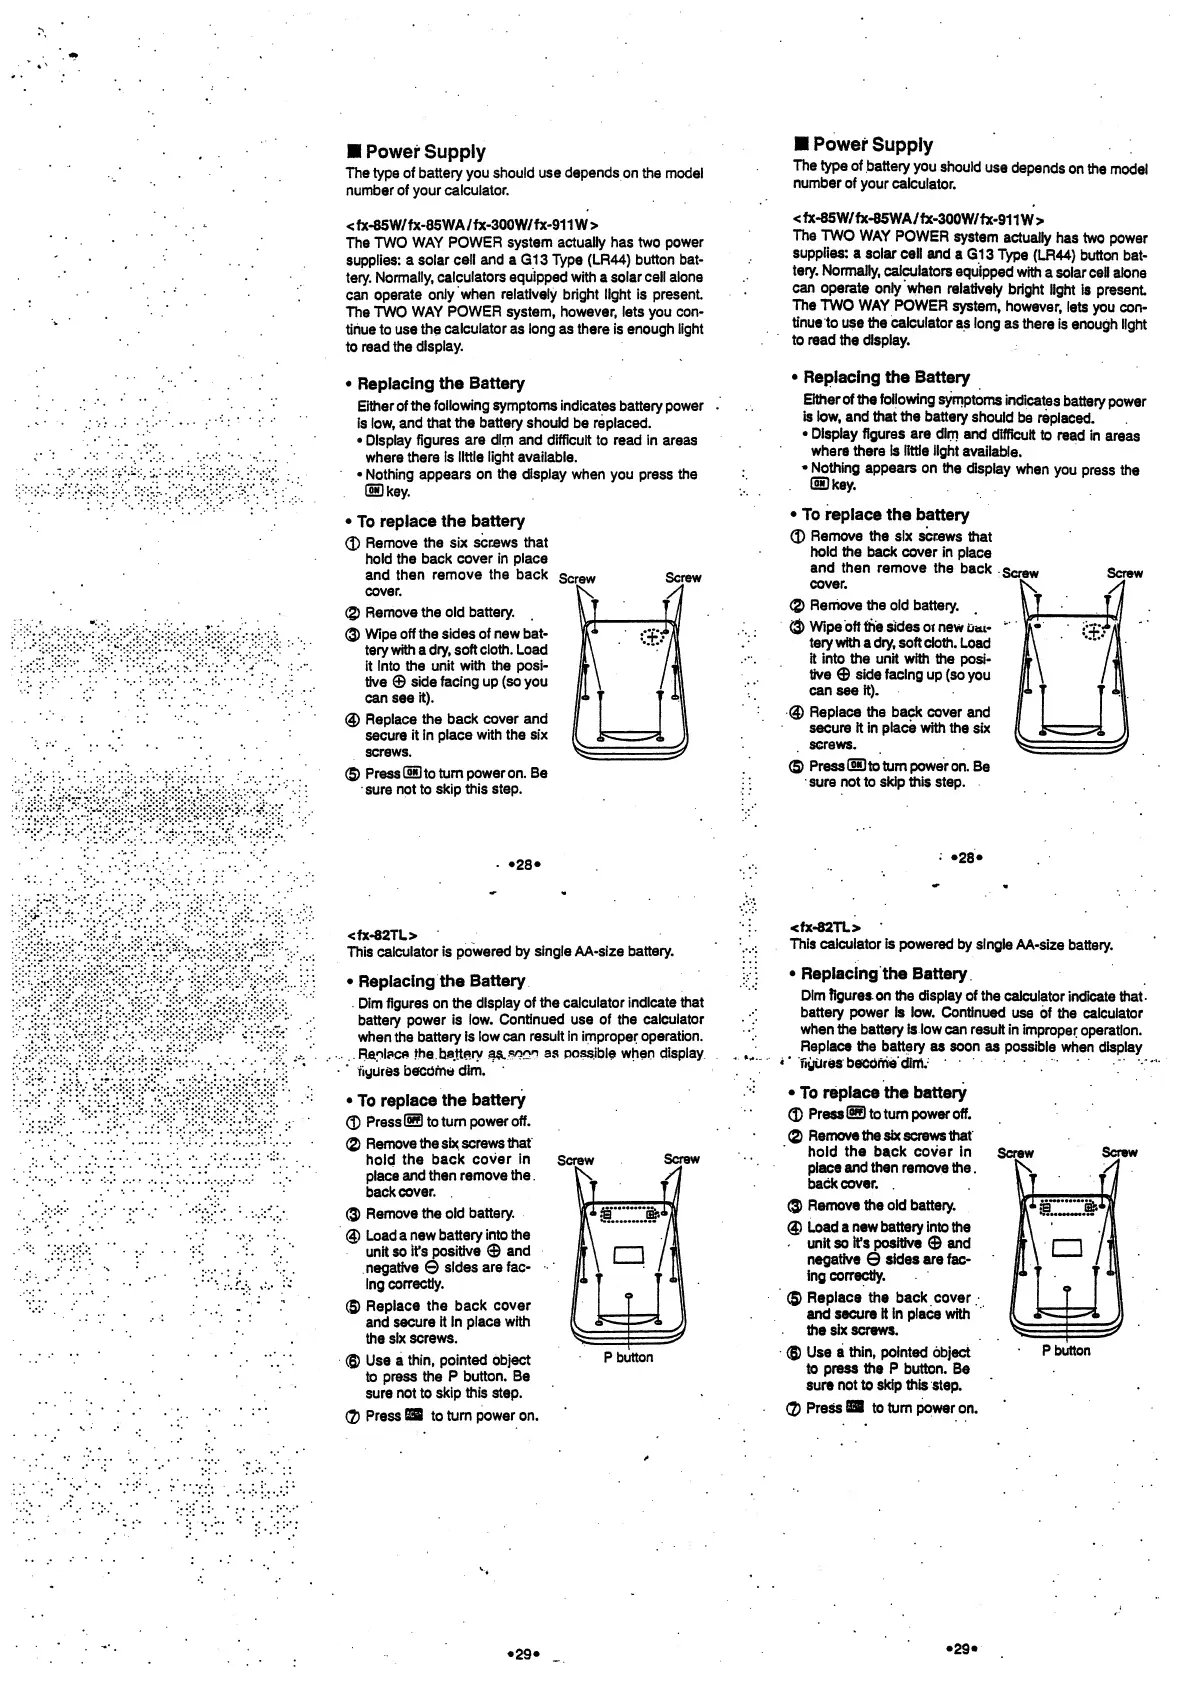
To
replace
the battery
<D
Remove
the six
screws
that
hold the back
cover
in
place
and then
remove
the back
cover.
®
Remove
the old
battery.
@
Wipe off
the sides of
new bat-
tery
with
a
dry,
soft
cloth.
Load
it
into the
unit
with the
posi-
tive
©
side
facing
up (so
you
can see
it).
<§)
Replace
the
back
cover and
secure
it in
place
with the six
screws.
(5)
Press
GUto
turn
power on.
Be
sure
not
to
skip this step.
Screw
Screw
•28«
Power
Supply
The
type of
battery
you
should
use
depends
on
the
model
number
of
your
calculator.
<fx^5W/fx^5WA/fx-300W/fx-911W>
The TWO
WAY
POWER
system
actually
has two
power
supplies:
a
solar ceil
and
a
G13
Type
(LR44) button
bat-
tery.
Normally,
calculators
equipped
with
a solar cell
alone
can
operate
only when
relatively
bright
light
is present
The
TWO
WAY POWER
system,
however,
lets
you con-
tinue
to
use
the
calculator
as long
as
there
is enough
light
to
read
the
display.
•
Replacing the Battery
Either of
the
following
symptoms
indicates
battery
power
is low, and that
the
battery
should
be
replaced.
•
Display
figures
are dim
and
difficult
to read
in
areas
where
there is
little
light
available.
•
Nothing appears
on the
display
when
you
press the
OS key.
•
To replace
the battery
<D
Remove
the
six
screws
that
hold
the
back cover
in
place
and then remove
the
back
cover.
(2)
Remove the old battery.
O
Wipe
oft
the sides ot
new
u<u-
tery
with
a
dry, soft
cloth.
Load
it into the unit
with
the
posi-
tive
@
side
facing
up
(so
you
can see
it).
@
Replace
the
back cover
and
secure it in place with
the six
screws.
(5)
Press G»D to turn power
on.
Be
sure
not
to
skip
this step.
Screw Screw
28«
Screw
Screw
<fx-82TL>
This
calculator is
powered by
single
AA-size
battery.
•
Replacing
the
Battery
Dim figures
on the
display
of the calculator
indicate that
battery
power is
low.
Continued use of the
calculator
when
the
battery
is low can
result in
improper
operation.
..
..
Replace
the
battery
aa..iw*yi
as possible when display
figures
becorne
dim.
•
To
replace
the
battery
<£
Press £9 to
turn
power off.
®
Remove
the
six. screws
that
hold
the
back
cover
in
place
and
then remove
the
.
back
cover.
Q)
Remove
the old
battery.
<g)
Load
a
new
battery
into the
unit so
it's
positive
©
and
negative
©
sides
are fac-
ing
correctly.
(§)
Replace
the back
cover
and
secure
it in
place
with
the six
screws.
®
Use a
thin,
pointed object
to
press the P
button.
Be
sure
not
to
skip this step.
Q)
Press
S3
to
turn power on.
P
button
Screw
Screw
<fx-82TL>
This calculator is powered
by
single
AA-size
battery.
•
Replacing the Battery
Dim
figures on the display of
the
calculator
indicate that-
battery
power is
low.
Continued
use
of
the
calculator
when the battery is
low
can result
in
improper
operation.
Replace the battery as soon
as possible
when display
i#
figiirds becOfrie dffrn.
•
To
replace
the
battery
0
press
@to turn power off.
(2)
Remove the six
screws that'
hold
the
back
cover in
place
and then
remove
the
.
back
cover.
.
®
Remove
the old battery.
®
Load a
new battery into
the
unit so
ifs positive
0
and
negative
0
sides are
fac-
ing
correctly.
®
Replace the back cover,
and
secure
it
in
place with
the
six screws.
®
Use a
thin,
pointed object
to
press
the P button.
Be
sure
not to skip this
step.
Q)
Press
SB
to
turn
power
on.
P
button
•29»
•29«
 Loading...