EasyManua.ls Logo

Casio HR-150LA - User Manual

Casio HR-150LA
3 pages
Print Icon
To Next Page IconTo Next Page
Loading...
e e
ti]
*
e
e
°
e
6 e
e
e
s
*eeeeee#¢e#8e0ee0¢#e
@
®e0eeese#es8ee#ee#8s8ese
ELECTRONIC
PRINTING
CALCULATOR
CALCULADORA
IMPRESORA
ELECTRONICA
R-150LA
OPERATION
MANUAL
MANUAL
DE
OPERACION
FC
@®@
SA1031C
Printed
in
Taiwan
HOCOZ05U201
W30
1.
important
Precautions
*
Never
try
to
take
the
calculator
apart.
*
Handle
the
calculator
carefully,
and
avoid
dropping
it.
*Do
not
operate
the
keys
roughly.
As
you
operate
the
keys,
monitor
your
input
by
watching
the
display
to
make
sure
that
vatues
are
being
input
correctly.
*
Avoid
using
the
calculator
in
very
hot
or
cold
areas
(below
32°F/O°C,
or
above
104°F/40°C).
Also
avoid
heavy
dust
and
moisture.
*
When
using
paper,
be
sure
that
you
install
it
correctly.
*
To
clean
the
calculator,
wipe
it
off
with
a
soft
cloth.
You
can
also
clean
the
exterior
by
wiping
it
with
a
soft
cloth
that
has
been
moistened
with
a
weak
solution
of
water
and
a
neutral
detergent.
*
Never
use
volatile
fluids
such
as
lacquer
thinner
or
ben-
zine,
etc.
when
cleaning
the
calculator.
*
Be
sure
to
switch
the
power
off
after
you
finish
using
the
calculator
or
if
you
do
not
plan
to
use
it
for
a
long
period.
As
with
all
electrical
appliances,
it
is
also
a
good
idea
to
unplug
the
power
cord
from
the
AC
outlet
if
you
are
not
going
to
use
the
calculator
for
a
long
time.
*
Be
sure
to
remove
the
packing
material
inside
the
printer
before
trying
to
perform
a
print
operation.
*
Make
sure
that
your
local
AC
power
supply
matches
the
power
marked
on
the
back
panel
of
the
calculator.
*
Power
continues
to
be
suppfied
to
the
calculator
aven
when
the
Function
Selector
is
In
the
OFF
position.
To
totally
cut
power
to
the
calculator
off,
unplug
the
power
cord
from
the
AC
outlet.
¢
Whenever
you
take
the
calculator
to
a
retailer
or
deal-
er
for
servicing,
we
recommend
that
you
remove
the
Paper
roll
holders,
the
tape
spools,
and
all
other
detachable
accessories
to
keep
them
from
getting
lost.
¢
Always
make
sure
that
roll
paper
is
installed
in
the
calcutator
before
using
any
of
the
Function
Selector
settings
that
activates
the
printer.
ein
no
event
will
CASIO
snd
its
suppliers
be
liable
to
you
or
any
other
person
for
any
damages,
including
any
incidental
or
consequential
expenses,
lost
profits,
lost
savings
or
any
other
damages
arising
out
of
use
of
this
product.
About
the
input
buffer
An
input
buffer
is
a
place
where
key
operations
are
tem-
porarily
collected
until
the
calculator
can
finish
the
oper-
ation
it
is
performing
now
and
start
on
the
next
one.
The
input
buffer
of
this
calculator
can
hold
up
to
15
key
oper-
ations
(both
number
entries
and
function
commands},
so
you
can
continue
key
input
even
while
another
operation
is
being
processed.
CASIO.
1.
Precauciones
importantes
*No
trate
de
desarmar
la
calculadora.
*
Manipule
la
calculadora
con
cuidado,
y
evite
dejarla
caer.
*
No
opere
las
teclas
bruscamente.
A
medida
que
opera
las
teclas,
verifique
el
ingreso
observando
en
la
pantalla,
para
cerciorarse
de
que
las
valores
estan
siendo
ingresa-
dos
correctamente.
*
Evite
usar
la
calculadora
en
déreas
muy
calurosas
o
frias
{debajo
de
O°C
o
por
sabre
40°C).
También
evite
el
polvo
y
la
humedad.
*
Cuando
utilice
papel,
cercidrese
de
instalarlo
correc--
tamente.
¢
Para
limpiar
fa
calculadora,
limpie
con
un
pafio
suave.
También
puede
limpiar
el
exterior
frotando
con
un
pano
suave
previamente
humedecido
en
una
solucién
diluida
de
agua
y
dstergente
neutro.
fi
*
Para
limpiar
la
caiculadora,
no
use
liquidos
volatiles
tales
como
diluyentes
de
laca
o
bencina,
etc.
*
Cercidrese
de
apagar
la
unidad
después
de
usar
la
cal-
culadora
o
si
tiene
pensado
no
usarla
por
un
largo
per!-
odo.
Como
con
todos
los
aparatos
eléctricos,
también
es
una
buena
idea
desenchufar
ei
cable
de
alimentacién
desde
la
toma
de
CA
si
no
va
a
usar
la
catculadora
por
fargo
tiempo.
*
Antes
de
intentar
de
realizar
una
operacién
de
impre-
sién,
asegurese
de
retirar
el
material
de
empaque
desde
el
interior
de
la
impresora.
*
Cercidrese
de
que
su
alimentacién
de
CA
local
coin-
cide
con
la
potencia
marcada
en
el
panel
trasero
de
la
caiculadora.
*La
alimentacién
continuaré
suministréndose
a
la
caiculadora
aun
cuando
a!
selector
de
funchén
se
encuentre
en
ta
posicién
OFF.
Para
cortar
com-
pletamente
fa
alimentacién
de
la
calculadora,
desen-
chufe
el
cable
de
alimentacién
desde
la
toma
de
CA.
*
Siempre
que
lieve
ta
calculadora
a
su
concesionario
©
distribuidor
autorizado
para
un
servicio,
se
reco-
mienda
extraer
los
soportes
de
rollo
de
papel,
los
carretes
de
cinta,
y
todos
los
otros
accesorios
des-
montables
para
evitar
de
que
se
plerdan.
*
Cercidrese
siempre
de
que
el
rotlo
de
papel
se
encuen-
tra
colocado
en
la
calculadora,
antes
de
usar
cual-
quiera
de
los
ajustes
del
selector
de
funcién
que
activa
la
impresora.
*
En
ningun
caso
CASIO
y
sus
suministradores
serén
responsables
ante
Ud.
o
cualquier
otra
persona
por
cualquier
dajio,
incluyendo
cualquier
gasto
inciden-
tal
o
consecuente,
pérdida
de
ganancias,
pérdida
de
ahorros
u
otros
dafios
que
puedan
ser
ocasionades
por
el
uso
de
este
producto.
Acerca
de
ta
memoria
intermedia
de
ingreso
Una
memoria
intermedia
de
ingreso
es
un
lugar
en
dende
se
almacenan
temporariamente
las
operaciones
de
tecta,
hasta
que
la
calculadora
pueda
terminar
la
operacidn
que
esté
realizando
y
comenzar
la
siguiente.
La
memoria
in-
termedia
de
ingreso
de
esta
calculadora
puede
retener
hasta
15
operaciones
de
tecla
(mandos
de
funcidn
e
ingre-
Sos
numéricos},
de
modo
que
puede
continuar
el
ingreso
de
tecla
aun
mientras
se
estd4
Procesando
otra
operacién.
2.
About
the
Selectors
C@
>)
=
Function
Selector
ts
LL
OFF
OM
PRINT
ITEM
OFF:
Power
is
off.
ON:
Power
is
on,
but
no
printing
is
performed
except
when
is
pressed
{see
‘14.
Printing
Reference
Numbers’').
Calculations
are
shown
on
the
dispiay
only.
PRINT:
Power
is
on,
and
printing
is
performed.
Printout
includes
all
keyboard
entries,
arithmetic
operation
sym-
bols,
results
and
memory
contents.
Calculations
are
also
shown
on
the
display.
ITEM:
Power
is
on
and
printer
is
operational.
The
total
number
of
items
added
and
subtracted
is
printed
along
with
the
rasult
when
you
press
the
[i
or
BE
key.
soeeaeert
t
F392
0
ADO
54
Decimal
Mode
Selector
F:
Floating
decimal.
3:
Values*
are
rounded
off
(O,
1,
2, 3,
4
are
cut
off;
5,
6,
7,
8,
9
are
rounded
up)
to
3
decimal
places.
2:
Values*
are
rounded
off
(0,
1,
2, 3,
4
are
cut
off:
5,
6,
7,
8,
9
are
rounded
up)
to
2
decimal
places.
0:
Values*
are
rounded
off
{0,
1,
2, 3,
4
are
cut
off;
5,
6,
7,
8,
9
are
rounded
up)
to
O
decimal
places.
ADD):
See
‘’9.
About
ADD
Mode
Calculations’’.
*{important
For
addition
and
subtraction,
all
numeric
antries
and
calculation
results
are
rounded.
For
multiplication
and
division,
the
calculation
is
first
performed
using
values
as
they
are
entered
and
then
the
results
are
rounded.
3.
Loading
the
Paper
Roll
Switch
power
on
by
satting
the
Function
Selector
to
ON.
Follow
the
procedure
illustrated
below.
¢
Always
use
the
Fg
key
to
advance
the
paper.
Never
pull
on
the
paper
by
hand.
*We
recommend
dustless
type
paper
(58
mm
wide
x
80
mm
or
less
diameter}.
2.
Acerca
de
los
selectores
C@_)
_~—s
Selector
de
funcién
OFF
ON
PRCT
ITEMS
OFF:
Desactiva
fa
unidad.
ON:
Activa
ia
unidad,
pero
no
realiza
!a
impresién,
excepto
cuando
se
presiona
i
{vea
14.
Impresién
de
los
numeros
de
referencia’’).
Los
c4lculos
se
muestran
solamente
en
la
pantalla.
PRINT:
Activa
la
unidad,
y
realiza
la
impresién.
Las
impre-
siones
incluyen
todas
los
ingresos
de
teclado,
slmbolos
de
operacién
aritméticos,
resultados
y
contenidos
en
la
memoria,
Los
cdlculos
también
se
muestran
en
la
pantalla.
ITEM:
La
unidad
estd
encendida
y
la
impresora
puede
operarse.
El
numero
total
de
ftemes
agregados
o
restados
se
imprimen
junto
con
el
resultado
al
pulsarse
la
tecla
Ki
o
Bk.
F320anas4
elector
de
modo
decimal
ae
eS
|
F:
Decimal
flotante.
3:
Los
valores*
se
redondean
por
defecto
(0,
1,
2,
3
y
4
son
recortados;
5,
6,
7,
8,
9
son
redondeados
por
exceso)
a
3
lugares
decimales.
2:
Los
valores”
se
redondean
por
defecto
(0,
1,
2,
3
y
4
son
recortados;
5, 6, 7, 8,
9
son
redondeados
por
exceso)
a
2
lugares
decimales.
0:
Los
valores*
se
redondean
por
defecto
(0,
1,
2,
3
y
4
son
recortados;
5,
6,
7, 8,
9
son
redondeados
por
exceso)
a
0
Jugares
dacimales.
ADD,:
Vea
‘’9.
Acerca
de
los
madas
de
calculos
ADD‘'
*importante
Para
la
suma
y
resta,
todos
los
ingresos
numéricos
y
resultados
de
calculo
son
redondeados.
Para
la
multipli-
caci6n
y
division,
el
cdlculo
se
realiza
primero
usando
los
valores
tal
como
son
ingresados,
y
Juego
jos
resultados
son
redondeados.
3.
Colocacién
def
rollo
de
papel
Encienda
Ia
unidad
fijando
e!
selector
de
funcidn
a
la
po-
sicién
ON.
Siga
el
procedimiento
ilustrado
a
continuacién.
®
Utilice
siempre
la
tecla
para
avanzar
et
papel.
Nunca
tire
del
papel
manua!mente.
*
Se
recomienda
un
papel
de
tipo
libre
de
polvo
(anchura
de
58
mm
x
80
mmo
menos
de
didmetro}.
Loading
the
Paper
Roll
/
Colocacién
del
rolio
de
papel
(Fig.
1)
4.
Replacing
the
Ink
Roller
The
printer
in
this
mode!
uses
a
disposable
ink
roller
(cartridge
type).
If
impressions
are
too
light
or
illegible,
replace
the
ink
roller
with
a
new
one.
1}
Open
the
printer
cover
(Fig.
A).
2)
Remove
the
ink
roller
by
pulling
it
up
(Fig.
B).
3)
Install
a
new
ink
roller
(Fig.
C).
4)
Make
sure
the
ink
roller
is
in
place,
and
replace
the
cover.
Note:
Never
fill
the
ink
roller
with
fluid
ink
as
it
may
run
oF
Clog
the
printer.
Use
only
CASIO
ink
cartridge
{IR-40),
4.
Cambio
det
rodillo
entintador
La
impresora
de
este
modelo
utiliza
un
rodillo
entintador
descartable
{tipo
cartucho).
Cambie
al
rodillo
entintador
por
una
nuevo
cada
vez
que
la
impresién
se
torne
poco
clara
o
ilegible.
1)
Abra
ta
cubierta
de!
impresor
(Fig.
A).
2}
Quite
e!
rodillo
entintador
tir4ndolo
hacia
arriba
(Fig.
B).
3}
Instale
un
rodillo
entintador
nuevo
(Fig.
C).
4)
Asegurese
de
que
el
rodillo
entintador
quede
bien
ins-
talado
y
vuelva
a
poner
la
cubierta.
Nota:
Nunca
coloque
el
rodillo
entintador
con
tinta
liquida
porque
puede
derramarse
o
atascar
la
impresora.
Utilice
unicamente
los
cartuchos
CASIO
(IR-40},
Replacing
the
Ink
Roller
/
Cambio
de!
rodillo
entintador
Sy
ink
roller
Rodillo
entintador
5.
Power
Source
This
calculator
operates
on
disposable
dry
batteries
or
AC
with
the
use
of
an
AC
adaptor.
=
Dry
battery
operation
Any
of
the
folowing
symptoms
indicates
that
batteries
are
low
and
should
be
replaced.
Switch
power
off
and
replace
batteries
to
correct
the
situation.
a)
Incorrect
printing
or
other
printing
problems.
b)
A
dim,
difficult-to-read
display.
c)
Abnormally
slow
print
speed.
PRECAUTIONS:
Incorrectly
using
batteries
can
cause
them
to
burst
or
leak,
possibly
damaging
the
interior
of
the
unit.
Note
the
fol-
lowing
precautions:
°
Be
sure
that
the
positive
(+}
and
negative
(—}
poles
of
each
battery
are
facing
in
the
proper
direction.
*
Never
mix
batteries
of
different
types.
®
Never
mix
old
batteries
and
new
ones.
*
Never
leave
dead
batteries
in
the
battery
compartment.
*
Remove
the
batteries
if
you
do
not
plan
to
use
the
unit
for
long
periods.
Replace
the
batteries
at
least
once
every
2
years,
no
matter
how
much
the
unit
is
used
during
that
period.
*
Never
try
to
recharge
the
batteries
supplied
with
the
unit.
*
Do
not
expose
batteries
to
direct
heat,
let
them
become
shorted,
or
try
to
take
them
apart.
*
Should
4
battery
leak,
clean
out
the
battery
compart-
ment
of
the
unit
immediately,
taking
care
to
avoid
letting
tha
battery
fluid
come
into
direct
contact
with
your
skin.
“Keep
the
battery
away
from
children.
If
swallowed
consult
your
doctor
immediately.
Replacement
of
batteries:
1)
Slide
open
the
battery
compartment
lid
on
the
back
of
the
unit.
2)
Remove
dead
batteries.
3)
Insert
new
batteries
with
the
polarity
as
shown
by
the
O
symbots.
4)
Replace
the
battery
companment
lid.
5)
The
first
time
you
switch
on
power
after
replacing
bat-
teries,
be
sure
to
press
the
ALL
RESET
button
on
the
back
of
the
unit
with
a
thin,
pointed
object.
5.
Fuente
de
alimentacién
Esta
calculadora
funciona
con
pilas
secas
descartables
o
con
CA
mediante
a!
uso
de
un
adaptador.
®
Funcionamiento
con
pilas
secas
Cualquiera
de
ios
siguientes
sintomas
indica
que
tas
pilas
estan
con
poca
energia
y
deben
ser
cambiadas.
Apague
la
unidad
y
cambie
las
pilas
para
corregir
la
situacién,
a)
impresion
incorrecta
u
otros
problemas
de
impresién.
b)
Una
pantalla
oscura,
dificil
de
leer.
c)
Velocidad
de
impresién
anormalmente
lenta.
PRECAUCIONES:
El
uso
incorrecto
de
las
pilas
puede
ocasionar
que
las
mismas
se
sulfaten
o
exploten,
y
pueden
ocasionar
darios
a
la
unidad.
Tenga
en
cuenta
las
siguientes
precauciones:
*
Cerciérese
que
la
polaridad
{+
/—)
sea
la
correcta.
*No
mezcle
diferentes
tipos
de
pilas.
*No
mezcle
las
pilas
nuevas
con
las
pilas
usadas.
*
Nunca
deje
pilas
agotadas
en
el
compartimiento
de
pilas
ya
que
pueden
ocasionar
fallas
en
el
funcionamiento.
*
Cuando
no
utilice
ta
unidad
por
un
periodo
prolongado
retire
las
pitas.
¢
Se
recomienda
que
las
pilas
se
reemplacen
una
vez
cada
2
afios
para
prevenir
de
fallas
en
el
funcionamiento.
*Las
pilas
suministradas
no
son
recargables.
*
No
exponga
las
pitas
al
calor
directo,
ni
permita
que
se
pongan
en
cortocircuito
ni
trate
de
desarmarias.
*Si
una
pila
se
suffata,
timpie
el
compartimiento
de
pilas
de
la
unidad,
teniendo
cuidado
de
evitar
que
el
fluido
de
la
pita
se
ponga
en
contacto
directo
con
su
piel.
*Mantenga
Ia
pita
alejadas
de
los
nifios.
Si
una
pila
llega
@
ser
digerida
consulte
a
un
médico
inmediatamente.
Cambio
de
las
pilas:
1}
Deslice
para
abrir
la
tapa
del
compartimiento
de
las
pi-
las
que
estd
en
la
parte
posterior
de
la
unidad,
2)
Saque
las
pilas
gastadas.
3)
Inserte
pilas
nuevas
con
jas
polaridades
segun
indican
los
signos
Py
OC.
4)
Vuelva
a
colocar
la
tapa
del
compartimiento
de
las
pitas.
5)
La
primera
vez
que
enciende
la
unidad
luego
de
cambiar
jas
pilas,
cerciérese
de
presionar
el
botén
ALL
RESET
Question and Answer IconNeed help?

Do you have a question about the Casio HR-150LA and is the answer not in the manual?

Overview

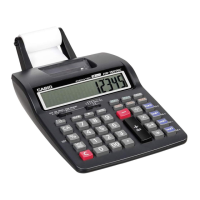
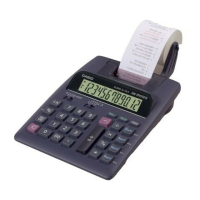
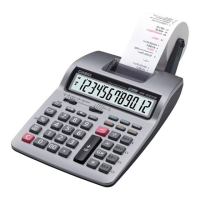
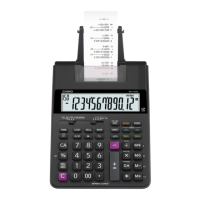
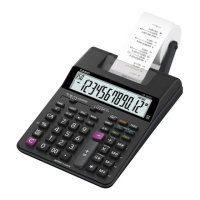
This document is the operation manual for the HR-150LA Electronic Printing Calculator manufactured by Casio Computer Co., LTD. It provides comprehensive instructions for its use, maintenance, and technical specifications.

Function Description

The HR-150LA is an electronic printing calculator designed for various arithmetic operations, including addition, subtraction, multiplication, division, percentages, and calculations involving memory. It features a print function that allows users to keep a physical record of their calculations. The calculator supports both decimal and fixed-point calculations, offering flexibility for different types of numerical tasks. It also includes an independent memory function, which allows for storing and recalling values without affecting ongoing calculations. The auto power-off function helps conserve battery life by automatically shutting down the calculator after a period of inactivity.

Important Technical Specifications

  • Power Supply: The calculator can be powered by either an AC adaptor (AD-4180) or four AA-size manganese batteries. The AC adaptor is rated for 120V AC, 60Hz, 5W (for USA/Canada) or 220V AC, 50Hz, 5W (for Europe/Australia/Asia).
  • Battery Life: Approximately 1,200 hours of continuous operation on type R6P (SUM-3) batteries.
  • Operating Temperature: 0°C to 40°C (32°F to 104°F).
  • Dimensions: 97mm (W) x 215mm (D) x 47mm (H) (3-13/16" W x 8-1/2" D x 1-7/8" H).
  • Weight: Approximately 420g (14.8 oz) including batteries.
  • Display: The calculator features a display that shows up to 12 digits.
  • Printing: It uses standard paper rolls (58 mm wide, 80 mm max. diameter) and an ink roller (IR-40). The printing speed is approximately 2.0 lines per second.
  • Decimal System: The calculator supports a decimal point system with settings for 0, 2, 3, 4, 6, and F (floating decimal).
  • Rounding System: It offers options for rounding up, rounding down, or no rounding (cut-off).

Usage Features

The HR-150LA is designed for ease of use with clearly labeled keys and a straightforward operational flow.

  • Basic Arithmetic Operations: Users can perform addition, subtraction, multiplication, and division using dedicated keys.
  • Percentage Calculations: A percentage key simplifies calculations involving percentages.
  • Memory Functions: The calculator includes keys for Memory Plus (M+), Memory Minus (M-), Memory Recall (MR), and Memory Clear (MC). The independent memory allows for storing and recalling values without interfering with ongoing calculations.
  • Grand Total Function: A GT key is available for calculating the grand total of all results obtained from multiplication and division operations.
  • Item Count: The calculator can display the number of items entered, which is useful for tracking multiple entries.
  • Decimal Selector: Users can choose the number of decimal places (0, 2, 3, 4, 6) or a floating decimal (F) for their calculations, providing precision control.
  • Rounding Selector: The rounding selector allows users to specify how results should be rounded: up, down, or cut-off (no rounding).
  • Print/Non-Print Selector: A selector allows users to toggle the printing function on or off, enabling them to choose when to print their calculations.
  • Feed Key: A dedicated feed key allows users to advance the paper roll.
  • Correction Key: The "C" key clears the last entered number, while the "AC" key clears all entries and calculations, except for the independent memory.
  • Time Calculations: The calculator can perform time calculations, displaying results in hours and minutes.
  • Tax Calculations: The calculator includes a tax rate setting function, allowing users to easily calculate amounts with or without tax.
  • Cost/Sell/Margin Calculations: Dedicated keys for Cost, Sell, and Margin enable quick calculations of profit margins.

Maintenance Features

Proper maintenance ensures the longevity and optimal performance of the HR-150LA calculator.

  • Paper Roll Replacement: The manual provides clear instructions for replacing the paper roll. Users should use standard paper rolls (58 mm wide, 80 mm max. diameter) and ensure the paper is inserted correctly to avoid jams.
  • Ink Roller Replacement: The ink roller (IR-40) needs to be replaced when printouts become faint or illegible. The manual details the steps for removing the old ink roller and installing a new one. It advises users to avoid touching the ink roller directly to prevent ink stains.
  • Battery Replacement: When the printout becomes faint or the display shows nothing, it indicates that the batteries are low and need to be replaced. The manual instructs users to replace all four AA-size batteries simultaneously and to use manganese batteries for optimal performance. It also warns against mixing old and new batteries or different types of batteries.
  • Cleaning: The calculator should be cleaned with a soft, dry cloth. Harsh chemicals, thinners, or benzene should not be used as they can damage the casing.
  • Storage: When not in use for extended periods, the batteries should be removed to prevent leakage and damage to the calculator. The calculator should be stored in a cool, dry place, away from direct sunlight, extreme temperatures, and moisture.
  • Troubleshooting: The manual includes a section on troubleshooting common issues, such as faint printouts, display problems, and incorrect calculations, providing solutions for users to resolve minor problems themselves.
  • AC Adaptor Usage: When using the AC adaptor, ensure it is the correct model (AD-4180) and that the voltage matches the local power supply to prevent damage to the calculator.
  • General Care: Avoid dropping the calculator or subjecting it to strong impacts. Do not attempt to disassemble or modify the calculator, as this will void the warranty. Keep the calculator away from water and other liquids.

Casio HR-150LA Specifications

General IconGeneral
BrandCasio
ModelHR-150LA
CategoryCalculator
LanguageEnglish

Related product manuals