11
Carburetor – Inspect/Adjust
Remove the side panel (side with service access
doors) by removing the 2 bolts and lifting out
and away (be careful to avoid breaking the
locating tabs). Remove the air filter and housing.
Use a suitable container to drain the fuel from
the hose (attached to the underside of the
carburetor) when removing the carburetor.
Dispose of the fuel properly. Clean the outside
surface of the carburetor before disassembly.
Remove bolt (3) and gasket (2). Carefully
remove the float chamber (1), and contain any
small parts that may fall out.
Remove float pin (1), carefully remove float (2)
and contain the small parts. Clean the internal
parts with carburetor cleaner and compressed
air.
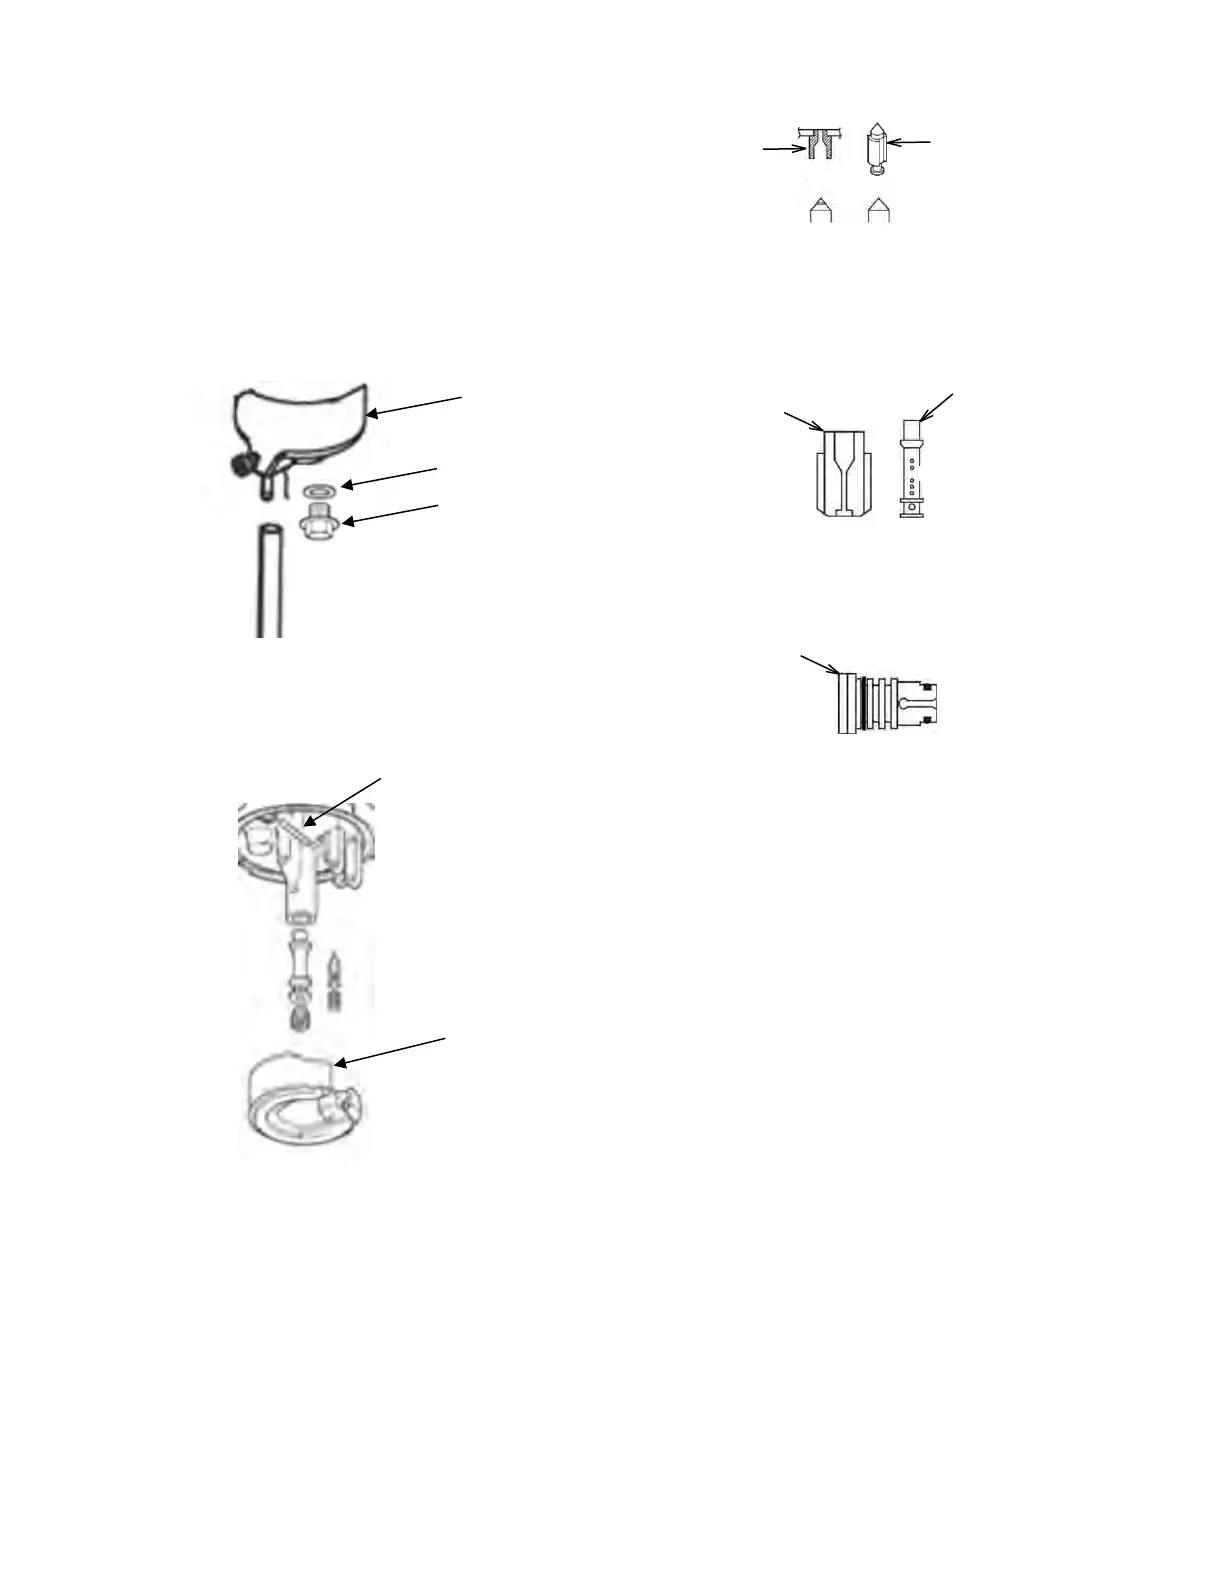
Check the float valve seat (1) and float valve (2)
for wear. Figure A shows a worn float valve that
needs replaced. Figure B shows a float valve
that can be reused.
Inspect main fuel jet (1) and main fuel nozzle
(2). If worn, replace.
Inspect the idle speed jet (1). Replace if
damaged. Apply a light coat of oil to the O-ring
seals before reinstalling.
After reinstalling the float, lightly press in with a
finger to make sure the float moves freely. Make
sure that the float valve is just contacting the
valve seat, and the spring is not compressed.
Set the float chamber in place so that the drain
hose can be accessed through the service
access door. Install gasket and bolt to hold the
float chamber in place.
Reinstall the carburetor. After starting the unit,
check for leakage.
 Loading...