18
Fuel Tank Cap and Strainer – Clean
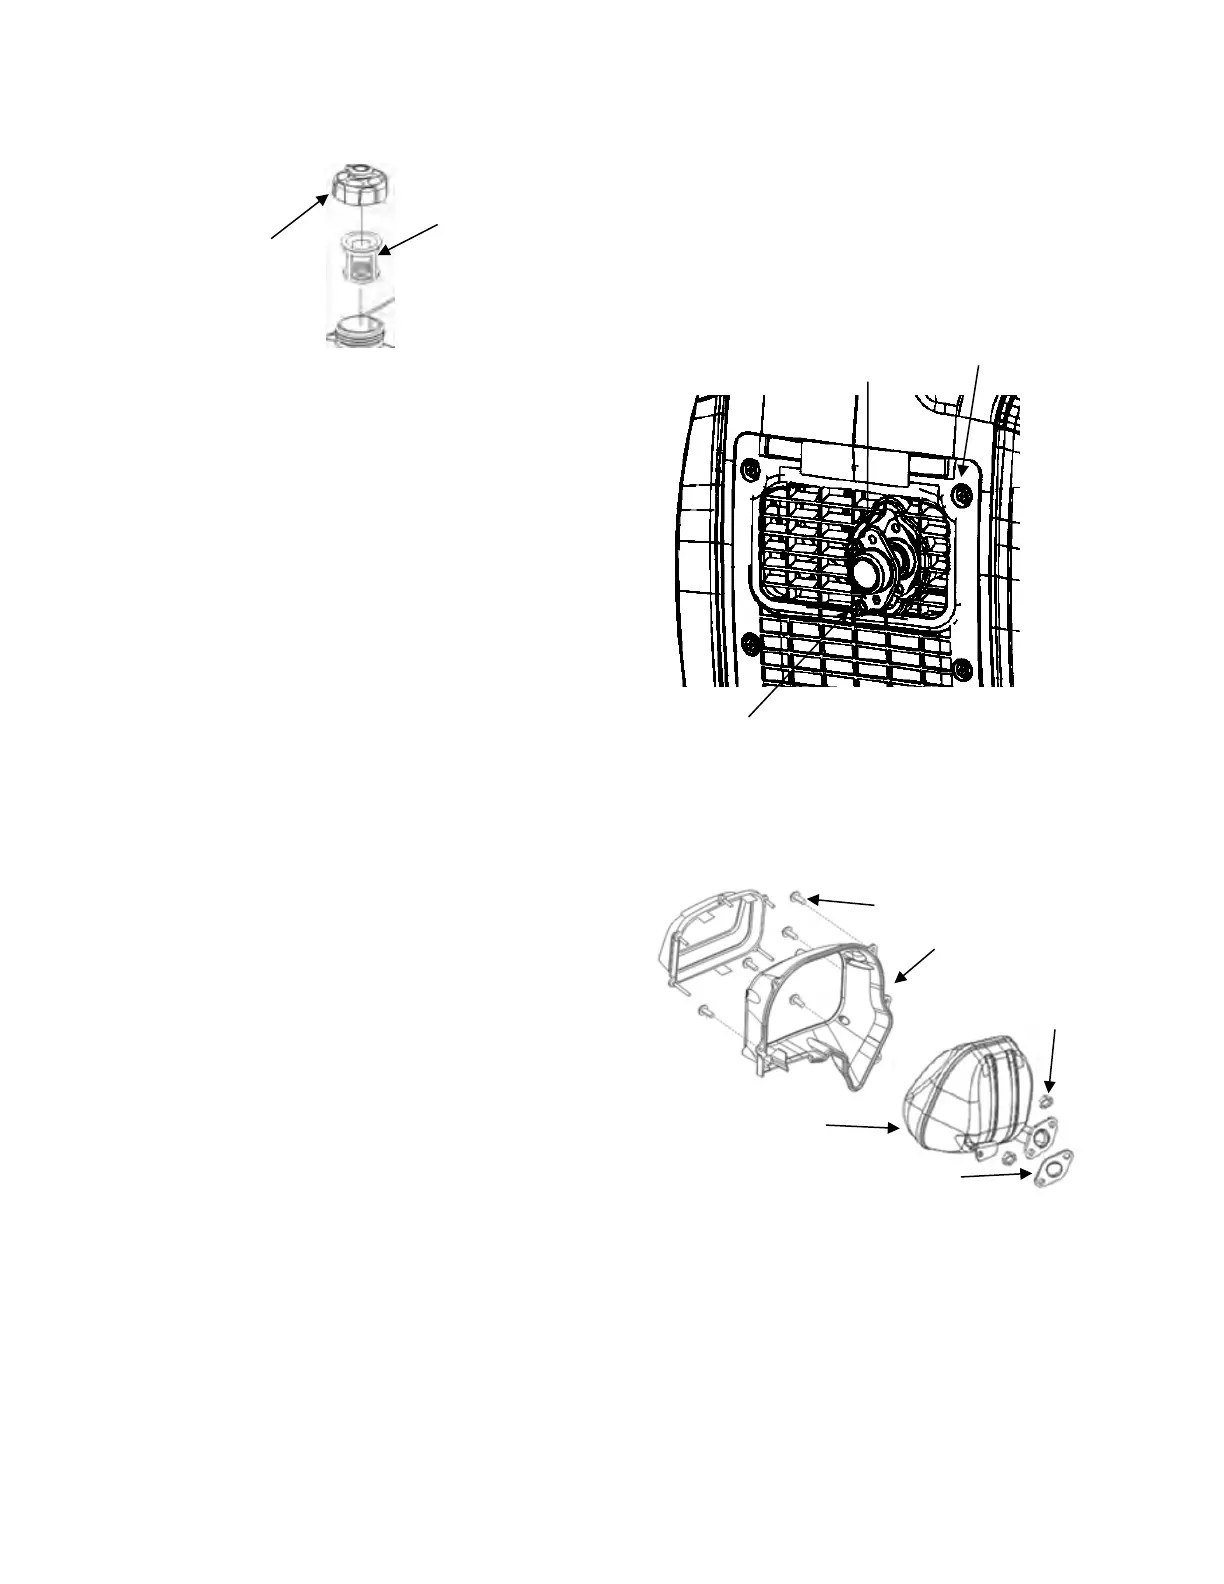
Wipe off the fuel cap (1) and surrounding area
before removing the fuel cap. Wiping off the fuel
cap and surrounding area before removing the
fuel cap helps to reduce the amount of
contaminants allowed into the fuel system.
Inspect the fuel cap. Make sure that the vacuum
relief valve moves easily. If the vacuum relief
valve does not move easily, replace the fuel cap.
If there is a build-up of debris in the fuel strainer
(2), remove the strainer and rinse out the
strainer. Allow the strainer to dry before
installing the strainer. If the strainer is damaged,
replace the strainer.
Generator - Inspect
Once a month start the engine and run the
engine until it reaches normal operating
temperature (about 10 minutes). Plug in a
corded device and turn on the device to ensure
that the generator is providing power. Once you
have verified that the generator is providing
power, turn off the device and unplug it. Then
turn the generator off.
High Altitude Kits
At higher altitudes, the standard air-fuel mixture
is too rich and will cause decreased
performance and increased fuel consumption. A
rich mixture will also foul the spark plug and
make starting difficult. Operation at higher
altitudes for extended periods of time may
increase emissions.
Proper operation can be ensured by installing a
high altitude kit when required. An altitude kit
consists of a smaller diameter main fuel jet and
an adjustment to the pilot screw. Refer to
Carburetor – Inspect/Adjust for instructions on
replacing the main fuel jet.
Note: At elevations greater than 8000 feet
above sea level, the engine may experience
decreased performance even with the high
altitude kit installed.
Muffler – Inspect/Replace
Allow the unit to cool before performing this
procedure.
Remove both side panels by removing the 2
bolts on each side and lifting out and away (be
careful to avoid breaking the locating tabs).
Remove the 6 bolts (1) on the muffler cover and
remove cover by lifting out.
Remove the 4 bolts (1) to remove the muffler
shroud (2) and cover and lift out. Remove nuts
(3) from the exhaust. Lift muffler (5) out and
discard used gasket (4). Check for cracks and
wipe off debris with a wire brush. Reinstall in
reverse order using a new gasket (4). To service
the spark arrestor, refer to Spark Arrestor –
Inspect/Clean/Replace.
 Loading...