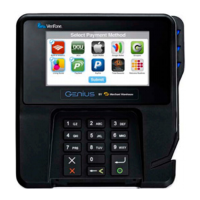
Genius device
AC adapterUtility cable
7
PRS TUV WXY
8
0
9
4
GHI JKL MNO
5 6
1
QZ ABC DEF
2 3
+12V DC Audio
USB
Ethernet 1
Ethernet 2 Ethernet 3
GETTING STARTED
Ethernet cable
CONNECTING THE COMMUNICATIONS MODULE
21
CONNECTING TO THE NETWORK
3
STEP 1
Turn the Genius device upside-down and
place it on a flat, stable surface. Firmly
press the flexible tabs and push up to
remove the communications module.
Remove communications module
STEP 2
Hold the module securely
in your hands and slide
the metal plate out.
STEP 3
Attach the utility cable
connector as shown and
slide the metal plate back
into place.
STEP 4
Insert the communications
module into the Genius
device.
Slide out metal plate
Attach utility cable
Insert module
STEP 1
Connect one end of your Ethernet
cable to an available port on your
router/switch.
STEP 2
Connect the other end of the
Ethernet cable to the Ethernet
port on the utility cable.
+12VDC Audio USB
Ethernet Ethernet 2 Ethernet 3
HOST
Router/Switch Utility cable
CONFIGURING YOUR POS
6
1. Locate your MerchantWARE credentials.
2. Consult with your POS provider for
assistance with configuring your
system with the Genius device.
3. Configure your POS with the
IP Address of the Genius device,
your MerchantWARE Name,
SiteID and Key.
TESTING A TRANSACTION
7
CONTACTING SUPPORT
8
Cayan recommends that you run a test transaction on your POS
system to check that it is correctly configured with the Genius device.
If the test transaction transfers successfully to the Genius device, no
further configuration is required. Cancel the transaction on your POS
and start processing live sales.
If the test transaction is unsuccessful, please call our support team
at the number below.
Before contacting the support
department with a query, please
gather the following information
about your system:
• Business name and information.
• MerchantWARE credentials.
• Your POS make and model.
• Specific details about the steps you
completed before the error occurred.
VERIFYING THAT THE GENIUS DEVICE IS READY
5
POWERING THE GENIUS DEVICE
4
STEP 1
Check that the communications
module is firmly in place on the
Genius device.
STEP 2
Connect the AC adapter to the +12V
connection on the utility cable and
plug the adapter into a power socket.
Genius should now power on.
A video tutorial is available at cayan.com/setup
Locate your MerchantWARE credentials. These were sent in an email from Cayan,
which contains the words “MerchantWARE Credentials” in the subject line.
Check that your Internet connection is functioning correctly, and that there is an
available network port on your router/switch.
Before you install your Genius device, please complete the following tasks:
+12VDC Audio USB
Ethernet Ethernet 2 Ethernet 3
HOST
+12VDC Audio USB
Ethernet Ethernet 2 Ethernet 3
HOST
*Note: If you do not have access to a free port on your router/switch, you can plug the Ethernet
cable directly into one of the Ethernet ports on the Genius utility cable from your POS (as shown).
Optional POS connection*
Pharmaserv POS Support
800.837.4767
Point of Sale Solution Support
800.872.0006
Configuring the static IP address: Note, use the stylus to navigate the menu within the Genius screens.
1. Make sure you have your IP address, subnet mask, Gateway and DNS1 for the
Genius device to connect to your router/switch.
2. On the keypad, hold down 1, 5 and 9 buttons together for two seconds, then release.
3. Use the keypad to insert the password 166832 and press Enter.
4. On the tabs at the top of the screen, touch Administration and then Communication.
5. Use the tabs at the top of the Communications screen, touch Network and then Ethernet.
6. From the Ethernet screen, touch the edit symbol next to Mode.
7. Select staticIP and touch OK.
8. Touch the Pencil symbol next to IP Address and use the keypad to enter the
IP address assigned to the Genius CED and then touch OK.*
9. Configure your subnet mask, Gateway and DNS settings.
10. Touch Apply.
Returning to the Genius idle screen:
On the Menu path at the top of the screen, touch Home. Next, touch Run App.
* Numbers that are less than three digits in length must be entered using preceding zeroes.
For example: To enter the IP address 10.50.31.120 you must press 010 050 031 120.