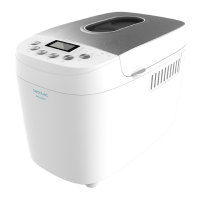
BREAD&CO 1500 PERFECTCOOKBREAD&CO 1500 PERFECTCOOK 5958
ENGLISH ENGLISH
Cleaning the housing and lid
Use a damp cloth to wipe the lid, housing, baking chamber and interior of the viewing window.
Never immerse the housing into water for cleaning.
Note: It is suggested not to disassemble the lid for cleaning.
Storage
Before the bread maker is packed for storage, ensure that it has completely cooled down, is
clean and dry, and the lid is closed.
5. TROUBLESHOOTING
No. Problem Cause Solution
1 Odour or burning
smell.
Flour or other ingredients
have spilled into the baking
chamber.
Stop the bread maker and
allow to cool completely.
Wipe excess our etc., from
the baking chamber with a
paper towel.
2 "HHH" displays
when Start/Stop
button is pressed.
Internal temperature of
bread maker is too high.
Allow unit to cool down
between programs.
Unplug unit, open lid, and
remove bread container.
Allow to cool 15-30 minutes
before starting new
programs.
3 Bottom is hollow
or holey inside.
Dough too wet, too much
yeast, no salt. Water too hot.
Measure all ingredients
accurately.
Decrease yeast or water
slightly.
Check salt measurement. Use
room temperature water.
4 Bread underside’s
crust is too thick .
Bread has been left in the
pan for too long. Not enough
water.
Take the bread sooner.
5 Diculty to take
the bread out.
Kneading blade is adhered to
the shaft inside the pan.
After taking the bread out,
pour hot water into the pan
and leave the kneading blade
for 20 minutes in water. Then,
take it out and clean it.
13
Jam
[1] Pulp 5 cups
Stir until mushy,
can add some
water or not.
[2] Starch 1 cups
[3] Sugar 1cups To taste
14
Bake
[1]
Adjust baking temperature by pressing crust button: 100 °C (light);
150 °C (medium); 200 °C (dark), default 150 °C.
15
Homemade
bread
[1]
Press this button to enter the home-made menu. In this menu, the
user can set each process’ timing e.g. kneading, fermenting, baking.
4. CLEANING AND MAINTENANCE
The device, as well as food rests, must be cleaned and removed regularly.
Unplug the cable from the power supply before starting the cleaning. Do not immerse the
product in water or any other uid during cleaning.
Always allow the device to cool completely down before cleaning it or disassembling any of
its parts.
The lack of maintenance and cleaning of the product may cause a deterioration on its surface
and aect its lifespan.
Do not use strong detergents, powder abrasives or metal brushes to clean the device.
Do not allow the control panel to become wet.
Cleaning the kneading blade
If the kneading blade is difficult to remove from the appliance, add lukewarm water to the
bottom of the bread container and allow to soak for up to 1 hour. Wipe the blade carefully
with a cotton damp cloth. Both the bread container and kneading blade are dishwasher
safe components.
Cleaning the bread container
Remove the bread container by turning it in anticlockwise, then lift up the handle. Wipe inside
and outside the container with a damp cloth. Do not use any sharp or abrasive agents in
order to protect the non-stick coating. Dry the container completely before installing it again.
Note: The outside of the bread container and base may discolour. This is normal.