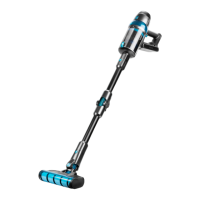
Do you have a question about the cecotec CONGA ROCKSTAR 1500 ULTIMATE ERGOWET and is the answer not in the manual?
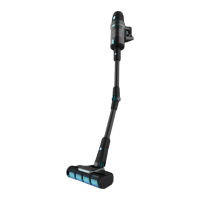
Diagram showing parts of the vacuum cleaner.
Diagram of the handheld unit display and controls.
Remove the product from its packaging.
Inspect for damage upon receipt and contact support if found.
Charge the device fully before first use.
Recommended 12-hour charge for first 3 uses.
Normal charging applies after initial uses.
Normal charging takes about 3 hours; unplug when full.
Instructions for assembling the vacuum tube and suction base.
Ensure handle and brush are aligned during assembly.
Use Flex tube for hard-to-reach areas.
Diagrams illustrating assembly steps.
Instructions for inserting the battery.
Store battery safely if device is not used for a long time.
Illustration of battery assembly.
Illustration of tube and base assembly.
Guide for mounting the wall charging base.
Recommended installation height for the charging base.
Ensure charging base is secure and connect device terminals.
Diagram showing charging base connection.
Information on charging the battery and reading the display.
Device enters low power mode at 20% battery.
Charge battery using the fast charge base.
Connect power adapter to supply and base.
Illustration of charging base connection.
Illustration of charging indicator and display.
Charging indicator shows red light and current percentage.
Battery can be charged directly with adapter.
Illustration of direct charging.
Illustration of charging indicator colors.
Instructions for operating the handheld unit.
Use the On/off button to power the device.
Select speed (Low, Medium, High, Smart) via dial.
Set medium speed using the dial.
Set high speed using the dial.
Set Smart speed for automatic suction adjustment.
Device switches to medium speed at 20% battery to save power.
Illustration of speed mode switching.
How to use the floor suction base.
Floor base removes dust from various floor types.
Brush stops automatically if overloaded or touched by child for safety.
Note on brush assembly compatibility.
Brush for removing pet hair.
Brush for effective dust removal, recommended for hard floors.
Illustration of Jalisco brush use.
Accessory for cleaning furniture and corners.
Illustration of 2-in-1 accessory use.
Accessory for cleaning furniture and windows.
Illustration of accessory use on furniture.
Brush for cleaning sensitive surfaces.
Illustration of long brush use.
Illustration of long brush use.
Hose for reaching difficult corners.
Brush for removing dust mites and bacteria.
Illustration of upholstery brush use.
Elbow for cleaning high areas.
Illustration of union elbow use.
Accessory for removing dust from fabrics.
Instructions for attaching accessories.
Diagram of attachment assembly.
Diagram of attachment assembly.
Guide to cleaning filters and dust tank.
Disconnect power, remove battery, and let cool before cleaning.
Clean filters frequently to prevent overheating and maintain suction.
Replace filters every 6 months; lifespan varies by use.
Remove filter system by pressing CLEAN button and pulling handle.
Illustration of filter removal.
Clean filters dry or dry then with water.
Illustration of filter cleaning.
Crucial note regarding filter reinstallation.
Reinstall filters only when completely dry to prevent motor damage.
Empty dust tank by pressing the lower opening button.
Illustration of dust tank emptying.
Instructions for cleaning the appliance exterior.
Clean surfaces with a soft, damp cloth.
Do not immerse appliance in water or liquids.
Avoid abrasive cleaners or scouring pads.
Clean brush if bristles tangle with hair/particles.
How to clean specific brushes.
Release brush cover to remove brush.
Remove one end of the brush.
Clean residues from the brush's rotary axis.
Reassemble brush after washing and drying.
Illustration of brush cleaning.
Steps to remove the battery.
Release battery, store in a dry plastic bag.
Illustration of battery removal.
Guidance on storing the device when not in use.
Remove and store battery in a dry, safe place for long periods of non-use.
Explanation of maintenance indicator lights.
Indicator icons signal if maintenance is overdue.
Illustration of maintenance indicators.
Remove and empty water tank for long periods of non-use.
Avoid direct sunlight and damp environments.
Instructions for attaching and removing the mop cloth.
Steps to remove and install the water tank.
Illustration of water tank removal.
Disassemble water tank before installing/removing cloth.
Remove water tank by holding base and pulling upward.
Reinstall water tank by pushing until it clicks.
Use only clean water, no cleaning agents.
How to attach the mop cloth to the water tank.
Attach mop cloth to water tank via Velcro strips.
Illustration of mop cloth attachment.
How to activate and stop water emission.
Illustration of water emission controls.
Ensure water tank lid is not fully open on first use.
Check button/lid when not in use to prevent leaks.
Press button to activate water emission, release to stop.
Remove and empty water tank if not used for a long time.
How to detach the mop cloth.
Remove mop cloth by pulling it from the tank.
General cleaning and maintenance of the wet accessory.
How to clean the water tank.
Clean water tank by filling, shaking, and emptying with water.
Wash mop cloth after every use.
Replace mop cloth after 20-30 uses.
Water output may be affected by prolonged mop cloth use.
Regular cleaning of cloth and tank prevents issues.
Possible causes and solutions for motor failure.
Causes and solutions for reduced suction and noise.
Illustration related to maintenance indicators.
Causes and solutions for short operating time.
Device turns off and does not charge; cause: Short-circuit.
Device does not charge; cause: Charger voltage low.
Device turns off; cause: Low battery.
Device turns off and displays E3; cause: Motor short-circuit when battery is low.
Device turns off and displays E5; cause: Main motor overload (second level).
Device turns off and displays E9; cause: Temperature too high or low.
Device stops or does not turn on showing E7; cause: Battery fault.
Device turns off and displays E8; cause: NTC error.
Filter not installed indication.
Dust tank or inlet filter blocked.
Long brush full of hair.
Blocked long brush.
Notes on low battery warning and error code behavior.
Product model number.
Product name.
Power requirements.
Battery specifications.
Motor power rating.
Brush motor power rating.
Manufacturing and design origin.
Disposal guidelines according to WEEE directive.
Contact local authorities for appliance/battery disposal info.
2-year warranty from purchase date with proof and proper use.
Situations not covered by the warranty.
Warranty excluded for misuse, damage, moisture, corrosive substances.
Unauthorized disassembly, modification, or repair voids warranty.
Warranty does not cover normal wear and tear.
Warranty covers manufacturing defects for 2 years, excluding consumables.
Contact Cecotec Support at +34 963 210 728 for issues or doubts.
| Model | Conga Rockstar 1500 Ultimate Ergowet |
|---|---|
| Category | Vacuum Cleaner |
| Battery | Lithium-ion |
| Battery Life | up to 90 minutes |
| Charging Time | 4-5 hours |
| Filtration System | HEPA |
| Display | LED |
| Wet & Dry | Yes |
| Cord Length | Cordless |
| Weight | 3.5 kg |
| Suction Pressure | 1500 Pa |
| Dust Container Capacity | 0.8 L |
| Dust Capacity | 0.6 L |
| Technology | Cyclonic Technology |
| Motor | Digital Brushless |
| Modes | 3 |

