ENERGYSILENCE 9190 SKYLINE IONIC CONNECTED ENERGYSILENCE 9190 SKYLINE IONIC CONNECTED
4544
ENGLISH ENGLISH
Remote control
Fig. 3
1. Timer +
2. Timer -
3. Oscillation
4. Modes
5. Ioniser
6. Power levels
7. On/O
Wi-Fi connectivity and mobile App
To link your product with our App, please follow the steps below.
1. Download Cecotec’s app from Google Play or App Store.
2. If it is the rst time you use it, register an account. If not, log in.
3. Once inside the App, press “+” on the top right-hand corner and tap “Skyline Ionic”.
4. Turn your device on and hold down the “Modes” button for 5 seconds until the device
beeps. The LED light above the button will start ashing rapidly.
5. Enter your Wi-Fi password and press conrm. Remember the Wi-Fi network must be 2.4
GHz.
6. Then, pairing will start automatically.
If the automatic pairing process fails, press the “Modes” button again until the device beeps,
the LED light ashes slowly, and a beep is heard again. Follow the below steps:
1. Once inside the App, press “+” on the top right-hand corner and tap “Skyline Ionic”.
2. A window will open to conrm that the Wi-Fi icon is ashing. If so, tap on “Conrm
indicator slowly blink”.
3. Next, a window will open asking for the Wi-Fi user name and password (remember your
Wi-Fi network must be of 2.4 GHz). Once you have entered your password and user name,
tap on “Next”.
4. On the next screen, you will have to select the pairing mode. Tap on “AP Mode” and a
mode-selection menu will open.
5. Select AP mode. Next, conrm the appliance light is ashing (tap on “Conrm indicator
slowly blink”) and tap on “Next”.
6. Another screen will open, telling you to connect to the appliance Wi-Fi appearing as
“SmartLife-XXXX”. Tap “Go to connect” and the application will open your mobile-device
Wi-Fi network menu. Connect to the previously mentioned network and wait for both
devices to connect.
7. Once connected, return to the App and pairing will begin.
8. Wait for it to nish and you will be able to use your appliance via the App.
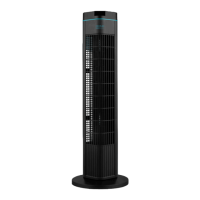
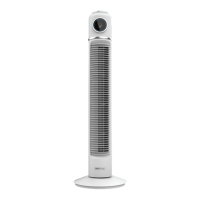
4. OPERATION
Control panel
Fig. 2
1. Oscillation
2. Power levels
3. On/O
4. Timer
5. Modes
- Place your fan on a at and stable surface. Plug the power cord into an electrical outlet.
Make sure that the power supply matches the product voltage. The panel will display the
room temperature.
- Press the On/O button to turn the fan on. The pre-set power will be displayed.
- Press the power level buttons to select the desired power level: 1, 2, or 3. The corresponding
icons will be displayed.
- To set a desired operating time, from 1 to 12 hours, press the timer button until the desired
time is selected. The selected time will blink on the display for a few seconds, and then it
will switch to the room temperature again.
- The fan will run for the selected time, up to 12 hours, or until it is turned on via the On/O
button if no operating time is set.
- To activate or deactivate the air-oscillation function, press the oscillation button (OSC).
Operating modes
- Press on Modes to switch between Natural Breeze and Sleep mode.
- When Natural Breeze mode is selected, the power level will vary from less to more
powerful every 5 seconds.
- Sleep mode will depend on the selected power level:
- When power level 3 is selected, the appliance will run half an hour at power level 3, then
half an hour at power level 2, and then at power level 1 until the pre-set time has elapsed
or until the fan turns o.
- When power level 2 is selected, the appliance will run half an hour at power level 2, then
half an hour at power level 1 until the pre-set time has elapsed or until the fan turns o.
- When power level 1 is selected, the appliance will run half an hour at power level 1 until the
pre-set time has elapsed or until the fan turns o.
- When no mode is activated, the fan will continuously run at the previously selected level
until the pre-set time has elapsed or until the fan turns o.
All these functions and congurations can be controlled selected the remote control as well.
The Ionising mode can also be activated from the remote control or from the App, which is
compatible with all the modes and pre-set settings.
 Loading...