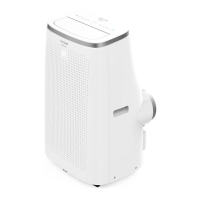
FORCECLIMA 7400 SOUNDLESS TOUCHFORCECLIMA 7400 SOUNDLESS TOUCH
6160
ENGLISH ENGLISH
NOTE:
Timer
Press this icon to set the timer. When the timer symbol blinks, use the increase and
decrease icons to select the desired operating time.
The timer can be set from 1 to 24 hours, and the digits increase and decrease by 1 hour.
Drainage instructions
not operate until the water inside the tank is drained.
Manual drainage. Fig. 10
1. Place a container below the water outlet behind the body.
2.
a container.
NOTE:
- Move the device carefully, so as not to spill the water in the water tank at the bottom of
the body.
- Keep the drain cap and the water plug properly.
- During drainage, the body can be tilted slightly backwards.
-
- When the water is discharged, re-tighten the water plug and tighten the drain cap.
- Restart the appliance after the plug and cap are installed, otherwise condensed water of
Continuous drainage. Fig. 11
- Unscrew the drain cap and unplug the water plug.
- Set the drainage pipe into the water outlet.
- Connect the drainage hose to a bucket or big container.
Protection features:
Frost protection function
too low, the appliance will automatically enter protection mode to prevent damage to the
evaporator. The appliance will restart when the temperature is restored to normal values.
Installing the window sealing plate
- The charge size is in accordance with the size of the room within which the refrigerant
containing parts are installed.
- Ventilation machinery and outlets are properly operated and unobstructed.
- If an indirect cooling circuit is used, the secondary circuit must be checked for the presence
of refrigerant.
-
should be corrected.
- The components or refrigerant piping are installed in a location where they are not
susceptible to exposure to any substance that may corrode the refrigerant containing
components, unless the components are constructed of materials that are inherently
4. OPERATION
The following functions can be activated from the control panel or from the remote control.
On/O
When the device is turned on, it will beep and enter standby mode. Touch the power icon
Mode
Sleep Mode
In cooling mode, press the increase and decrease icons to activate the Sleep mode. The
device will operate saving energy and silently.
Increase and decrease icons
Use these icons to increase or decrease temperature and time.
Fan speed
Under the cooling mode, press the icon to select high or low wind speed operation.