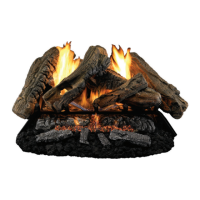
www.usaprocom.com
200015-01B20
INSTALLATION
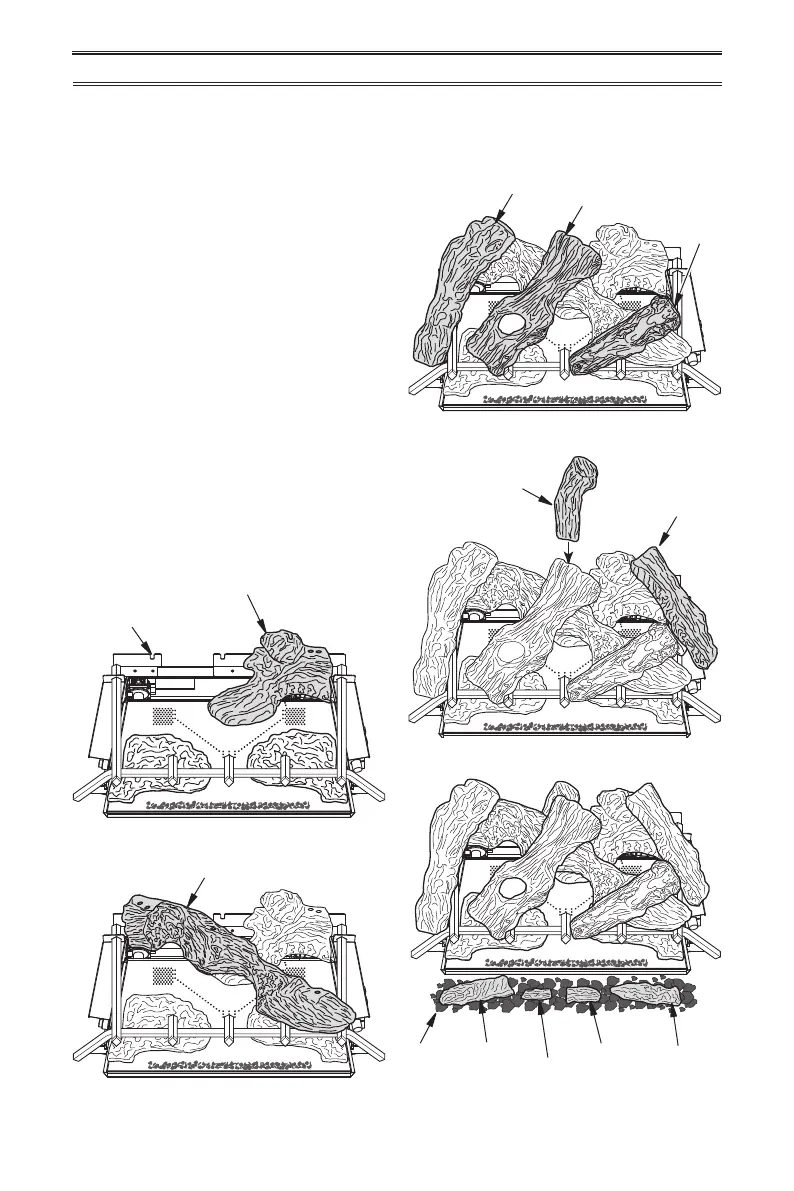
Slot for Log #4
Log #4
Log #5
Log #6
Log #8
Log #9
Log #7
Log #10
Log #11
Log #12
Log #13
Lava
Rock
Log #3
Figure 21 - Installing Log #3
Figure 22 - Installing Log #4
Figure 23 - Installing Logs #5, #6 and #7
Figure 24 - Installing Logs #8 and #9
Figure 25 - Installing Lava Rock and
Logs #10, #11, #12 and #13
3. Insert pin on the back of log #4 into slot
in rear log bracket on grate base (see
Figures 21 and 22).
4. Insert pin on the bottom of log #5 into
hole in log #4, with the other end placed
on grate base (see Figure 23).
5. Insert pin on the bottom of log #6 into
hole in log #4, with the other end placed
on grate base (see Figure 23).
6. Insert the pin on the bottom of log #7 into
hole in log #4, with the other end placed
on grate base (see Figure 23).
7. Insert the pin on the bottom of log #8 into
the hole in log #3. Rest the front edge onto
log #4 (see Figure 24).
8. Turn log #9 as shown in Figure 26. Insert
log #9 in front of rear log bracket on grate
base, inserting pin on the rear of log, into
slot on rear log bracket (see Figure 24).
9. Place lava rock on the oor in the front of
the burner (see Figure 25).
10. Place log #10, #11, #12 and #13 on top of
lava rock in front of burner (see Figure 25).
IMPORTANT: Make sure logs do not cover
any burner ports. It is very important to install
the logs exactly as instructed. Do not modify
logs. Use only logs supplied with heater.
 Loading...