4 x CE Table Leg FSC 5/4 x 4 x 29-1/2”
2 x Support Table FSC 2 x 4 x 16-1/4”
2 x Support Seat FSC 2 x 4 x 36”
012
011
010
Fig. 1.1
Wood Parts
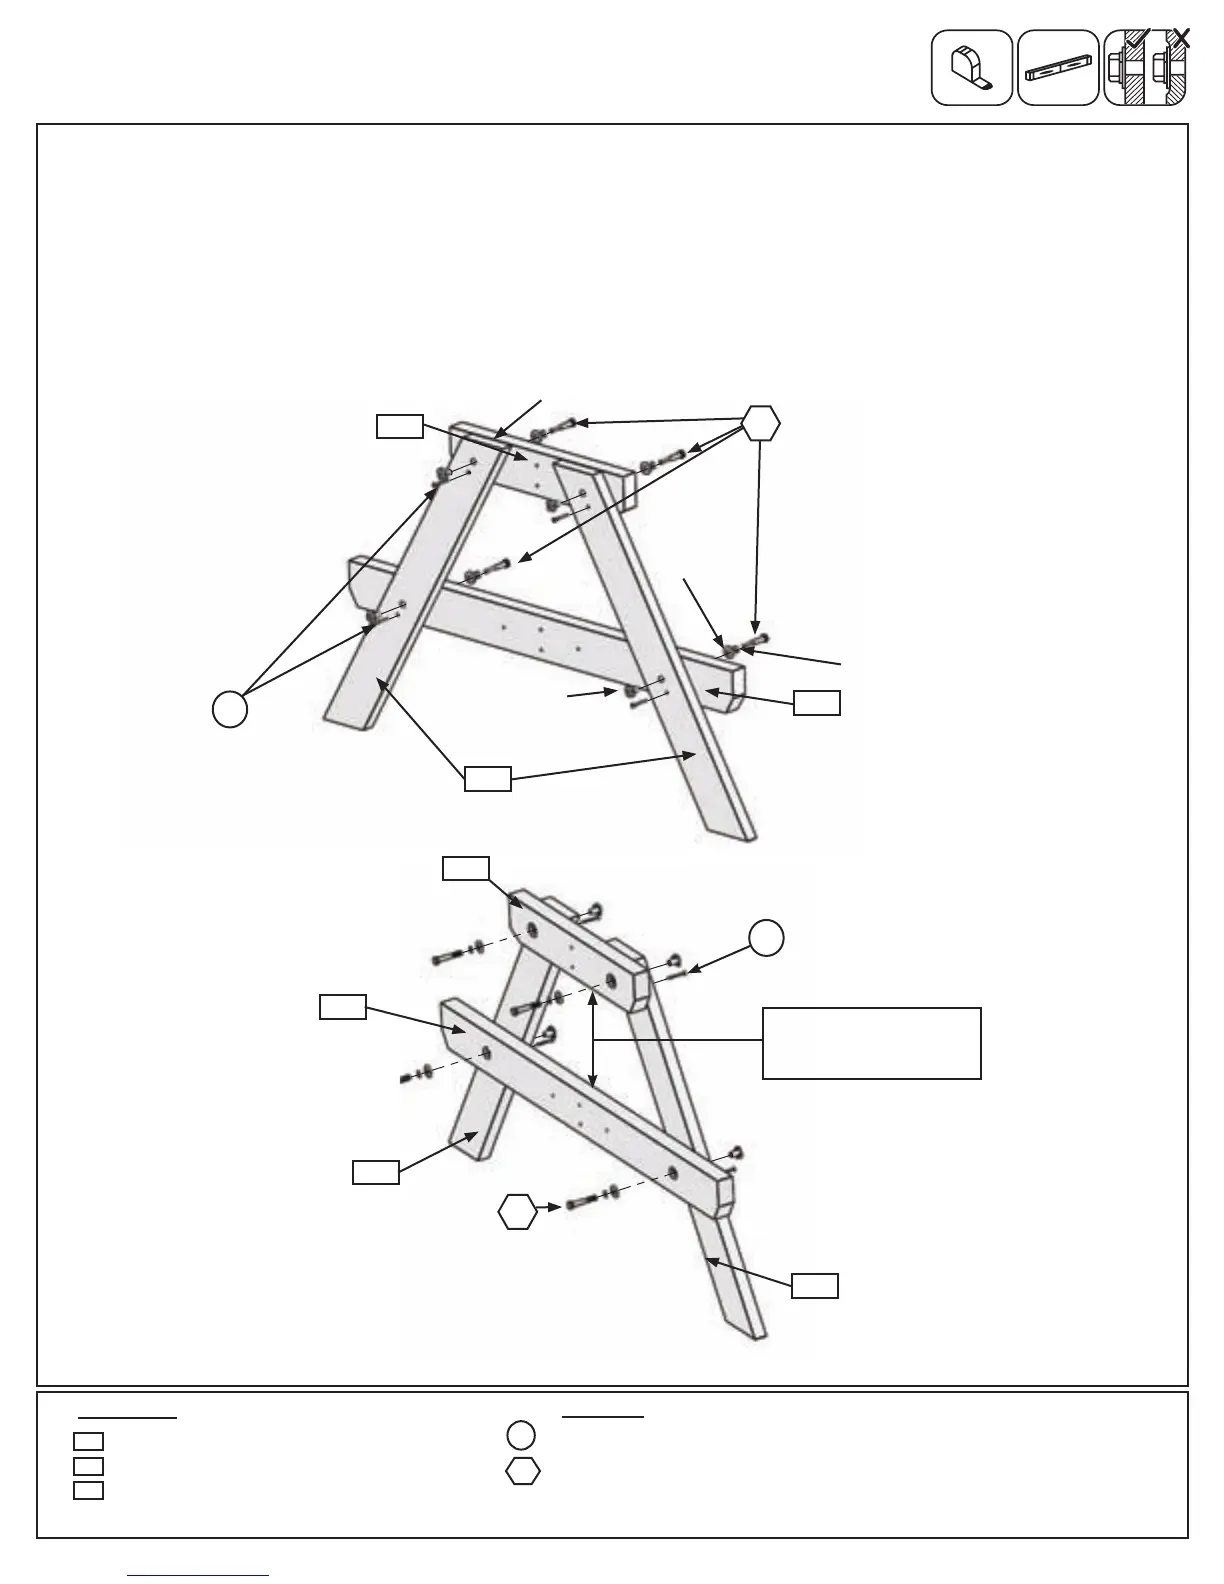
Step 1: Picnic Table Assembly
Part 1
A:Looselyattach1(011)SupportTableand1(012)SupportSeatto2(010)CETableLegsusing2(G8)5/16
x2”HexBolts(withlockwasher,atwasherandt-nut)perboard,asshowning.1.1and1.2.Makesure(011)
SupportTableislevelandushwithtopofeach(010)CETableLegsandtheanglededgesof(011)SupportTable
and(012)SupportSeatarefacingdown.Thedistancebetween(011)SupportTableand(012)SupportSeatmust
measureaminimumof9”.Thensecurewith2(S15)#8x1-3/4”WoodScrewsperboardandtightenbolts.(g.
1.1)
B:RepeatStepAtocreate2TableEndAssemblies.
8 x #8 x 1-3/4” Wood Screw
8 x 5/16 x 2” Hex Bolt
(5/16” lock washer, 5/16” at washer, 5/16” t-nut)
S15
010
012
012
5/16”Flat
Washer
G8
5/16”T-Nut
5/16”Lock
Washer
Hardware
G8
S15
x2perboard
011
010
011
010
G8
Fig. 1.2
S15
Flush
Note: Must maintain
a minimum of 9”
InsideView
OutsideView
21 support@cedarsummitplay.com
 Loading...