Step 1: Picnic Table Assembly
Part 2
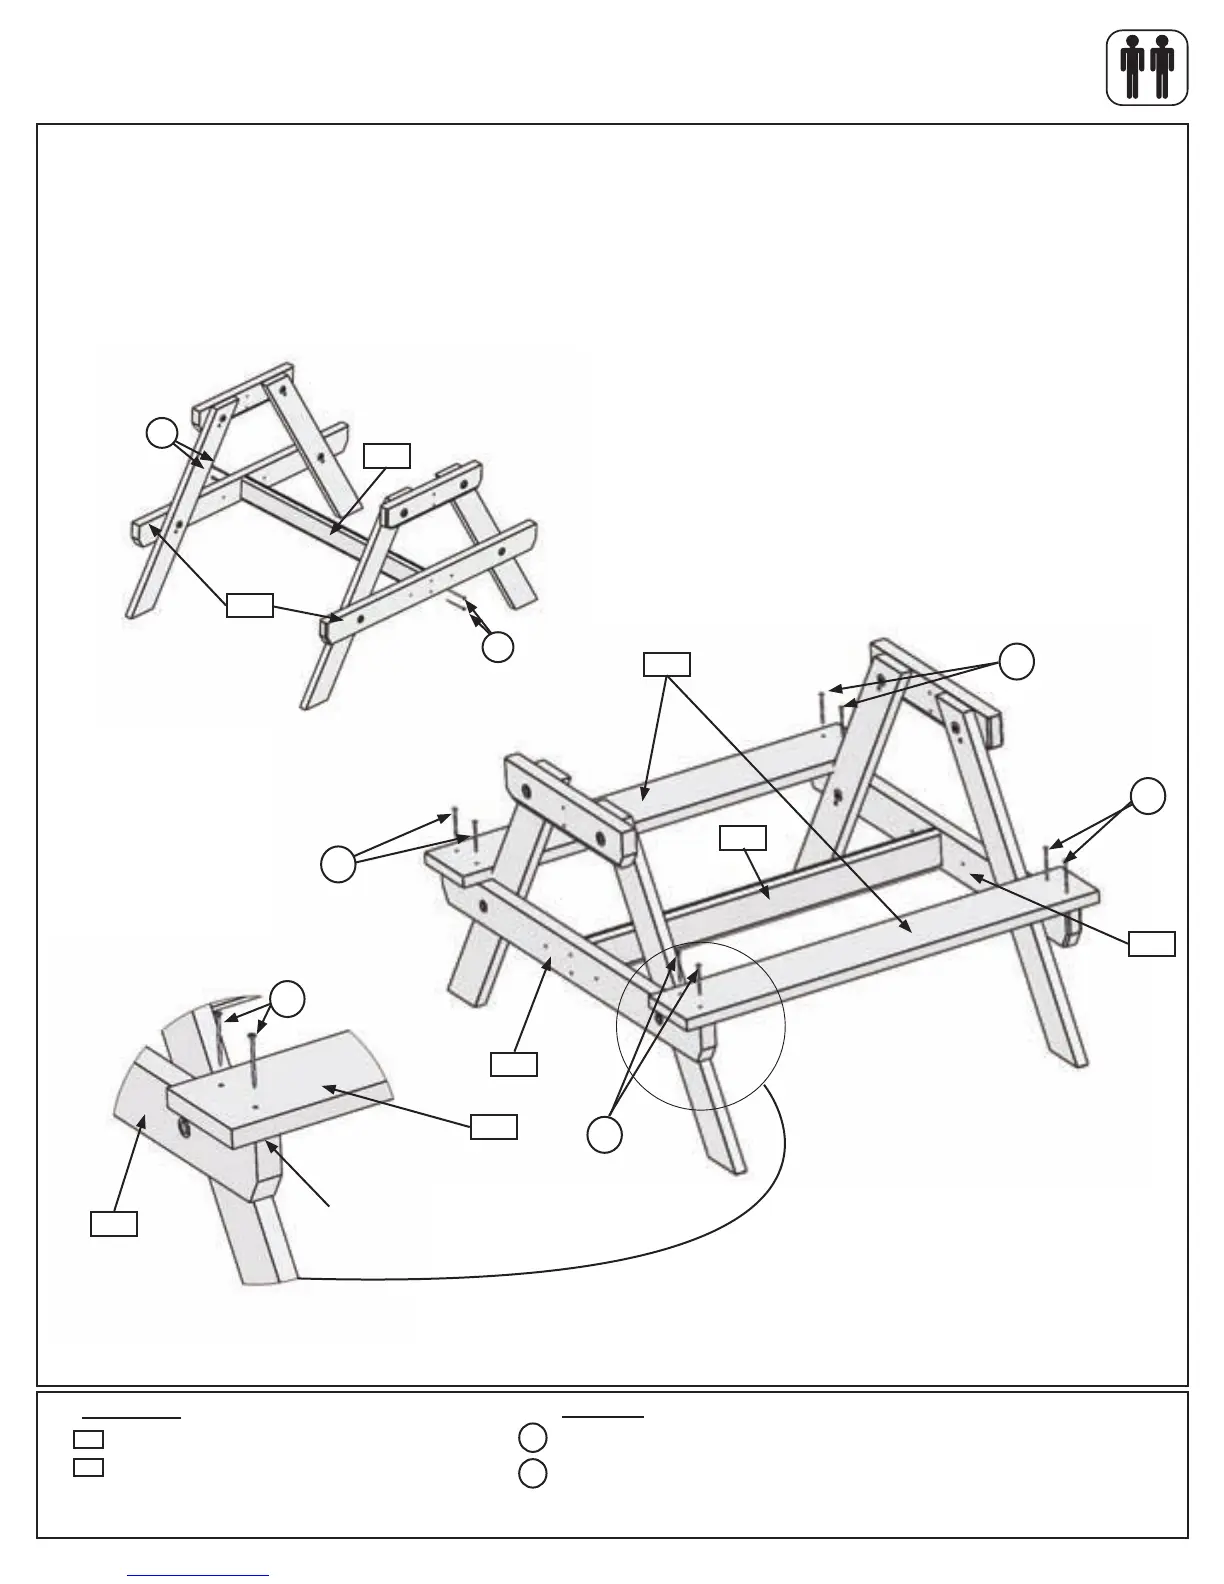
C: Withassistancefromanotheradult,attach(013)TableRailtoeach(012)SupportSeatusing4(S4)#8x3”
WoodScrews,asshowning.1.3.
D:Attach1(014)SeattoeachsideoftheTableAssembly,oneach(012)SupportSeat,using4(S15)#8x1-3/4”
WoodScrewsper(014)Seat,asshowning.1.4.
Note: The outside edges of both (014) Seats should be ush to the top edges of (012) Support Seats. (g. 1.5).
1 x Table Rail FSC 5/4 x 4 x 30-3/4”
2 x Seat FSC 5/4 x 6 x 36”
013
Wood Parts
8 x #8 x 1-3/4” Wood Screw
4 x #8 x 3” Wood Screw
Hardware
013
012
014
012
014
012
Fig. 1.3
Fig. 1.4
014
012
S4
013
Flushforbothseats
S15
S15
S15
S15
S15
S15
Fig. 1.5
S4
S4
TableAssembly
TableAssembly
22 support@cedarsummitplay.com
 Loading...