Step 1: Picnic Table Assembly
Part 3
3 x Table Top FSC 5/4 x 6 x 38-1/4”
2 x Picnic Gusset FSC 5/4 x 4 x 8”
015
Wood Parts
2 x #8 x 1-3/8” Wood Screw
12 x #8 x 1-3/4” Wood Screw
2 x #8 x 2-1/2” Wood Screw
4 x #8 x 3” Wood Screw
Hardware
S3
S4
016
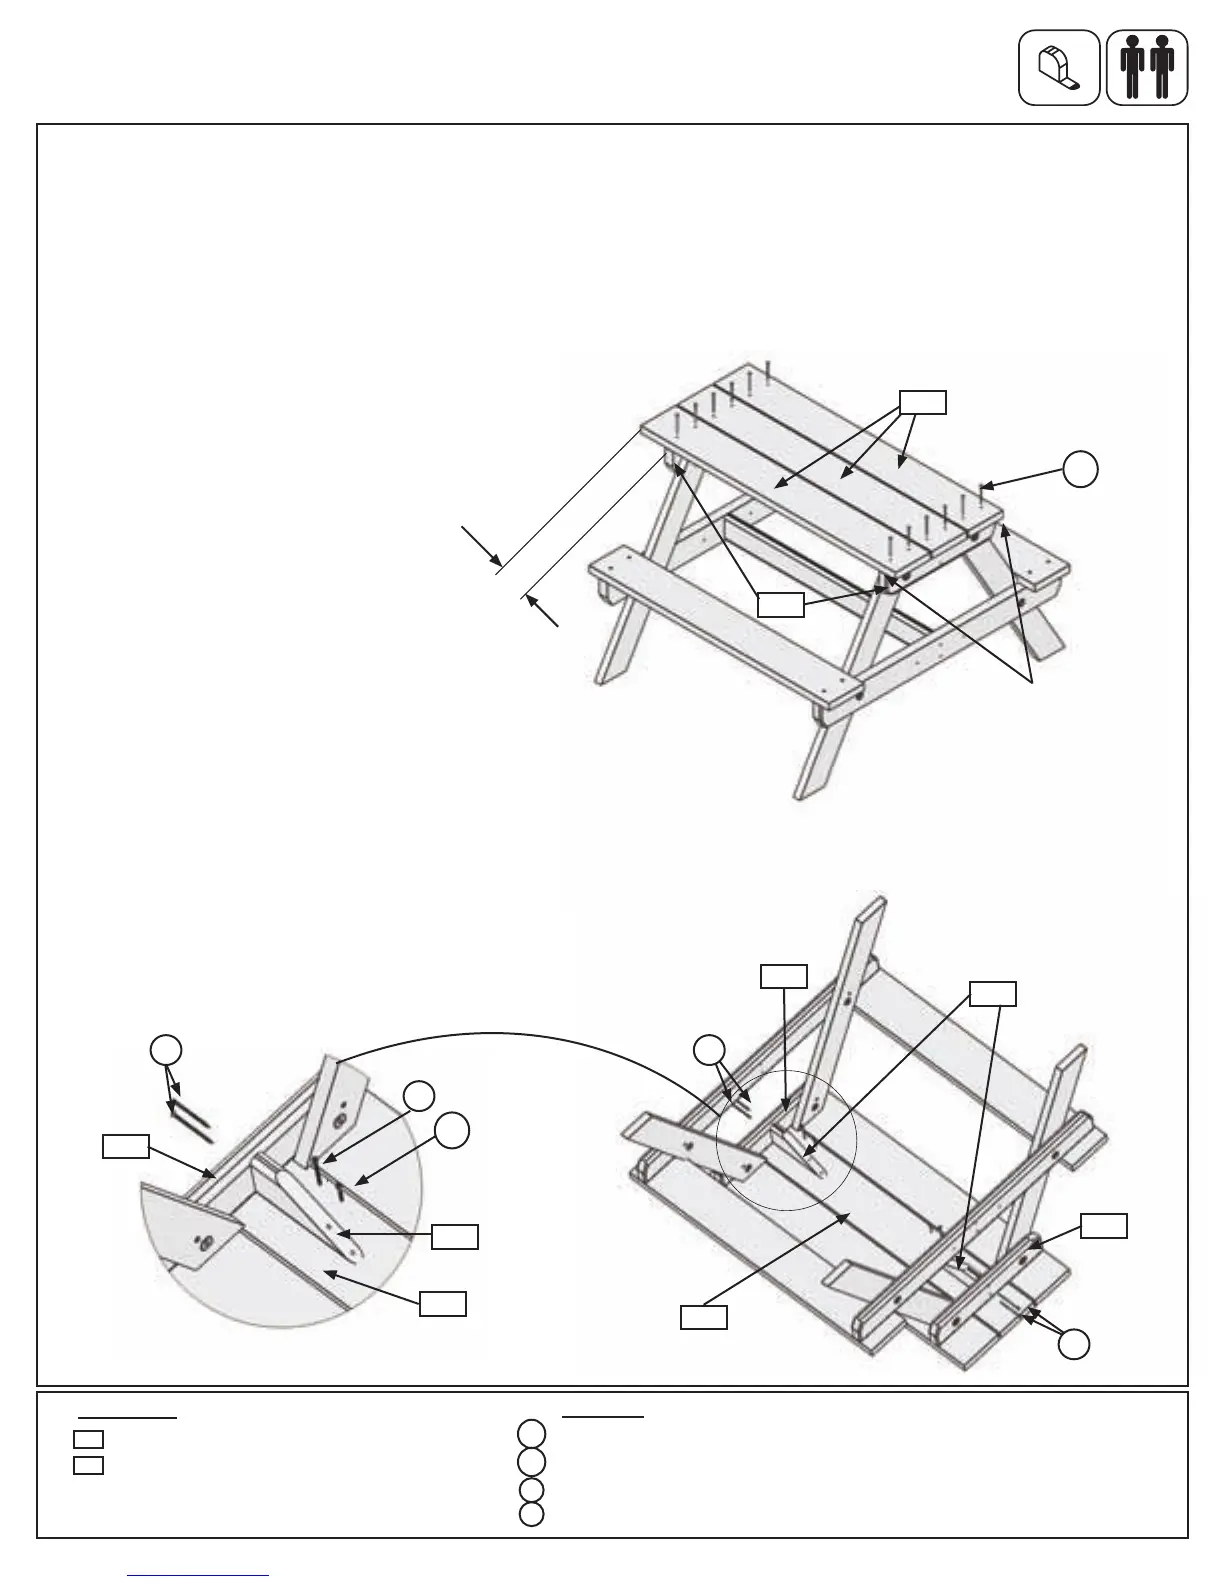
H:Ontheinsideofeach(011)SupportTable,andatagainstthe
middle(015)TableTop,attach1(016)PicnicGussettoeach(011)
SupportTableusing2(S4)#8x3”WoodScrewspergusset.(g.
1.7and1.8)
I: Attachboth(016)PicnicGussetstomiddle(015)TableTopwith
1(S20)#8x1-3/8”WoodScrewand1(S3)#8x2-1/2”WoodScrew
pergusset,asshowning.1.8.
Flush
(bothsides/ends)
Fig. 1.7
015
011
011
015
011
015
011
S4
S3
Fig. 1.6
Fig. 1.8
E:Place3(015)TableTopsoneach(011)SupportTables,makingsuretheoutsideboardsareushto
theoutsideedgesof(011)SupportTables.OnoneendoftheTableAssemblythe(015)TableTopsshould
overhangtheedgeof(011)SupportTableby3-5/8”.ThisisthesidetheTicTacToeAssemblywillbe
attached.(g.1.6).
F:Attach(015)TableTopstoeach(011)SupportTableusing4(S15)#8x1-3/4”WoodScrewsperboard,as
showning.1.6.Makesuretoevenlyspacethecentre(015)TableTop.
G:Withhelp,turntheTableAssemblyupsidedown.
3-5/8”
S4
016
S4
016
Note:Railremovedforclarity.
S15
S15
S20
S20
x12
23 support@cedarsummitplay.com
 Loading...