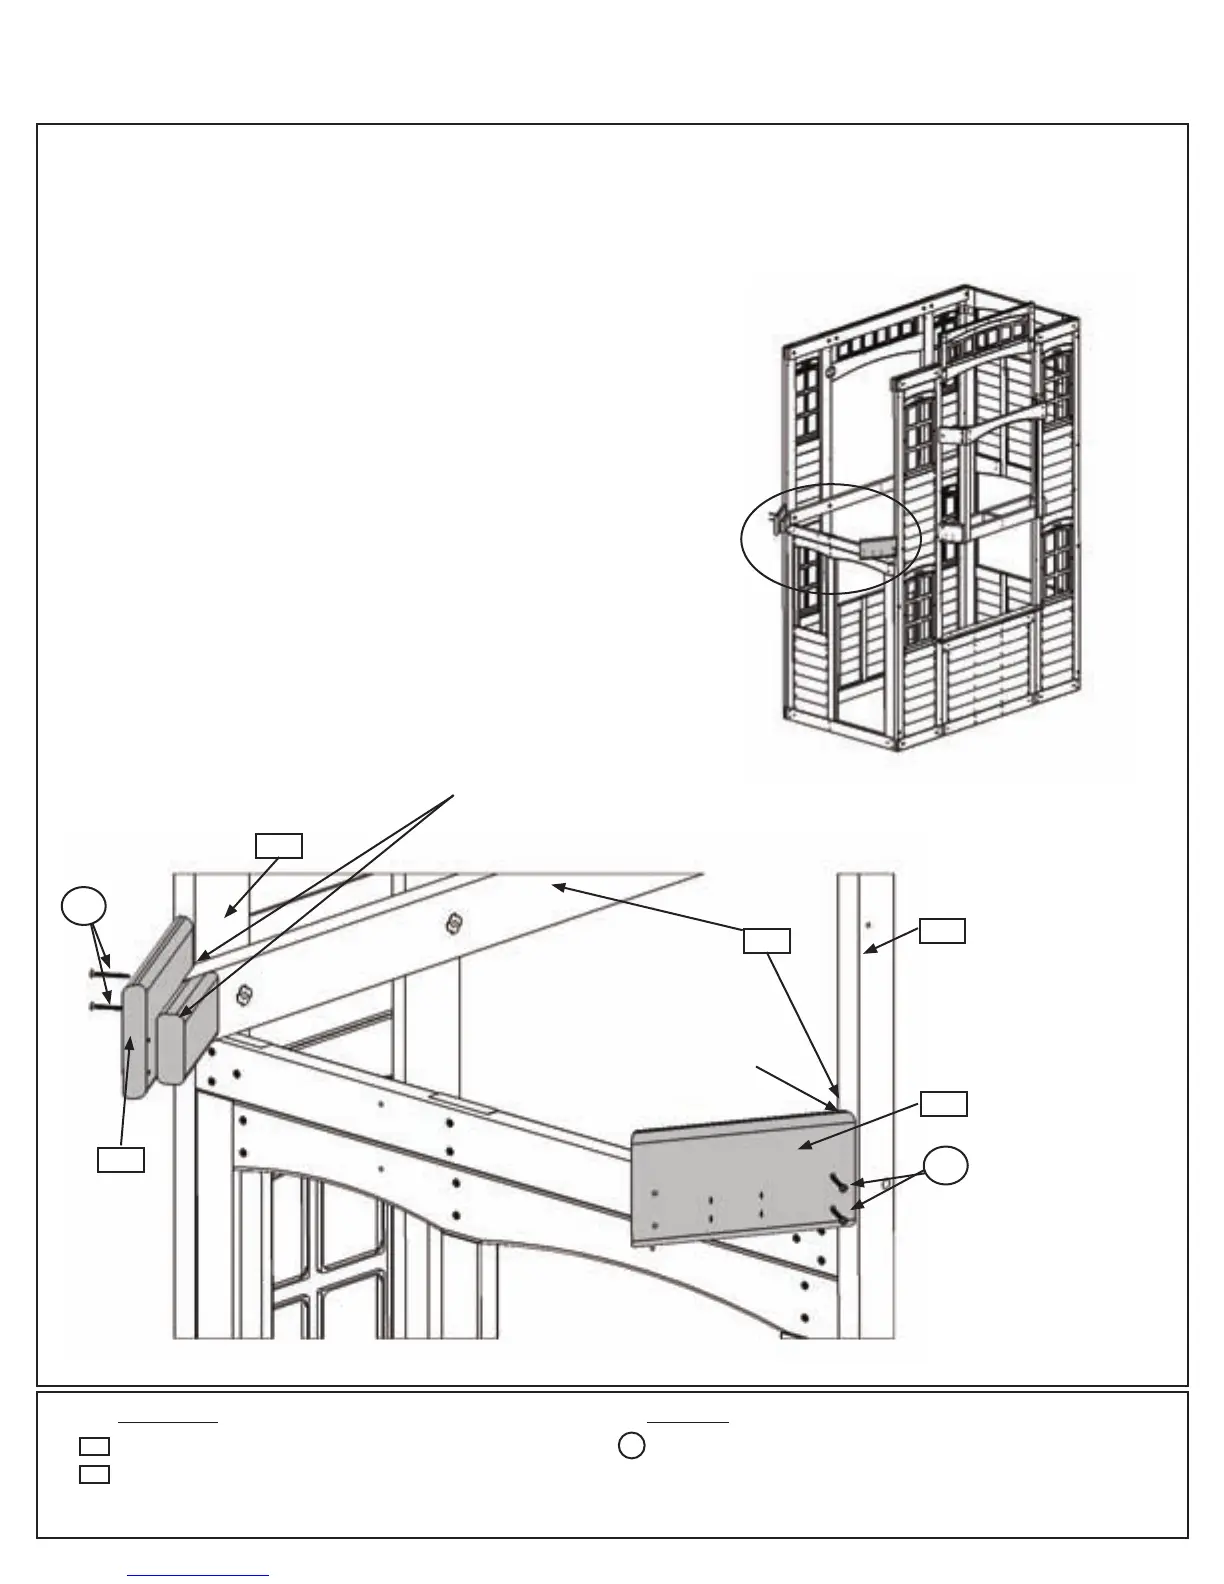
Step 10: Crowsnest Assembly
Part 1
A:OntheDoorWallSidet(100)CrowsnestAssemblyRightand(101)CrowsnestAssemblyLefttighttoand
ushtothetopsofeach(043)JoistSideandaretightto(030)NarrowWindowPanels,asshowning.10.2.
Attacheachassemblyto(043)JoistSidewith2(S15)#8x1-3/4”WoodScrewsperassembly,asshowning.
10.1and10.2.
Hardware
Fig. 10.2
030
Door Wall Side
Fig. 10.1
101
100
NoticetheCrowsnest
AssemblyistighttoJoist
Sidesandanglededgeis
connectingtotheJoist.
043
NoticeCrowsnestAssembly
endistighttoNarrow
WindowPanel.
030
4 x #8 x 1-3/4” Wood Screw
1 x Crowsnest Assembly Left FSC 2-3/16 x 5-1/4 x 10-1/4”
1 x Crowsnest Assembly Right FSC 2-3/16 x 5-1/4 x 10-1/4”
101
100
Wood Parts
S15
S15
S15
59 support@cedarsummitplay.com
 Loading...