Wood Parts
Hardware
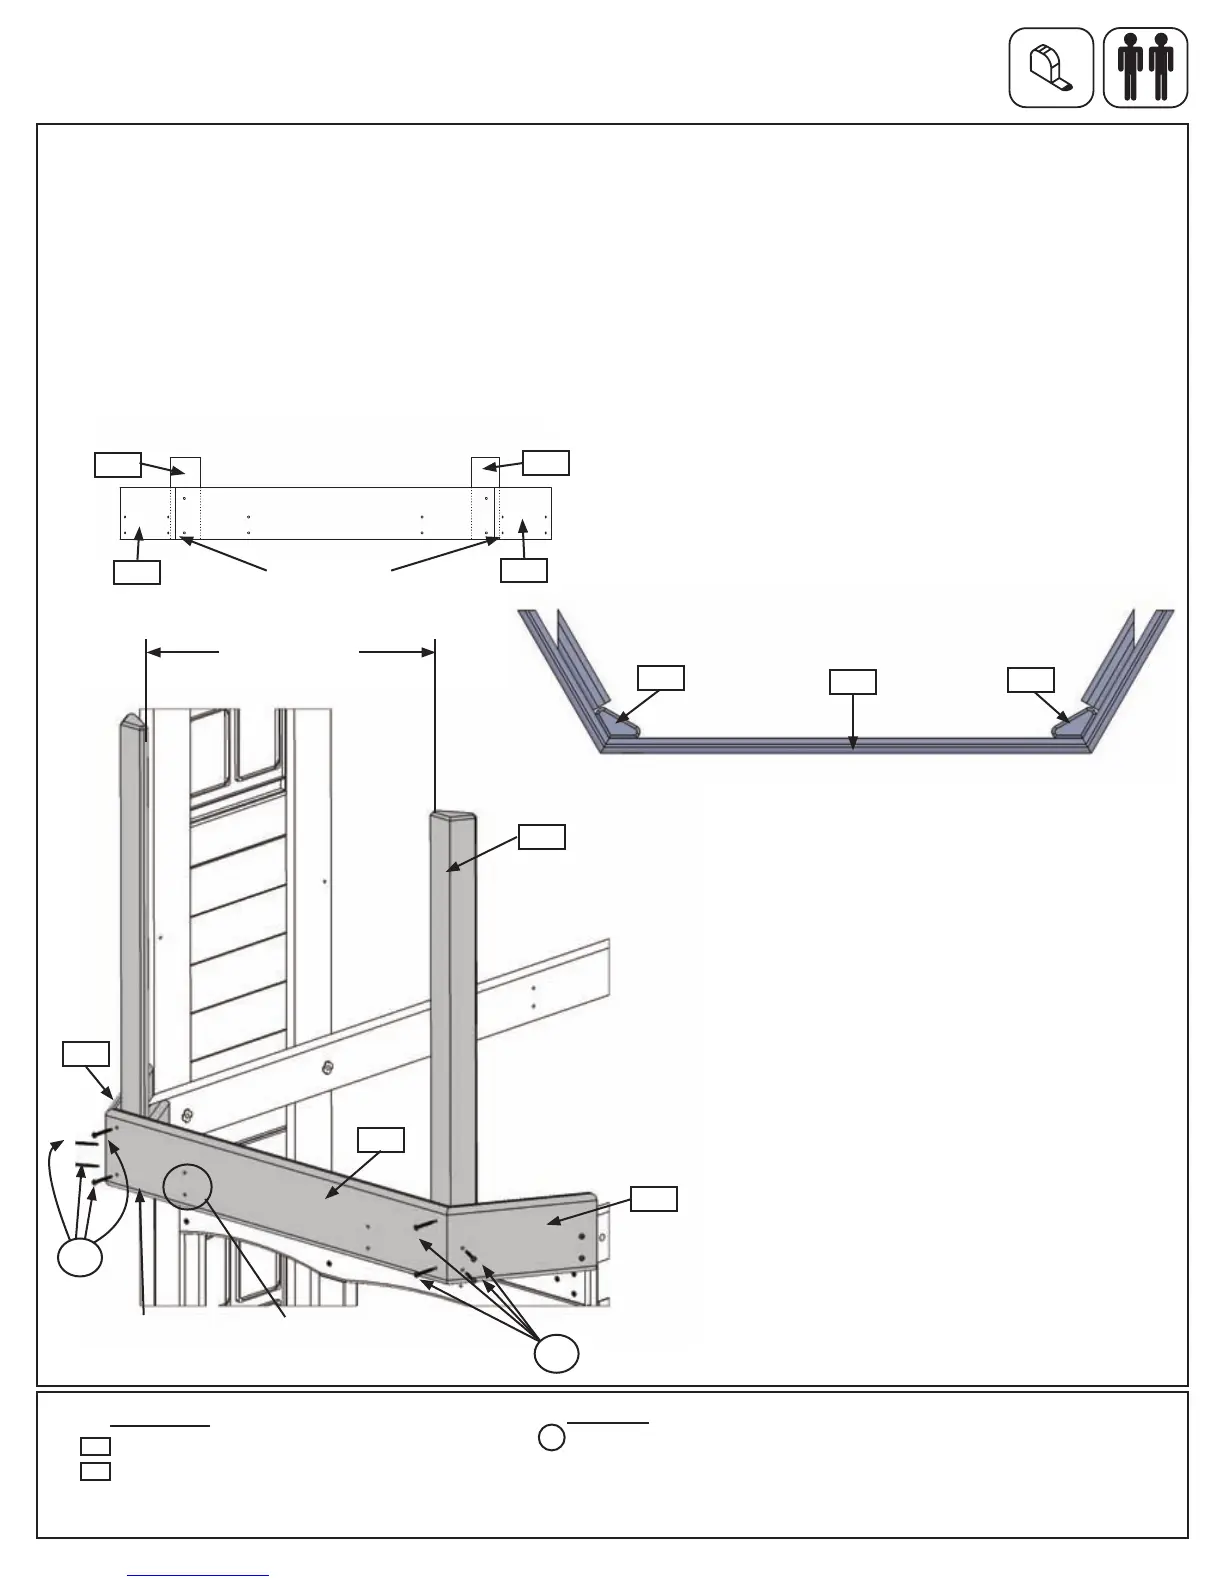
Step 10: Crowsnest Assembly
Part 2
B:Attach1(081)CrowsnestPosttoeach(100)CrowsnestAssemblyRightand(101)CrowsnestAssemblyLeft
with2(S15)#8x1-3/4”WoodScrewsperpost.Thebottomofthepostsshouldbeushtothebottomsofthe
assemblies.(g.10.3and10.4)
C:Makesurethedistancebetween(081)CrowsnestPostsis25-1/2”thenattach(102)CrowsnestCentreto
eachpostwith4(S15)#8x1-3/4”WoodScrews.Thebottomofthe(102)CrowsnestCentreshouldbeushto
thebottomofeachpost.(g.10.3and10.4)
Note: Theorientationofthe(081)CrowsnestPoststothe(102)CrowsnestCentre.(g.10.5)
Fig. 10.4
081
Lower View
081
101
100
NoticeFlush
101
102
100
081
Noticeholesare
towardstheground.
PostandCentreare
ushatbottom.
1 x Crowsnest Centre FSC 5/4 x 6 x 30-1/2”
2 x Crowsnest Post FSC 1-1/2 x 3 x 31-7/8”
Wood Parts
102
8 x #8 x 1-3/4” Wood Screw
Fig. 10.5
Fig. 10.3
Top View
081
081
102
25-1/2”
S15
081
S15
S15
60 support@cedarsummitplay.com
 Loading...