Step 10: Crowsnest Assembly
Part 3
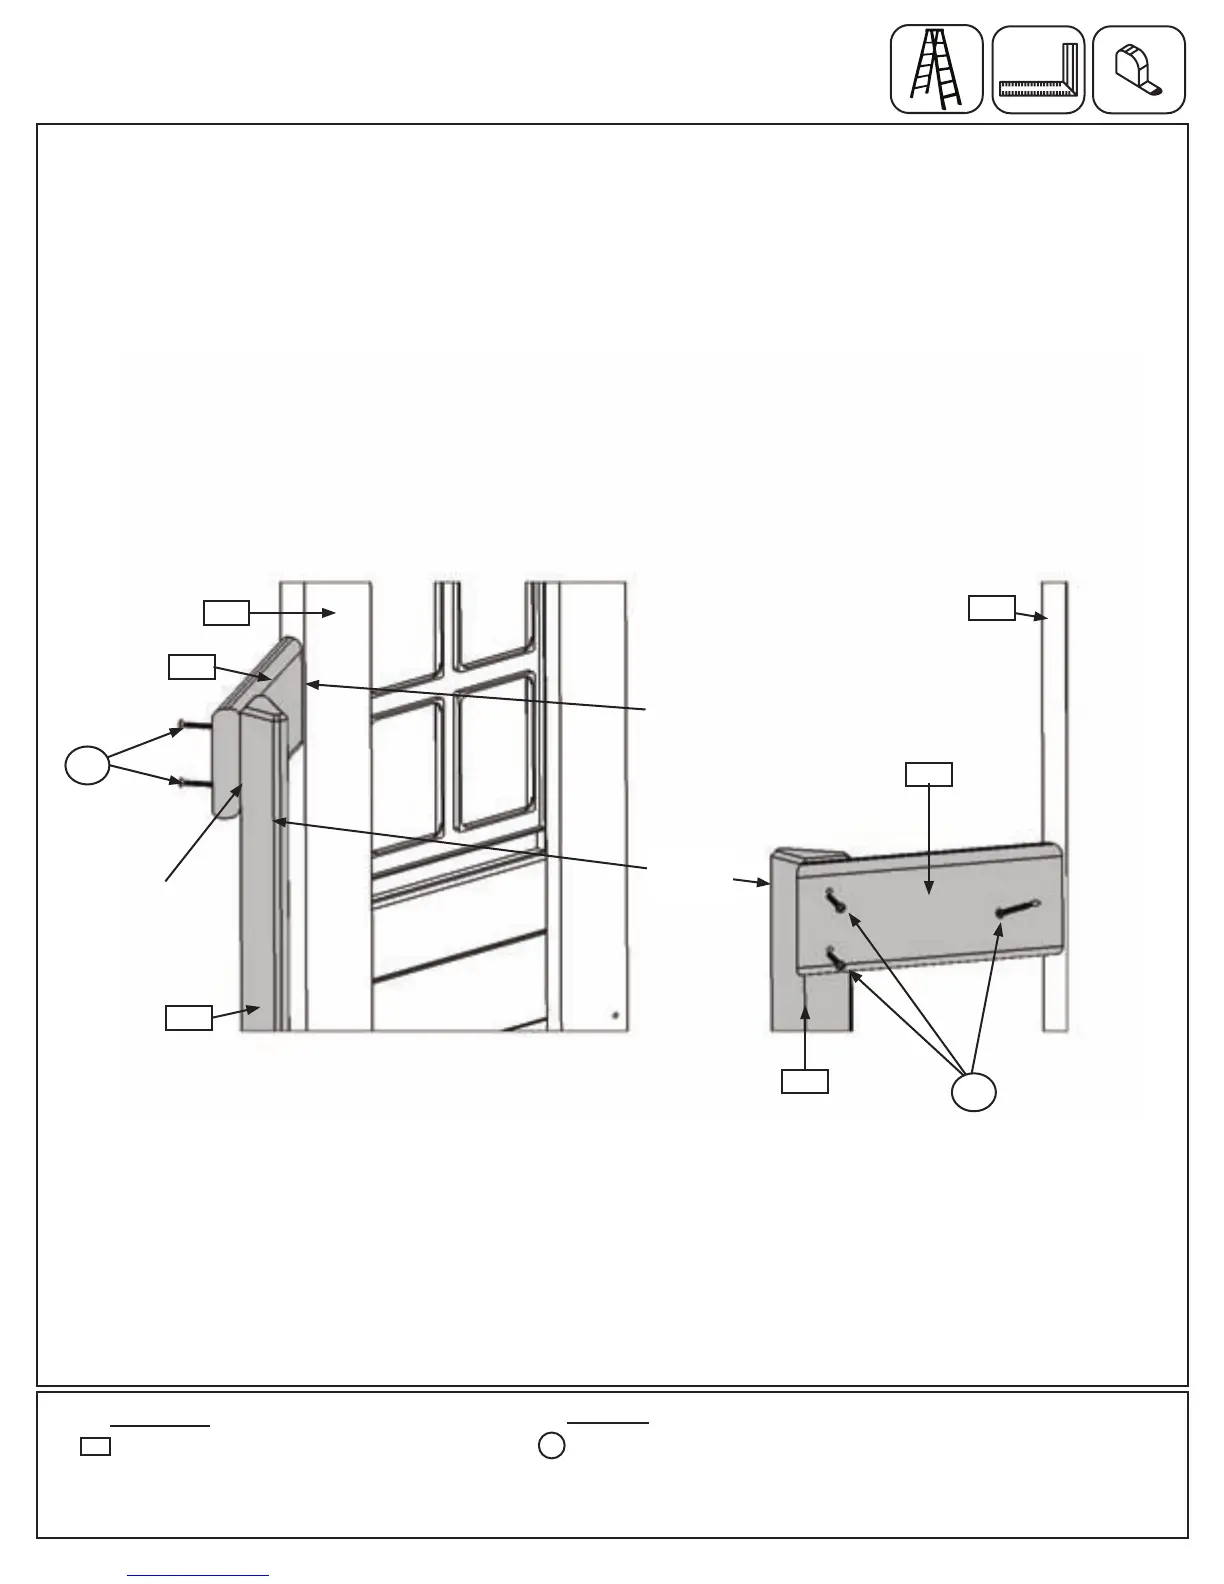
D:Attach1(103)CrowsnestR&Ltoeach(081)CrowsnestPostwith2(S15)#8x1-3/4”WoodScrewsperpost
andto(030)NarrowPanelswith1(S15)#8x1-3/4”WoodScrewperpanel.Each(103)CrowsnestR&Lshould
beushtotheinsideendsofthepanelsandushtothepeakededgeoftheposts.(g.10.6)
Note: Thedistancebetween(081)CrowsnestPostsshouldbemaintainedat25-1/2”.
Hardware
030
Flushto
NarrowWalls.
6 x #8 x 1-3/4” Wood Screw
Fig. 10.6
103
081
081
030
103
25-1/2”
FlushtoPost.
2 x Crowsnest R&L FSC 5/4 x 5 x 10-1/4”
Wood Parts
103
S15
S15
S15
61 support@cedarsummitplay.com