Wood Parts
Hardware
221
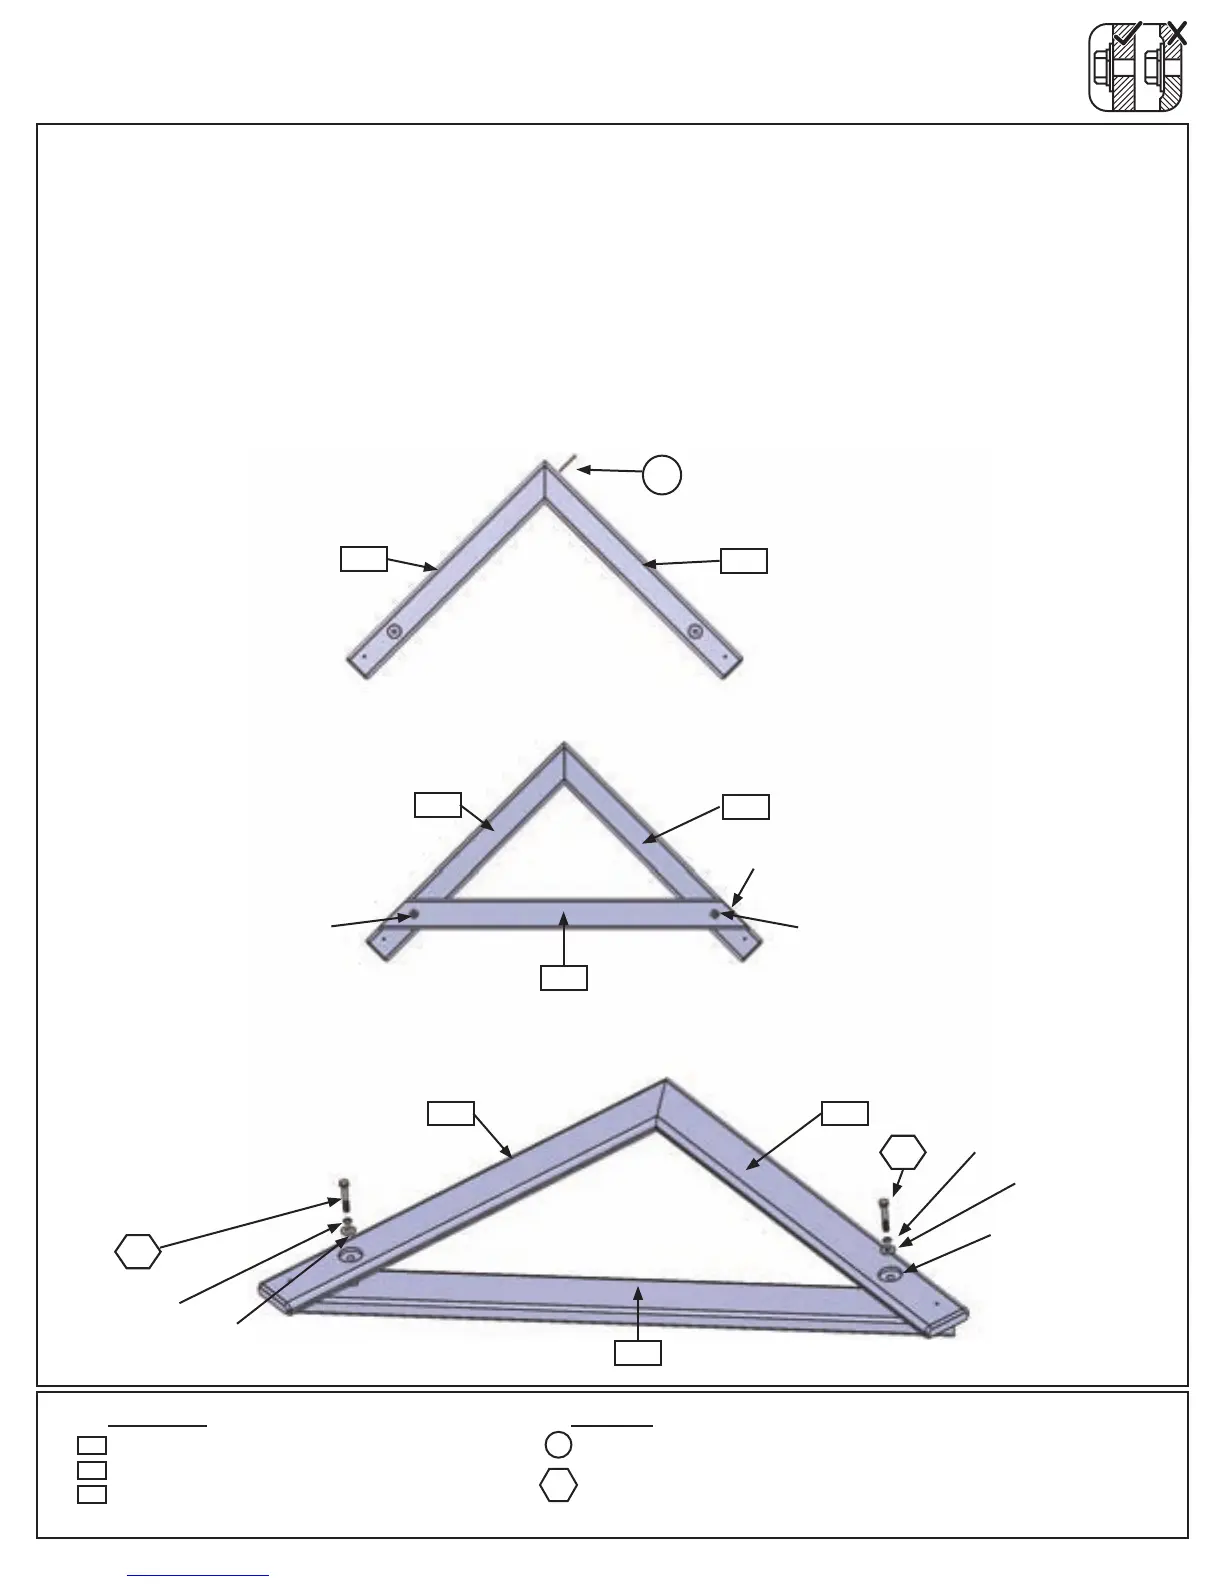
Fig. 22.1
2 x Roof Support Left FSC 5/4 x 4 x 31”
2 x Roof Support FSC 5/4 x 4 x 31”
2 x Gable Bottom FSC 2 x 4 x 41”
222
220
221
2 x #8 x 3” Wood Screw
4 x 5/16 x 2” Hex Bolt
(5/16” lock washer, 5/16” at washer, 5/16” t-nut)
S4
Step 22: Roof Support Assembly
Part 1
A:Attach1(220)RoofSupportto1(221)RoofSupportLeftatpeakusing1(S4)#8x3”WoodScrew.(g.
22.1)
B:Place(222)GableBottomon(220)RoofSupportand(221)RoofSupportLeftsoitisushtotheoutside
edgesofthesupports.Intheboltholestapin2-5/16”t-nuts.(g.22.2)
C:Fliptheassemblyoversothelargecountersunkholesarefacingup.Attach(222)GableBottomto(220)
RoofSupportand(221)RoofSupportLeftwith2(G8)5/16x2”HexBolts(withlockwasherandatwasher).
(g.22.3)
Repeat to make 2 assemblies.
Fig. 22.2
Fig. 22.3
220
221
220
220 221
222
Noticelargeholes
facingout.
5/16”Flat
Washer
G8
G8
222
S4
5/16”Lock
Washer
5/16”Flat
Washer
G8
5/16”Lock
Washer
5/16”T-Nut 5/16”T-Nut
Flush
86 support@cedarsummitplay.com
 Loading...