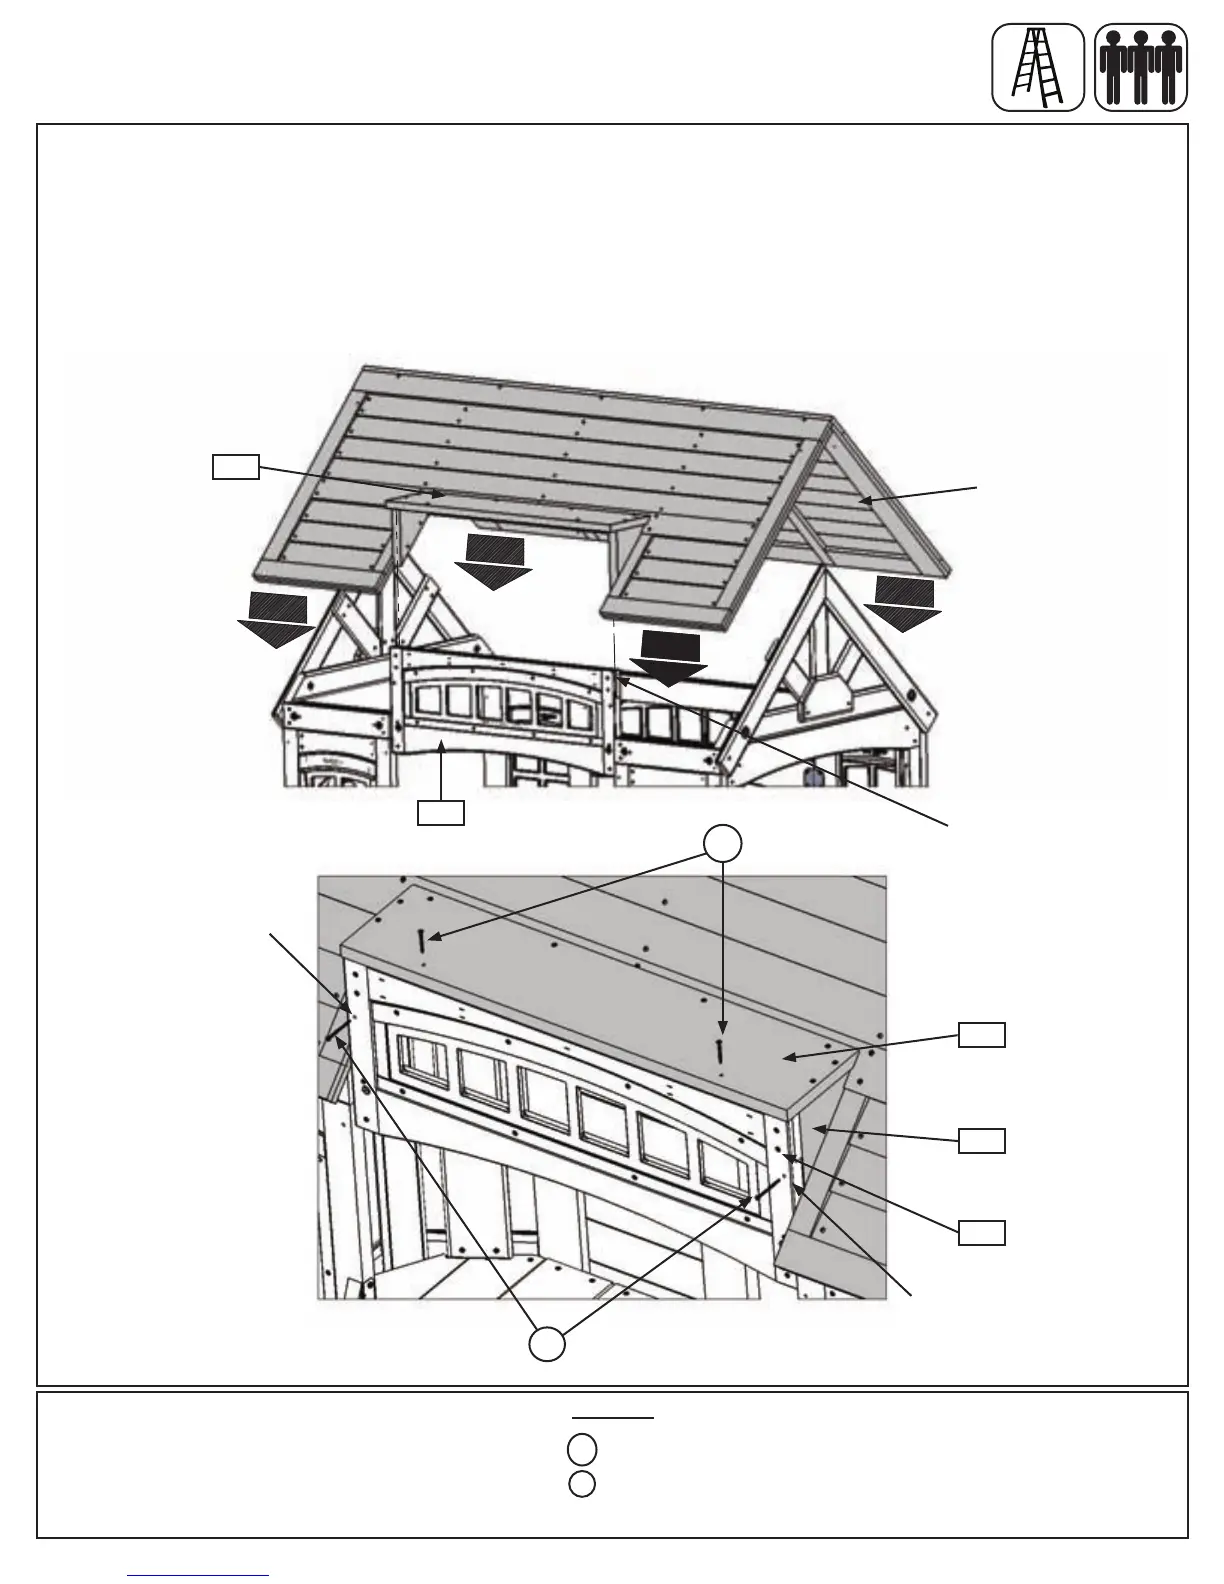
A:With2peopleonthegroundandatleast1personinthefort,lifttheRoofAssemblyupandovertheBack
sideofthefort.GuidetheRoofAssemblyontothefortsoitalignswith(061)TransomPanelFront.(g.25.1)
B: Usingthefactorydrilledholesasguides,attach(061)TransomPanelFrontto(232)TransomSideswith2
(S3)#8x2-1/2”WoodScrewsthenattach(233)TransomRoofto(061)TransomPanelFrontwith2(S15)#8x
1-3/4”WoodScrews.(g.25.2)
Step 25: Attach Roof Assembly to Fort
Part 1
Fig. 25.1
233
Back
Fig. 25.2
061
RoofAssembly
Front
Alignroofto
Transom.
S15
233
061
232
Factorydrilledhole.
S3
Hardware
2 x #8 x 1-3/4” Wood Screw
2 x #8 x 2-1/2” Wood Screw
S3
Factorydrilledhole.
S15
96 support@cedarsummitplay.com
 Loading...