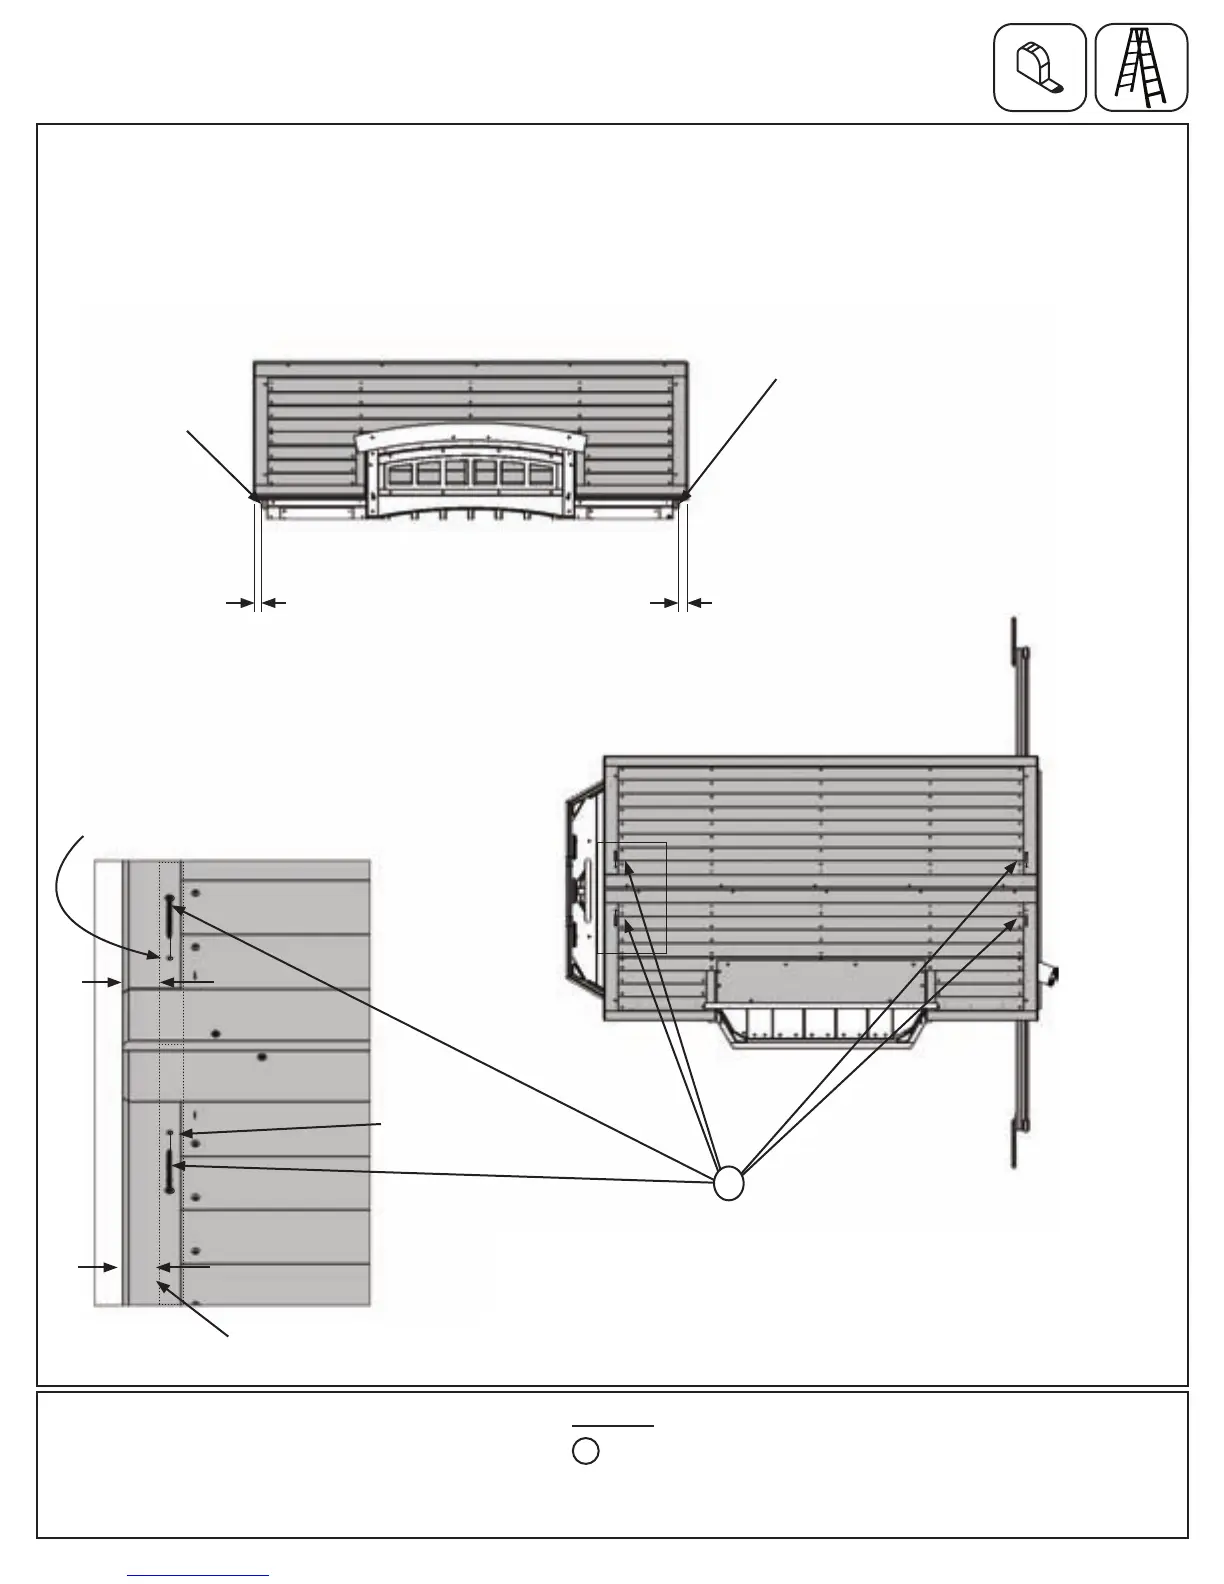
D:MakesuretheRoofAssemblylaysatoneachRoofSupportAssemblyanditoverhangsbothRoofSupport
Assembliesby1-1/2”.(g.25.4)
E:UsingthefactorydrilledholesasaguideattachtheRoofAssemblytothecentreoftheRoofSupport
Assemblieswith2(S3)#8x2-1/2”WoodScrewsperside,asshowning.25.5and25.6.
Step 25: Attach Roof Assembly to Fort
Part 3
Fig. 25.4
Hardware
4 x #8 x 2-1/2” Wood Screw
S3
Fig. 25.5
Fig. 25.6
RoofSupport
Assembly
S3
RoofSupport
Assembly
1-1/2”
1-1/2”
Factorydrilledhole
Factorydrilledhole
1-1/2”1-1/2”
RoofSupportAssembly
(hidden)
98 support@cedarsummitplay.com
 Loading...