22 support@cedarsummitplay.com
2 x Heavy SW Post 2 x 3 x 86-11/16”
1 x SW Upright 4 x 4 x 50-15/16”
1 x SW Support 5/4 x 4 x 46-1/2”
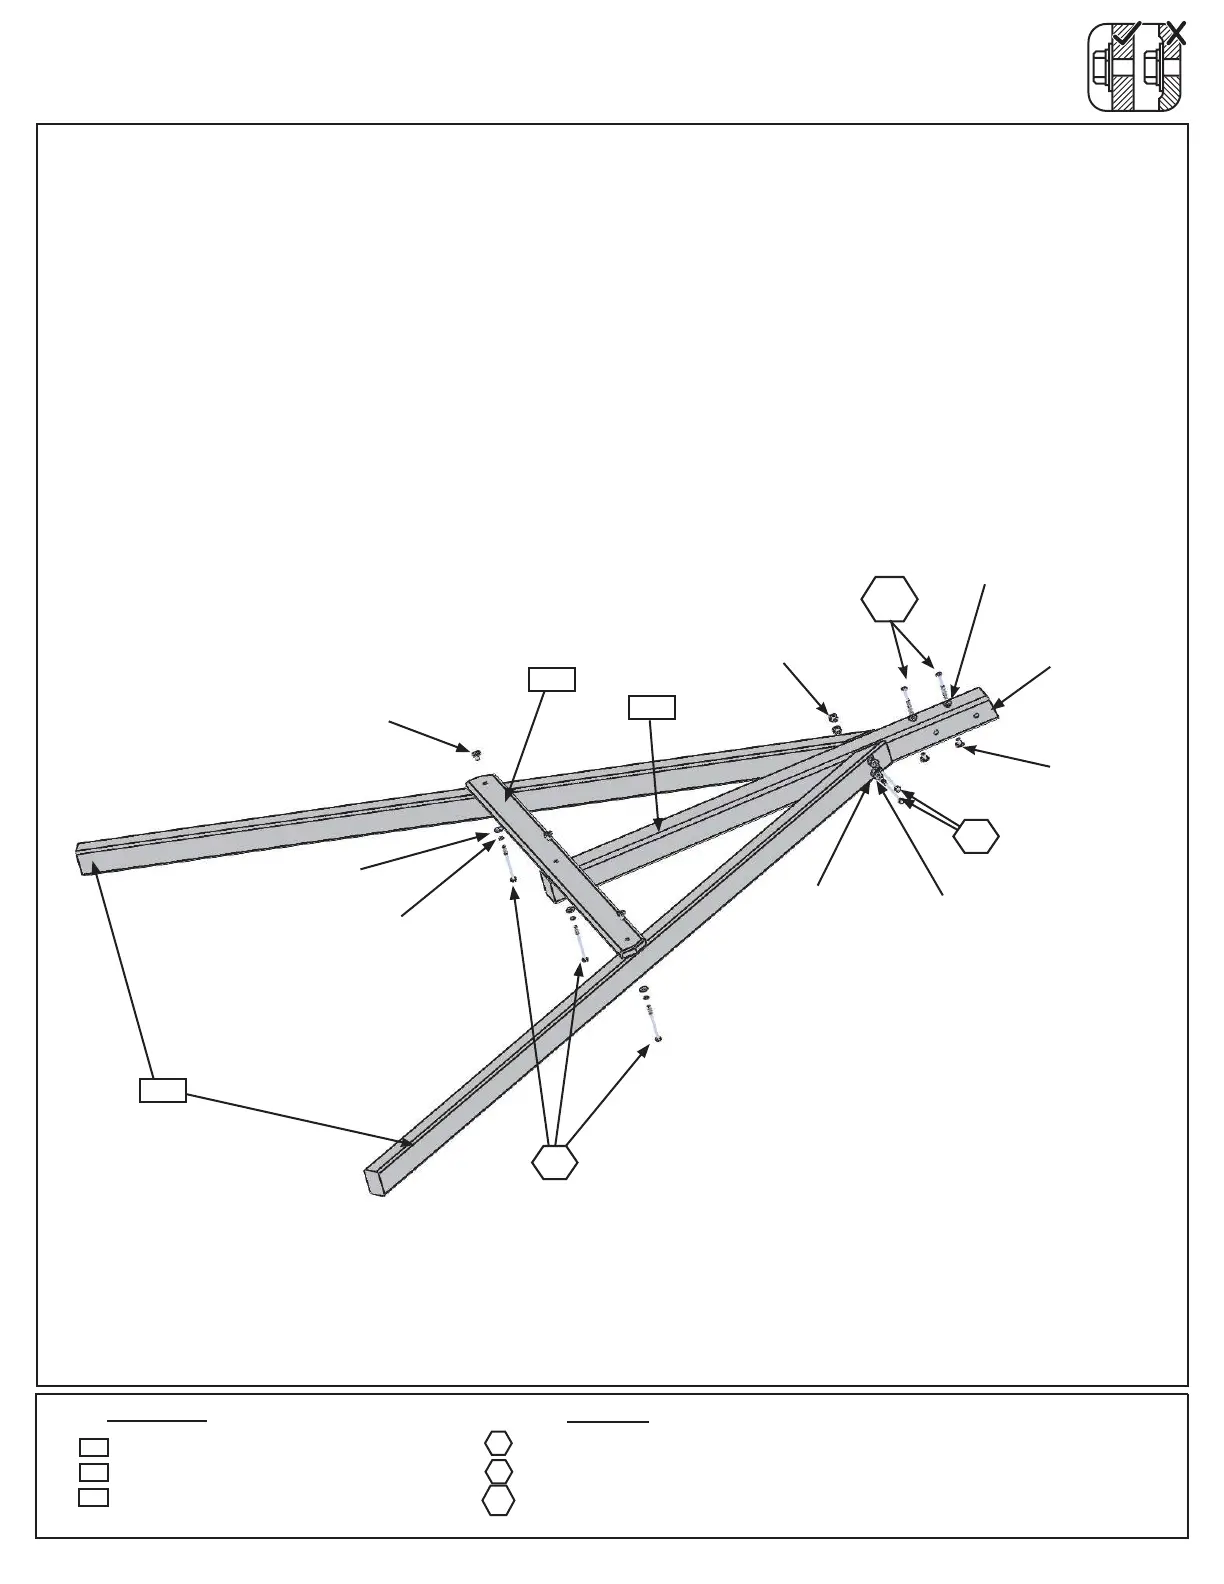
Step 6: Swing End Assembly
A: Loosely attach 2 (2613) Heavy SW Posts to (2615) SW Upright using 2 (G7) 5/16 x 5-1/2” Hex Bolts (with
lock washer, at washer and t-nut). Notice 2 bolt holes at top of (2615) SW Upright and orientation of angle.
(g. 6.1)
B: Attach (2616) SW Support to both (2613) Heavy SW Posts and (2615) SW Upright using 3 (G4) 5/16 x 4”
Hex Bolts (with lock washer, at washer and t-nut). Tighten all bolts (g. 6.1)
C: Install 2 (WB7) 5/16 x 3” Wafer Bolts (with at washer and t-nut) in the top bolt holes in (2615) SW Upright
as shown in g. 6.1. IT IS IMPORTANT THAT THESE BOLTS ARE ATTACHED. THEY WILL MINIMIZE
CHECKING OF WOOD.
Hardware
Wood Parts
5/16”
T-Nut
5/16” Flat
Washer
2 x 5/16 x 5-1/2” Hex Bolt (5/16” lock washer, 5/16” at washer, 5/16” t-nut)
3 x 5/16 x 4” Hex Bolt (5/16” lock washer, 5/16” at washer, 5/16” t-nut)
2 x 5/16 x 3” Wafer Bolt (5/16” at washer & 5/16” t-nut)
G7
WB7
G4
Notice 2 bolt
holes at top and
orientation of
the angle
5/16” Lock
Washer
WB7
5/16”
T-Nut
5/16”
T-Nut
5/16” Flat
Washer
5/16” Flat
Washer
5/16” Lock
Washer
Fig. 6.1
2613
2615
2613
2615
2616
G7
2616
G4