32 support@cedarsummitplay.com
Details
REV.
SHEET 1 OF 1
DWG. NO.
SIZE
SCALE:1:50 WEIGHT:
Use #8 x 1½" Wood Screws to attach Rock Boards to Rails
Use #8 x 1" Pan Screws + 1/4 x 1¼ Pan Bolt
(1/4 lc wash, 3/16 flat wash, 1/4 barrel Nut) to attach Rocks to Rock Board
Use #8 x 2" Wood Screws to attach Rock Rail to fort - flush to top edge
Re-attach top Access Board to Rock Rails
HardwareWood Parts
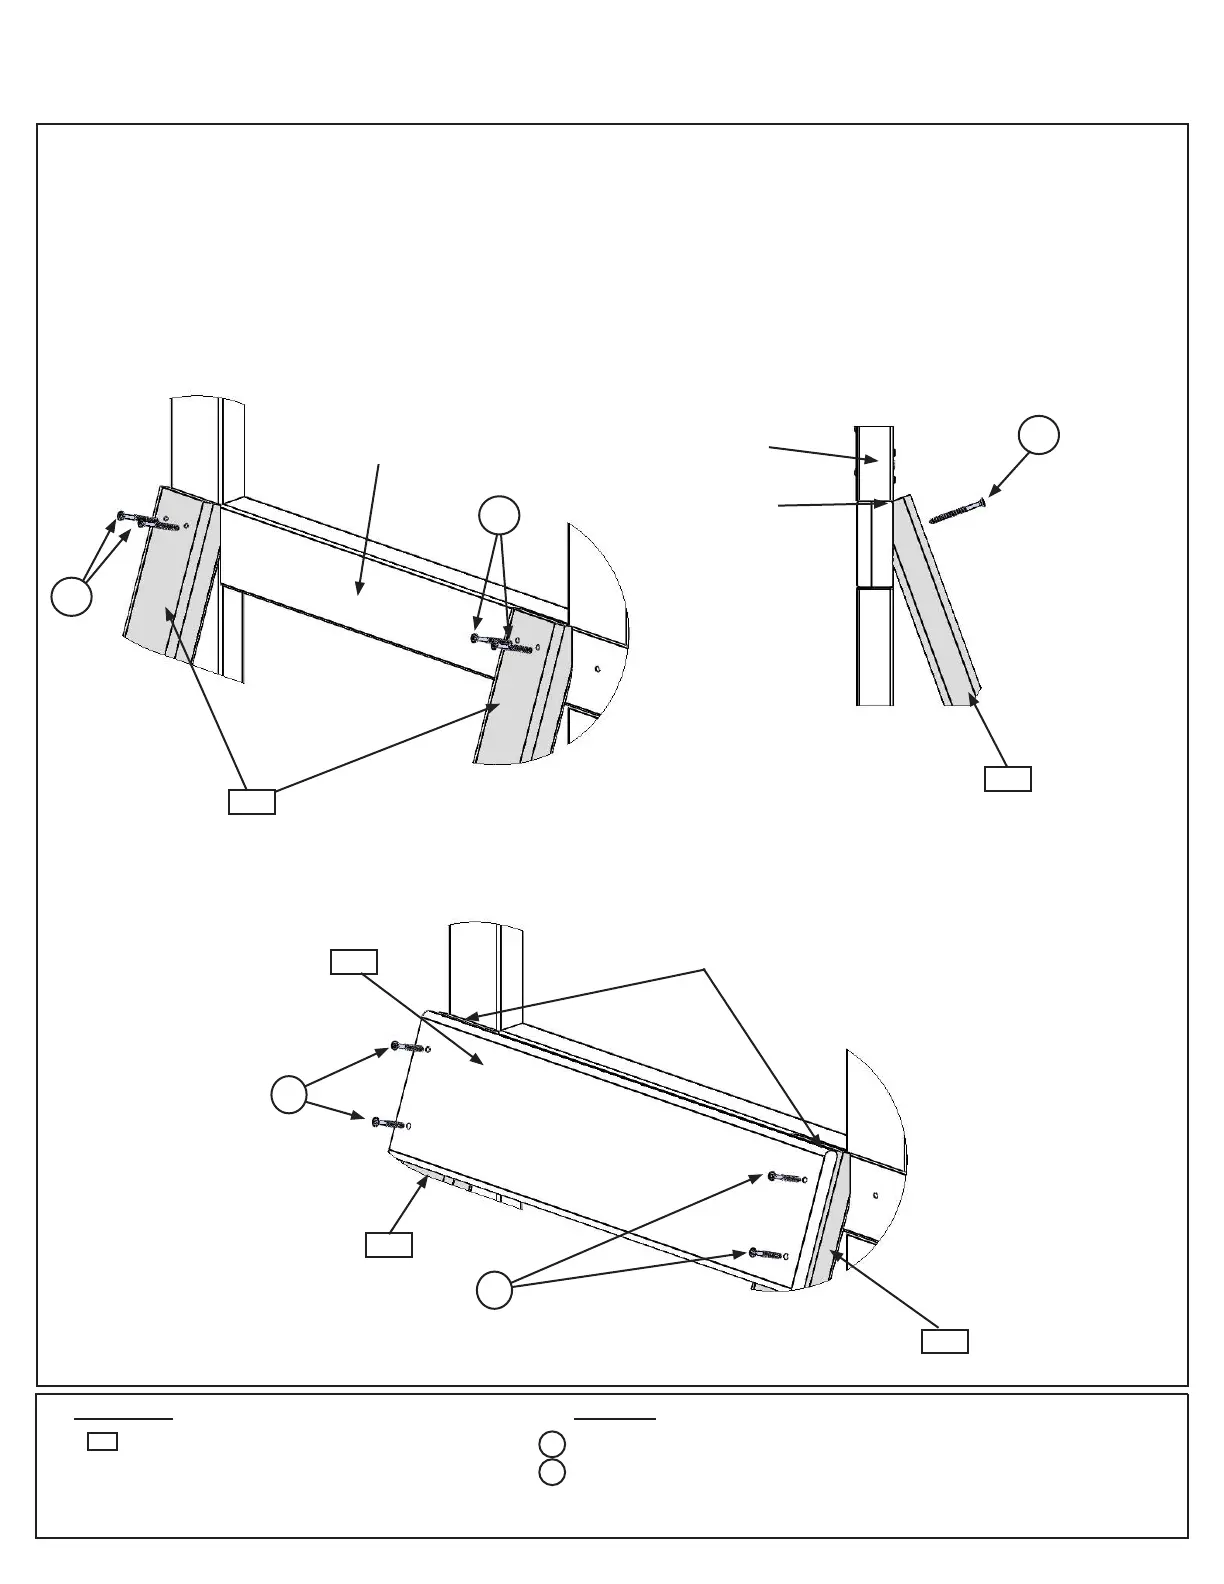
Step 14: Attach Rock Wall Assembly to Fort
Part 1
A: Place Rock Wall Assembly in opening shown on the Fort Guide and ush as shown below. Attach (0349) Rock
Rails to panel using 4 (S11) #8 x 2” Wood Screws. (g. 14.1 and 14.2)
B: Attach 1 (2605) Access Board to top of Rock Wall Assembly, ush to top of (0349) Rock Rail using 4 (S20) #8 x
1-3/8” Wood Screws. (g. 14.3)
4 x #8 x 1-3/8” Wood Screw
4 x #8 x 2” Wood Screw
1 x Access Board 1 x 6 x 19-3/4”
2605
Fig. 14.2
0349
S11
2605
0349
Fig. 14.1
Fig. 14.3
0349
S11
0349
S11
Flush
Panel
Panel
Flush
S11
S20
S20
S20