34 support@cedarsummitplay.com
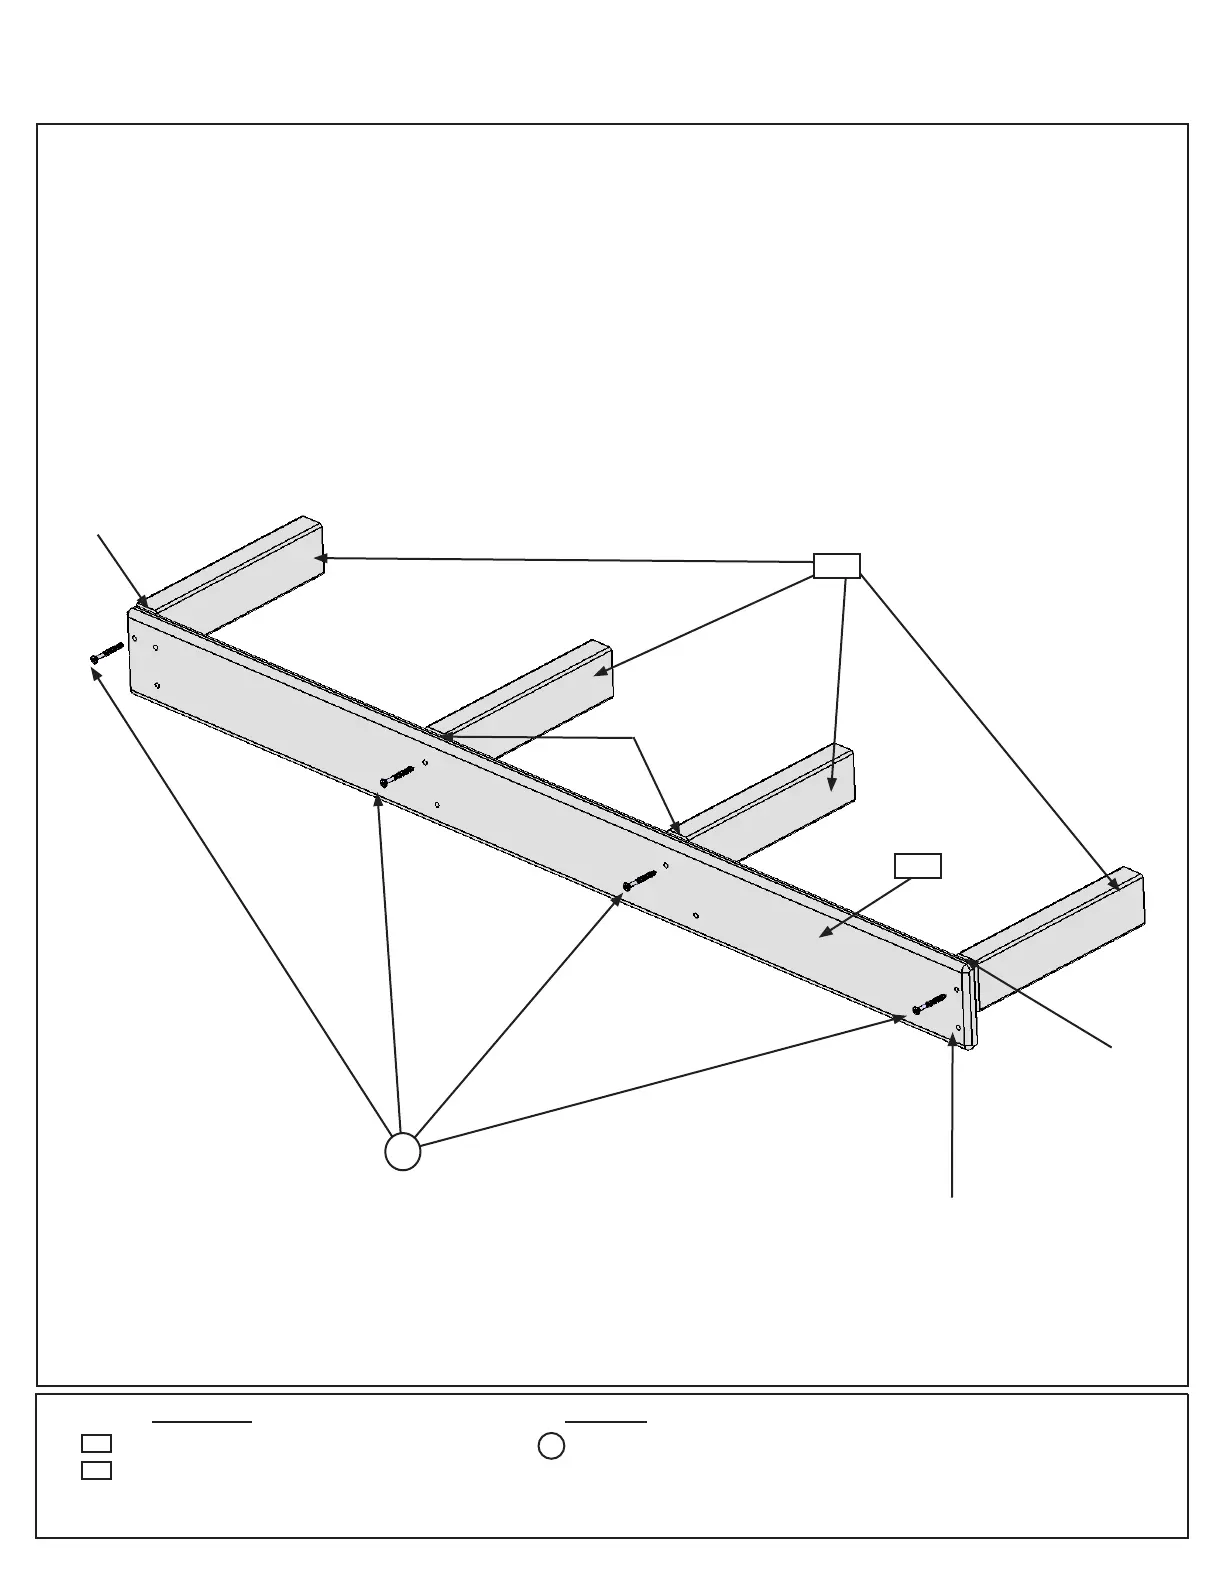
Step 15: Counter Assembly
Part 1
A: Flush to each end and to the top of (2687) Counter Back attach 1 (5736) Counter Joist per end with 1 (S20) #8
x 1-3/8” Wood Screw per joist. Notice the remaining holes at the bottom of (2687) Counter Back. (g. 15.1)
B: Place the remaining 2 (5736) Counter Joists centred over the pilot holes in the middle of (2687) Counter Back
and ush to the top of the board, then attach, in the top holes, with 1 (S20) #8 x 1-3/8” Wood Screw per joist. (g.
15.1)
WEIGHT:
Details
SHEET 1 OF 4
REV.
DWG. NO.
SIZE
SCALE:1:50
Use 4 -#8 x 1-1/2" Wood Screws to attach Counter Joists to Counter Back
Wood Parts Hardware
4 x #8 x 1-3/8” Wood Screw
1 x Counter Back 1 x 4 x 40-5/8”
4 x Counter Joist 1 x 2 x 8-1/4”
2687
5736
Notice hole
locations
5736
Fig. 15.1
2687
Flush
Flush
Flush
S20
S20