English - 6 -
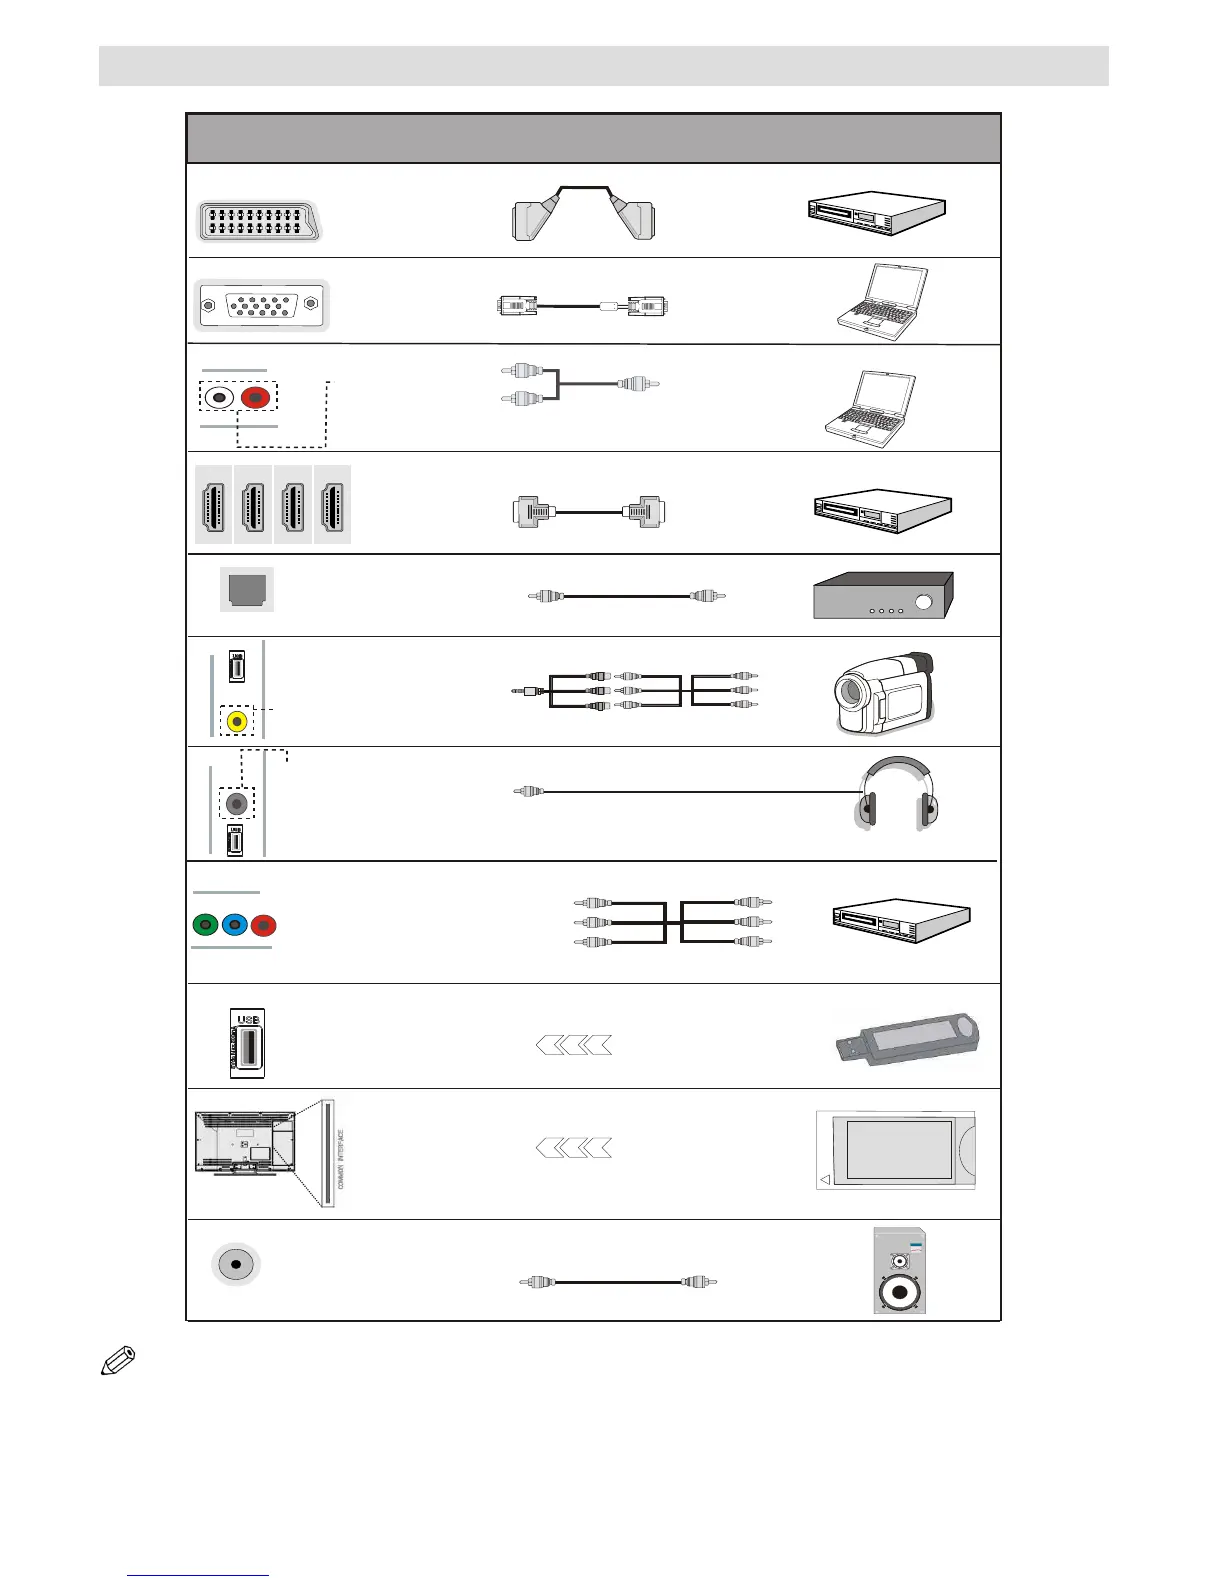
Connections
NOTE: When connecting a device via the YPbPr or Side AV input, you must use the supplied connection cables to enable
connection. See the illustrations above. | To enable PC audio, you will need to use the PC/YPBPR AUDIO CONNECTION
cable’s WHITE & RED inputs. | If an external device is connected via the SCART socket, the TV will automatically switch to
AV mode.| When receiving DTV channels (Mpeg4 H.264) or while in Media Browser mode, output will not be available via
the scart socket. | When using the wall mounting kit (optional), we recommend that you plug all your cables into the back of
the TV before mounting on the wall. | Insert or remove the CI module only when the TV is SWITCHED OFF. You should refer
to the module instruction manual for details of the settings.