Last update:
2021/06/08
14:26
en:ost:telescope:c11_bedienung https://polaris.astro.physik.uni-potsdam.de/wiki/doku.php?id=en:ost:telescope:c11_bedienung
https://polaris.astro.physik.uni-potsdam.de/wiki/ Printed on 2021/08/26 08:47
tightens the screws (see figure 15).
Remove the cover from the tube (figure 16) and add, if needed, the sun filter (see figure 17).8.
Now you can attach an eyepiece, a camera, or a spectrograph to the tube. To use 2″ oculars or9.
one of the other instruments you need to exchange the 1.4″ adapter at the end of the tube by a
2″ adapter from the storage container.
Often a focal reducer is already attached to the telescope. It can be easily removed, if you don't10.
want to use it.
Before using the telescope you have to tare the rotation axes. First lose the bolts fixing the11.
right-ascension axis, until you can freely move the telescope around this axis. Now adjust the
position of the counterweights such that there is no movement along this axis anymore. Tighten
the bolts again and repeat this procedure for the declination axis. As there are no
counterweights for this axis, one has to shift the tube along the clamp to tare the declination
axis. Again this should be done by two people.
Done! (figure 18)12.
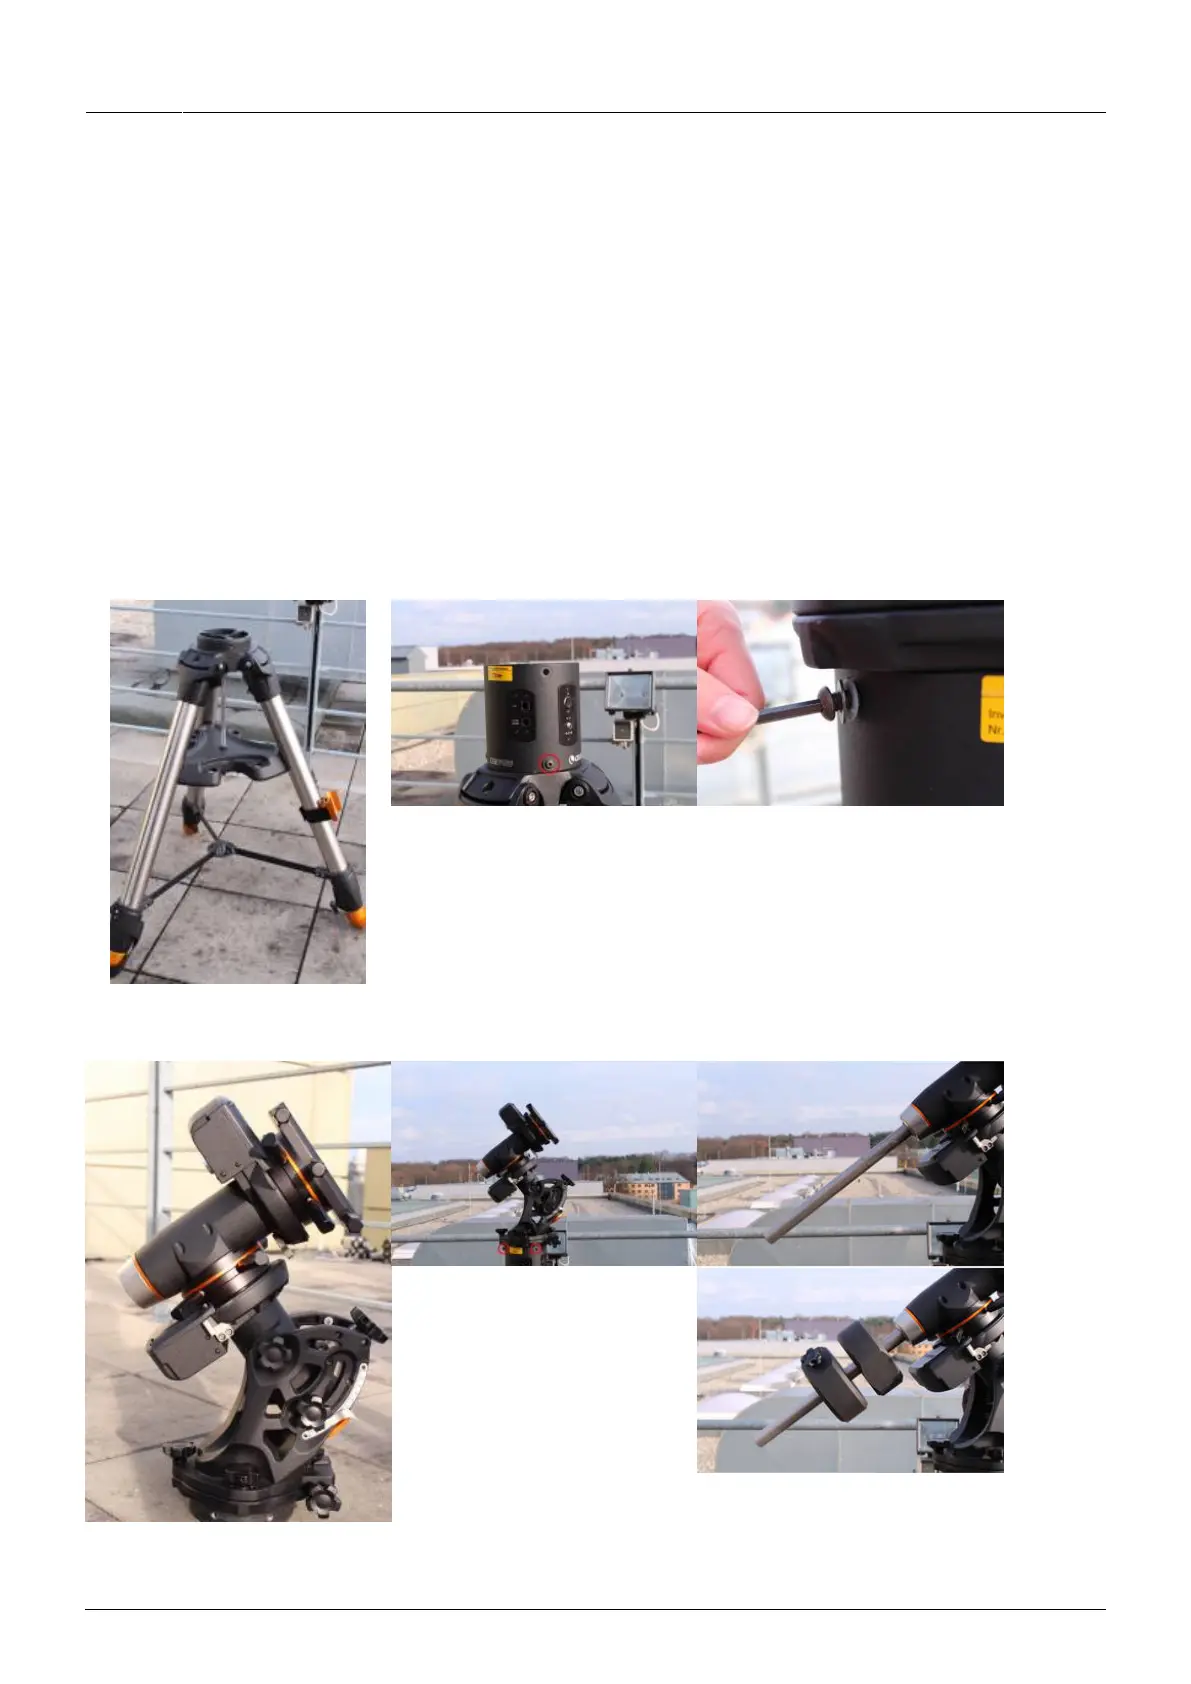
Fig. 1: CGE PRO tripod
Fig. 2: Tripod with the
electronic box (the red circle
indicates one of the bolts that
needs to be fastened)
Fig. 3: One of the bolts
Fig. 4: Mechanics of the CGE
PRO
Fig. 5: CGE PRO mounted on
the electronic box and the
tripod (the red circles indicate
two of the bolts that need to
be fastened)
Fig. 6: CGE PRO with the
counterweights on the bar