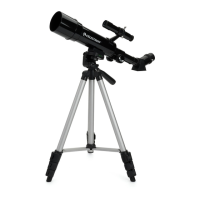
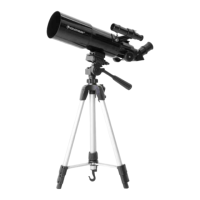
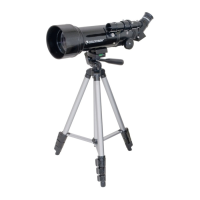
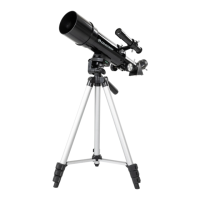
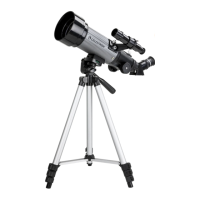
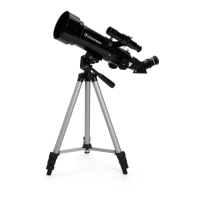
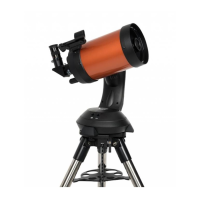
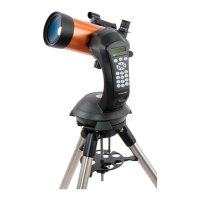
This manual describes the collimation process for Celestron Schmidt-Cassegrain (SCT) and EdgeHD telescopes, focusing on how to achieve optimal optical alignment for the best performance and image quality. Collimation refers to the proper alignment of the telescope's optics, which is crucial for sharp, clear views. While telescopes are factory-collimated and QA-checked before shipping, factors such as rough transport or significant temperature changes can cause misalignment, necessitating re-collimation.
The primary adjustment available to the user for collimation involves tilting the secondary mirror, which is housed at the center of the Schmidt corrector. This is the only user-adjustable component for collimation. The manual explicitly warns against attempting to adjust the Schmidt corrector's orientation or positioning, as this can degrade collimation and optical performance, potentially requiring professional repair.
Function Description
The core function of the collimation process is to align the optical components of an SCT or EdgeHD telescope to ensure that light paths are perfectly centered and focused. This alignment is critical for producing high-quality astronomical images and observations. When the optics are properly collimated, the telescope can deliver its optimal optical performance, resulting in sharp, well-defined star images and clear views of celestial objects. The process involves adjusting the tilt of the secondary mirror to center the diffraction pattern of a defocused star, thereby ensuring that all optical elements are working in harmony.
Usage Features
The manual outlines a step-by-step guide for checking and performing collimation, emphasizing ease of use and precision.
Checking Collimation:
- Setup: Begin by setting up the telescope as usual, connecting a high-power eyepiece (10mm focal length or less). It's crucial to allow the telescope to reach thermal equilibrium with its surroundings, which may take up to 45 minutes if moving between significant temperature extremes.
- Star Selection: Choose a bright star at least 20 degrees above the horizon to minimize atmospheric seeing effects. Center the star in the field of view.
- Defocusing: Defocus the telescope by about one turn of the focus knob until the star image appears doughnut-shaped. A properly collimated telescope will show a centered dark hole (the shadow of the secondary obstruction) surrounded by brighter rings of light. If the hole is off-center, collimation adjustment is needed.
- Double-Check: Reverse the focus direction to check the other side of focus. The hole should remain centered in the rings. If not, adjustment is required.
- Uncertainty: If unsure whether adjustment is needed, it's best not to make any changes, as incorrect adjustments can worsen collimation.
Collimation Setup:
- Acclimatization: Ensure the telescope is acclimatized to the ambient temperature before starting the collimation process.
- Light Source: A bright star is ideal for collimation, especially one near the zenith to minimize atmospheric distortion. The mount's tracking should be engaged to prevent star drift. Alternatively, Polaris can be used if an equatorial mount is roughly polar-aligned and tracking is not desired, due to its minimal movement.
- Seeing Conditions: Good seeing conditions (steady air) are crucial for accurate collimation. Turbulent conditions will blur diffraction patterns, making precise judgment difficult. Look for steady, non-twinkling stars.
- Eyepiece Selection: Use a high-powered eyepiece (focal length less than 10mm) for precise optical alignment. For ideal seeing, eyepieces with even higher magnification (2.3mm to 7mm) are recommended.
- Dew Shield: Remove the dew shield, if attached, to provide better access to the collimation screws.
- Dew Heater (Optional): If collimating in heavy dew, consider using a dew heater system to prevent dew from forming on the Schmidt corrector.
- Eyepiece Connection: Ensure all thumbscrews are firmly tightened when connecting the eyepiece to ensure mechanical alignment with the optical axis. The retaining ring connecting the visual back to the rear cell should also be securely tightened. For imaging, collimating with the eyepiece directly in the visual back (without a diagonal) can eliminate potential alignment errors from the diagonal.
- Re-centering: After each collimation adjustment, re-center the star in the eyepiece using the telescope's hand control at a slow speed rate. Keep the hand control nearby for convenience.
Collimation Process:
- Tools: A Phillips-head screwdriver is used to adjust the three collimation screws on the back of the secondary mirror assembly.
- Older Models: Some older SCTs have an orange cap covering the collimation screws, which must be carefully pried off with a flat-head instrument.
- Adjustment Mechanism: The three collimation screws provide a "tip/tilt" adjustment. Loosening one screw requires tightening the other two slightly, and vice versa, to maintain proper screw tension. However, for small adjustments, it's often not necessary to adjust all three simultaneously due to mechanical flex.
- Warning: Exercise caution when using the screwdriver to avoid scratching the Schmidt corrector. A red-light flashlight can help illuminate the screws.
- Goal: The objective is to center the central shadow (hole) in the defocused star image. Make very small adjustments, typically 1/10th of a turn at most, to each screw.
- Step-by-Step Adjustment:
- Center the bright star in the eyepiece using the highest power eyepiece suitable for current seeing conditions.
- Defocus the star until a dark "hole" and 2-4 diffraction rings are visible. Avoid over-defocusing, which makes the image dim and hard to see.
- Inspect the out-of-focus diffraction pattern.
- Turn the focus knob in the opposite direction to pass through focus and defocus on the other side. Again, ensure the central hole and 2-4 rings are visible.
- Inspect both sides of focus and use the side with clearer light and dark diffraction rings for collimation.
- Ensure the star remains centered in the eyepiece. Note the direction in which the central shadow and inner bright ring are skewed relative to the outer ring.
- Place a finger along the edge of the front cell, pointing towards the collimation screws (without touching the corrector). The shadow of the finger should be visible in the eyepiece. Rotate the finger until its shadow is closest to the narrowest portion of the rings (matching the skew direction of the central shadow).
- Identify the collimation screw closest to where the finger is pointing. This is the first screw to adjust. If the finger points between two screws, adjust the one further away.
- Slightly tighten the identified screw (1/10th of a turn). Re-center the star in the eyepiece using the mount's slow speed rate.
- Confirm that the central shadow and inner bright ring have moved closer to the center. If they moved further off-center, loosen the screw instead. Continue making small adjustments and re-centering until the shadow and inner ring are as centered as possible with that screw.
- If the pattern is still not centered, repeat the process with a different collimation screw.
- Screw Tension Management: If a screw becomes very tight, slightly loosen the other two screws equally to relieve pressure. If a screw becomes too loose, tighten the other two screws.
- Lost Star: If the star moves out of the field of view after an adjustment (especially with short focal length eyepieces), use the finderscope to re-center it.
Proper Collimation:
- Collimation is achieved when the central shadow, inner bright diffraction ring, and outer bright diffraction ring are concentric.
- The thin concentric dark ring between the two bright rings should extinguish uniformly and simultaneously as you slowly pass through focus.
- This results in a star image diffraction pattern that is concentrically similar both inside and outside of focus, delivering optimal optical performance.
Maintenance Features
The manual emphasizes that while regular checks are recommended, frequent collimation adjustments are generally not needed unless the telescope has been subjected to rough handling or significant temperature changes. This implies that under normal, careful usage, the telescope's collimation should remain stable.
- Warranty Warning: The manual explicitly states that attempting any adjustments to the optics or mechanics of the telescope beyond the collimation screws will void the warranty and likely worsen alignment. In such cases, users are directed to contact Celestron Technical Support for warranty evaluation or paid repair. This highlights the importance of adhering to the prescribed collimation procedure and avoiding unauthorized modifications.
- Learning Curve: Collimation requires some learning and patience. The manual suggests that with practice, the process will become easier and less time-consuming, implying that user experience and familiarity with the procedure contribute to effective maintenance.
In summary, the Celestron SCT & EdgeHD Collimation Guide provides comprehensive instructions for maintaining the optical alignment of these telescopes, ensuring users can achieve the best possible viewing and imaging results through careful, systematic adjustments of the secondary mirror.