BIO X6 User Manual v. 1.0 50
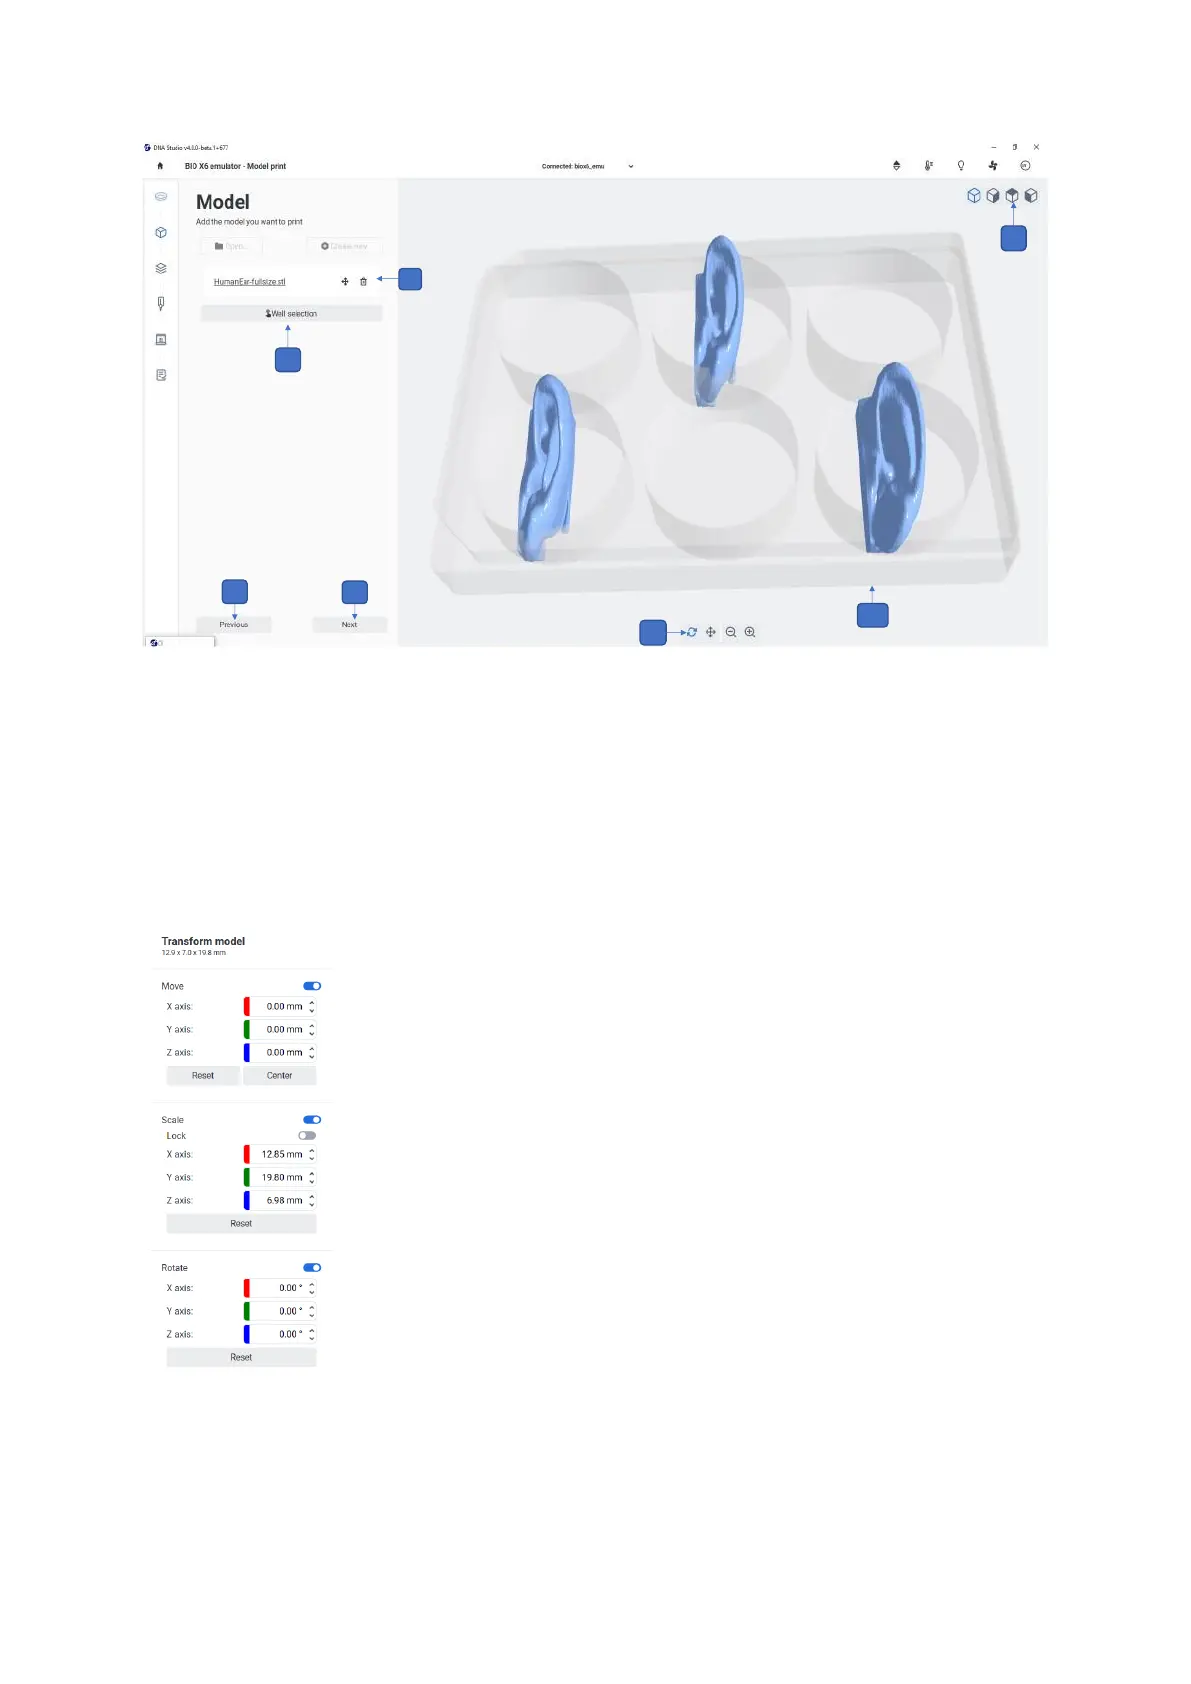
Figure 24 Overview of the Model step
2. Selected model: The file name of the 3D model you have selected is displayed here.
Tap the left button to transform your 3D model by rotating, scaling, and moving it.
Tap the trash bin to delete the selected file. Any modifications can be reset or
previewed in the center of any print surface.
3. Well selection: Tap to select which wells to print in and in what order (see
screenshot below).