BIO X6 User Manual v. 1.0 61
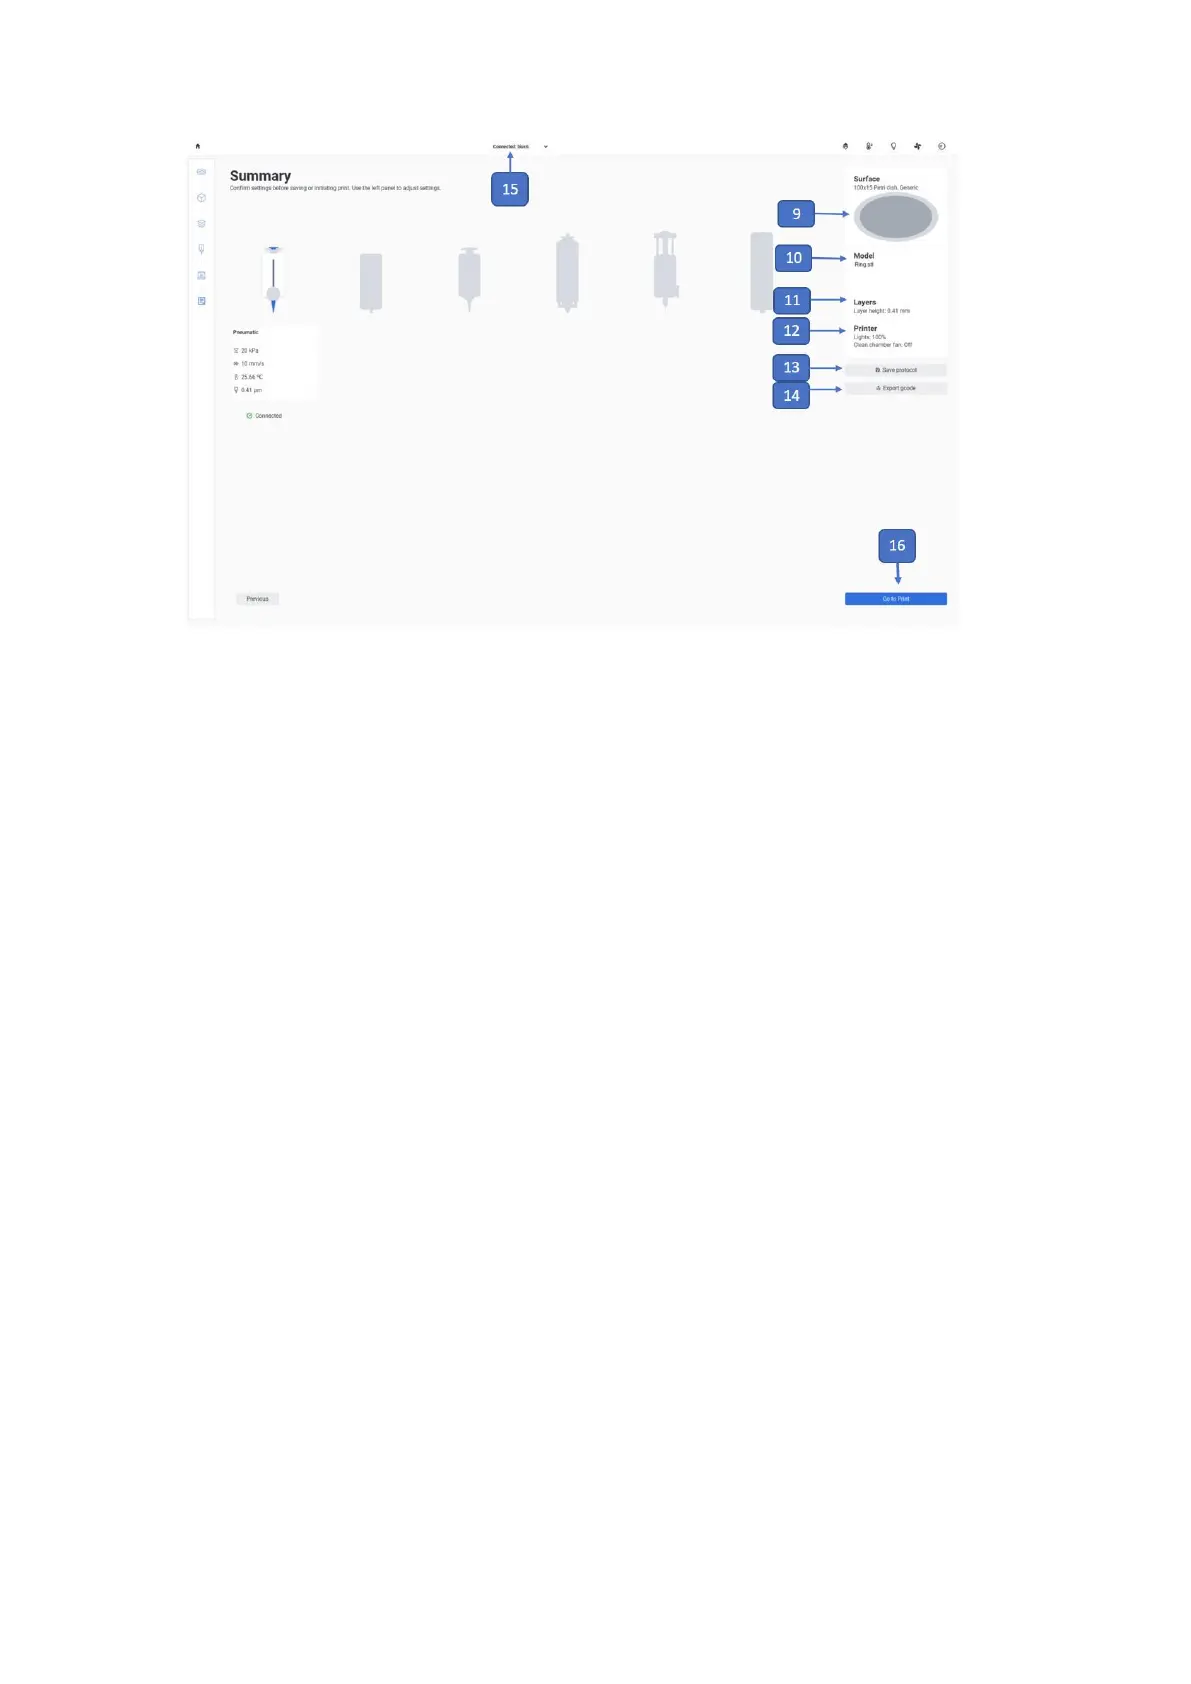
Figure 33 Settings summary, part 2
9. Surface: Displays a summary of the selected settings for the print surface.
10. Model: Displays the file name of the 3D model selected.
11. Layers: Displays a summary of the layer settings. Tap to edit settings.
12. Printer: Displays a summary of the printer settings. Tap to edit settings.
13. Save protocol:
extension.
14. Export gcode
extension.
15. Connection status: Indicates whether a bioprinter is connected to the
tablet/computer or not. If not connected, you cannot proceed with the bioprinting
process.
16. Go to Print: Tap to proceed with the bioprinting process.
After checking all the settings, proceed with the bioprinting process, tap Go to Print
and continue with the calibration settings.


 To Next Page