BIO X6 User Manual v. 1.0 60
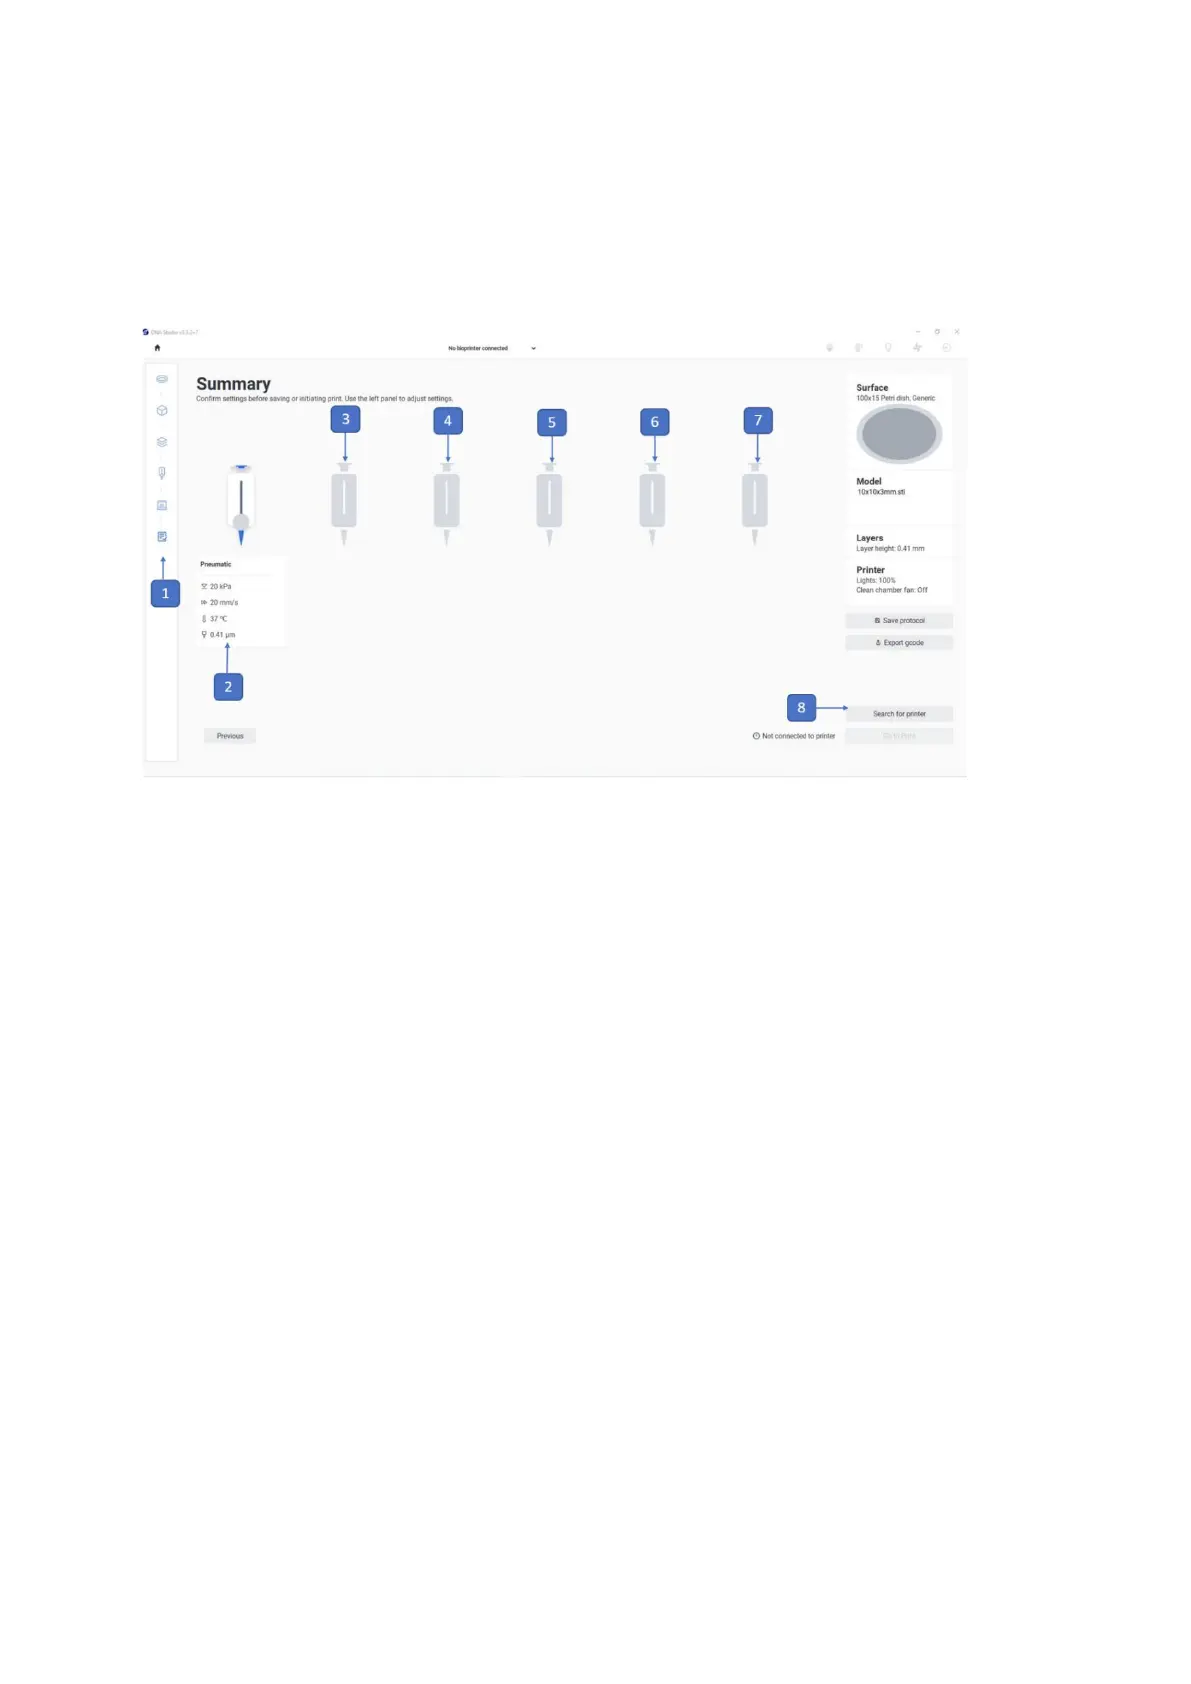
4.4.6 Summary
In this step, you review all your selected settings. If a setting or value is incorrect, use the
boxes to the right or the navigation bar to the left to edit.
1. Printing process navigation bar: This bar displays the steps of the overall
bioprinting process and highlights in blue the step you are currently in.
2. Tool 1: Displays an illustration of the tool 1 and shows its settings.
3. Tool 2: Displays an illustration of the tool 2 and shows its settings.
4. Tool 3: Displays an illustration of the tool 3 and shows its settings.
5. Tool 4: Displays an illustration of the tool 4 and shows its settings.
6. Tool 5: Displays an illustration of the tool 5 and shows its settings.
7. Tool 6: Displays an illustration of the tool 6 and shows its settings.
8. Search for printer: This button indicates that the BIO X6 is not connected with the
tablet/computer on which the bioprinting process is being set up. If not connected,
you cannot proceed with the bioprinting process.
 Loading...