BIO X6 User Manual v. 1.0 66
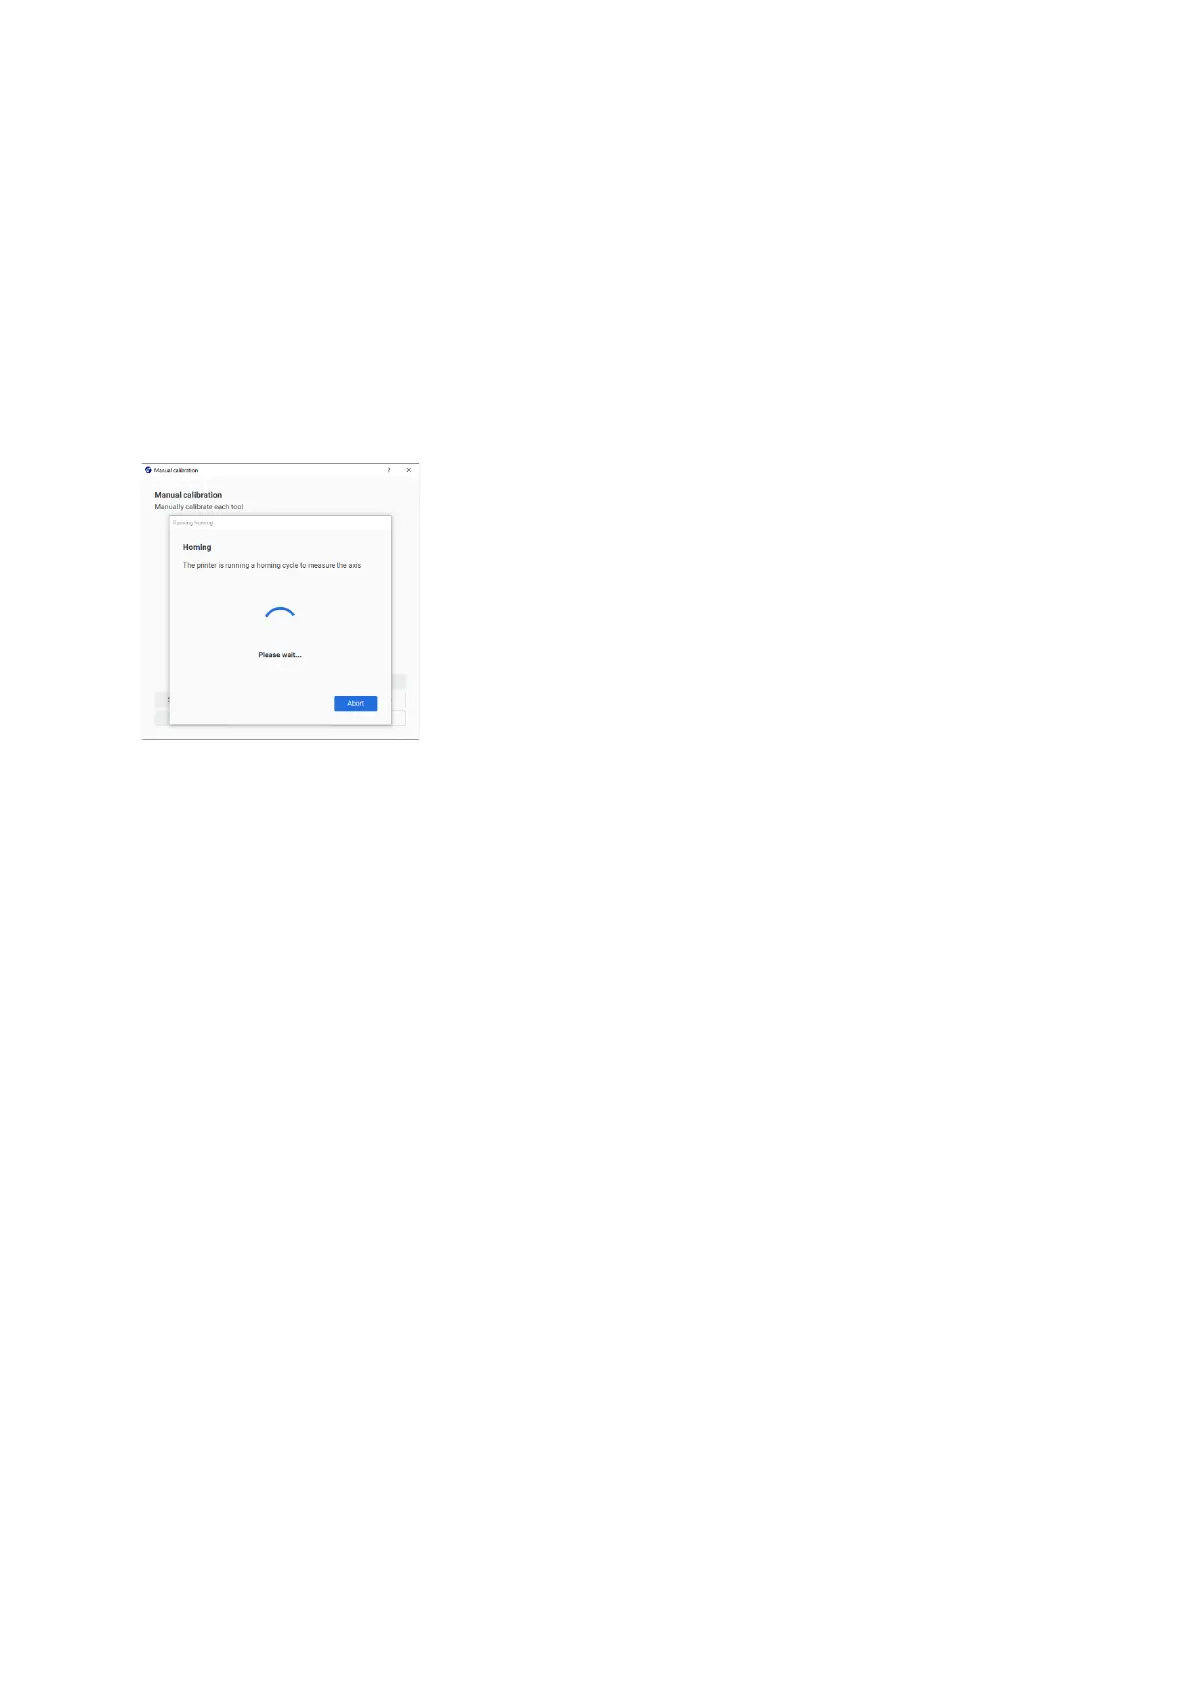
4.4.9 Manual calibration
With manual calibration you can adjust the start point of printing for each of the heads in
each of the 6 slots, with this calibration mode you can adjust the value in X, Y & Z, initially,
manual calibration does an automatic homing to calculate the zero initials of each of the
coordinate axes values, the user must calibrate the heads to the surface with 0.0 distance.
depending on the surface used.
The printer runs a homing cycle to get the 0 values in all the axes.
Tip: Before calibration, unscrew the cartridge locking screw to avoid damaging the nozzle if
accidentally moving the printbed too high. Re-tighten it before saving the calibration.
The first step of the instructions to follow vary depending on what surface you use:
 Loading...