5.Product Specifications
7.Feature
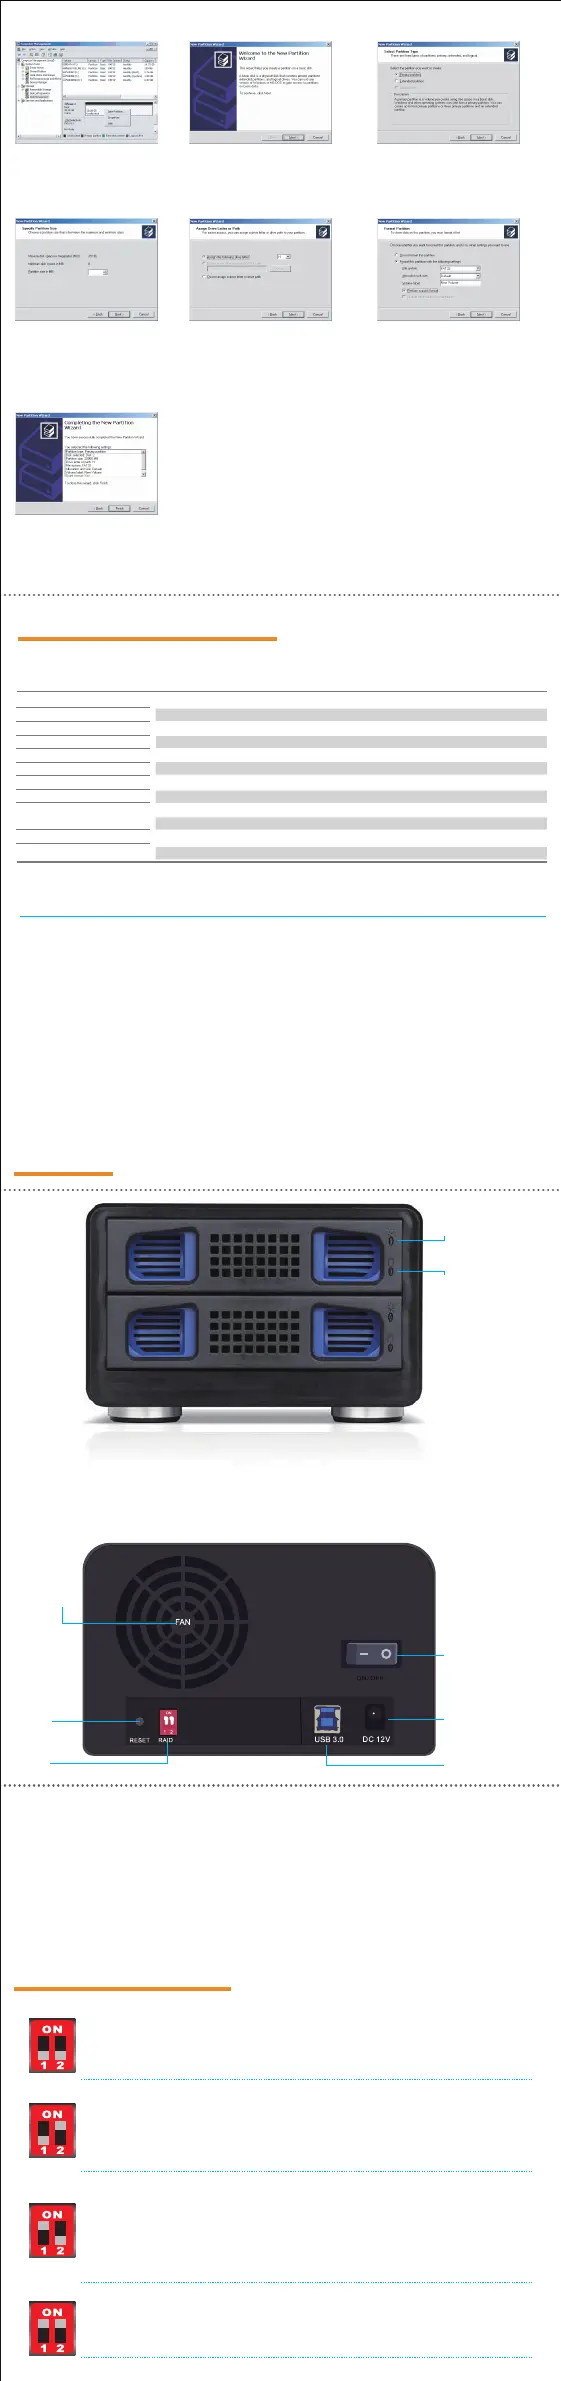
DC IN
USB 3.0 Interface
Power
7cm Cooling Fan
Light 1 : Fault Indicator Light
Light 2: Drive Read/Write Signal Light
When the hard drive is connected and working normally, the light is blue. When
the indicator light become red,it meansthat the hard drive failure.
When this light flashing red, it means that the PC is reading/writing the data from
the hard drive. When the PC finish the process of reading/writing, the red light will
not flash and stop working,
RAID
Reset
1. RAID Level : RAID 0, RAID 1, JBOD, NORMAL
2. USB 3.0 (MAX 5Gbps), USB 2.0 (MAX 480Mbps)
3. DC IN : 12V power supply
4. Cooling Fan : 7cm Fan
5. OS Support : Windows 2000 or above, MAC OS 10.3 or
above, and Linux
8.RAID Level Setting
| Product Specification |
RAID Level
HDD Supported
Interface
Max. Transfer Rate
Package Contents
Dimension
Note
Cooling Fan
OS Support
Power Adapter
Enclosure
RAID 0, RAID 1, JBOD, NORMAL
Supports 2.5/3.5 inch SATA HDDs and SSDs
USB 3.0
5Gb/s
802RU, USB 3.0 Cable, Screws and Screws-Driver,
Power Adapter and User Manual.
205 x 130 x 80 mm
HDD is not included
70mm Cooling Fan
Windows 2000 or above, MAC OS 10.3 or above, and Linux
12V Power Adapter
Extruded Aluminum Case
6. USB 3.0 to SATA RAID Enclosure
- USB 3.0 to SATA Enclosure
- Support 2.5/3.5 inch Hard Drive
- Support Auto Rebuild in RAID 1 Mirror Mode
- USB 3.0 (MAX 5Gbps), USB 2.0 (MAX 480Mbps)
- Convenient Tool-less Design
- Supports Windows 2000 or above, MAC OS 10.3 or above, and Linux
- Support over 2TB Hard Drives
* Each works as a single hard disk, and the data is transferred individually to each hard drives.
* Switch 1 and 2 are on.(Both Switch 1 & 2 are up.)
JBOD Mode
* RAID 1 mode (Mirroring) will provide RAID 1 protection against HDD failure
* Switch 1 is off and Switch 2 is on(Switch 1 down & Switch 2 up)
RAID 1 Mode
* RAID 0 mode (Stripping) provides best performance,combining both drives for
read/write to both drives.
* Switch 1 is on and Switch 2 is off(Switch 1 up & Switch 2 down).
RAID 0 Mode
* JBOD mode (Spanning) join both hard drives capacity to provide a large volume.
No performance or redundancy in this mode.
* Both Switch 1 & 2 are off (Both Switch 1 & 2 are down).
NORMAL
4. When new disk appears, right
click on it and select “News
partition”.
7. Select the partition size We
reccomend to use as maximum
and click on [Next].
8. Select the drive letter to assign
the hard disk and click on [Next].
10. New partition is complete and
your hard disk is ready to use.
Click on [Finisk].
9. Select the format settings : “FAT
32”, “DEFAULT” and Volume Label
and “Perform a quick format”.
5. When the wizard window
appears, click on [Next].
6. Select “Primary Partition” and
click on [Next].
Fault Indicator Light
Read/Write Signal Light
 Loading...