Page 10 For technical questions, please call 1-888-866-5797. Item 40211
SAFETY OPERATION MAINTENANCEINSTALLATION
Maintenance and Servicing
Procedures not specifically explained in this manual must
be performed only by a qualified technician.
TO PREVENT SERIOUS INJURY FROM ACCIDENTAL OPERATION:
Turn the Power Switch “OFF” and unplug the Air Dryer from its electrical outlet
before performing any inspection, maintenance, or cleaning procedures.
TO PREVENT SERIOUS INJURY FROM AIR DRYER FAILURE:
Do not use damaged equipment. If abnormal noise or vibration occurs,
have the problem corrected before further use.
Cleaning, Maintenance, and Lubrication
Note: This Air Dryer uses Refrigerant 134A. The
refrigerant system does not need servicing unless
the unit begins to leak. If the unit leaks refrigerant,
take it to an authorized service technician.
1. BEFORE EACH USE, inspect the general
condition of the air dryer. Check for:
• loose hardware,
• misalignment or binding of moving parts,
• cracked or broken parts,
• damaged electrical wiring, and
• any other condition that may
affect its safe operation.
2. AFTER USE, wipe external surfaces of
the Air Dryer with a clean cloth.
3. PERIODICALLY, Use a dust collector and an air
gun to clean dirt and debris off of the Condenser.
Be careful not to get too close to the unit as high
pressure will damage the unit. If grease or oil
are built up and wont blow off, remove the Left
Side Panel and wash off the Condenser with
a mild detergent, then replace the Panel.
4. Never attempt to adjust the temperature;
this adjustment should only be done by
an authorized service technician.
5. WARNING! If the supply cord of this
Air Dryer is damaged, it must be replaced
only by a qualified service technician.
6. WARNING! Repairing this unit (other than
resetting the pressure switch) should only be
performed by an authorized service technician.
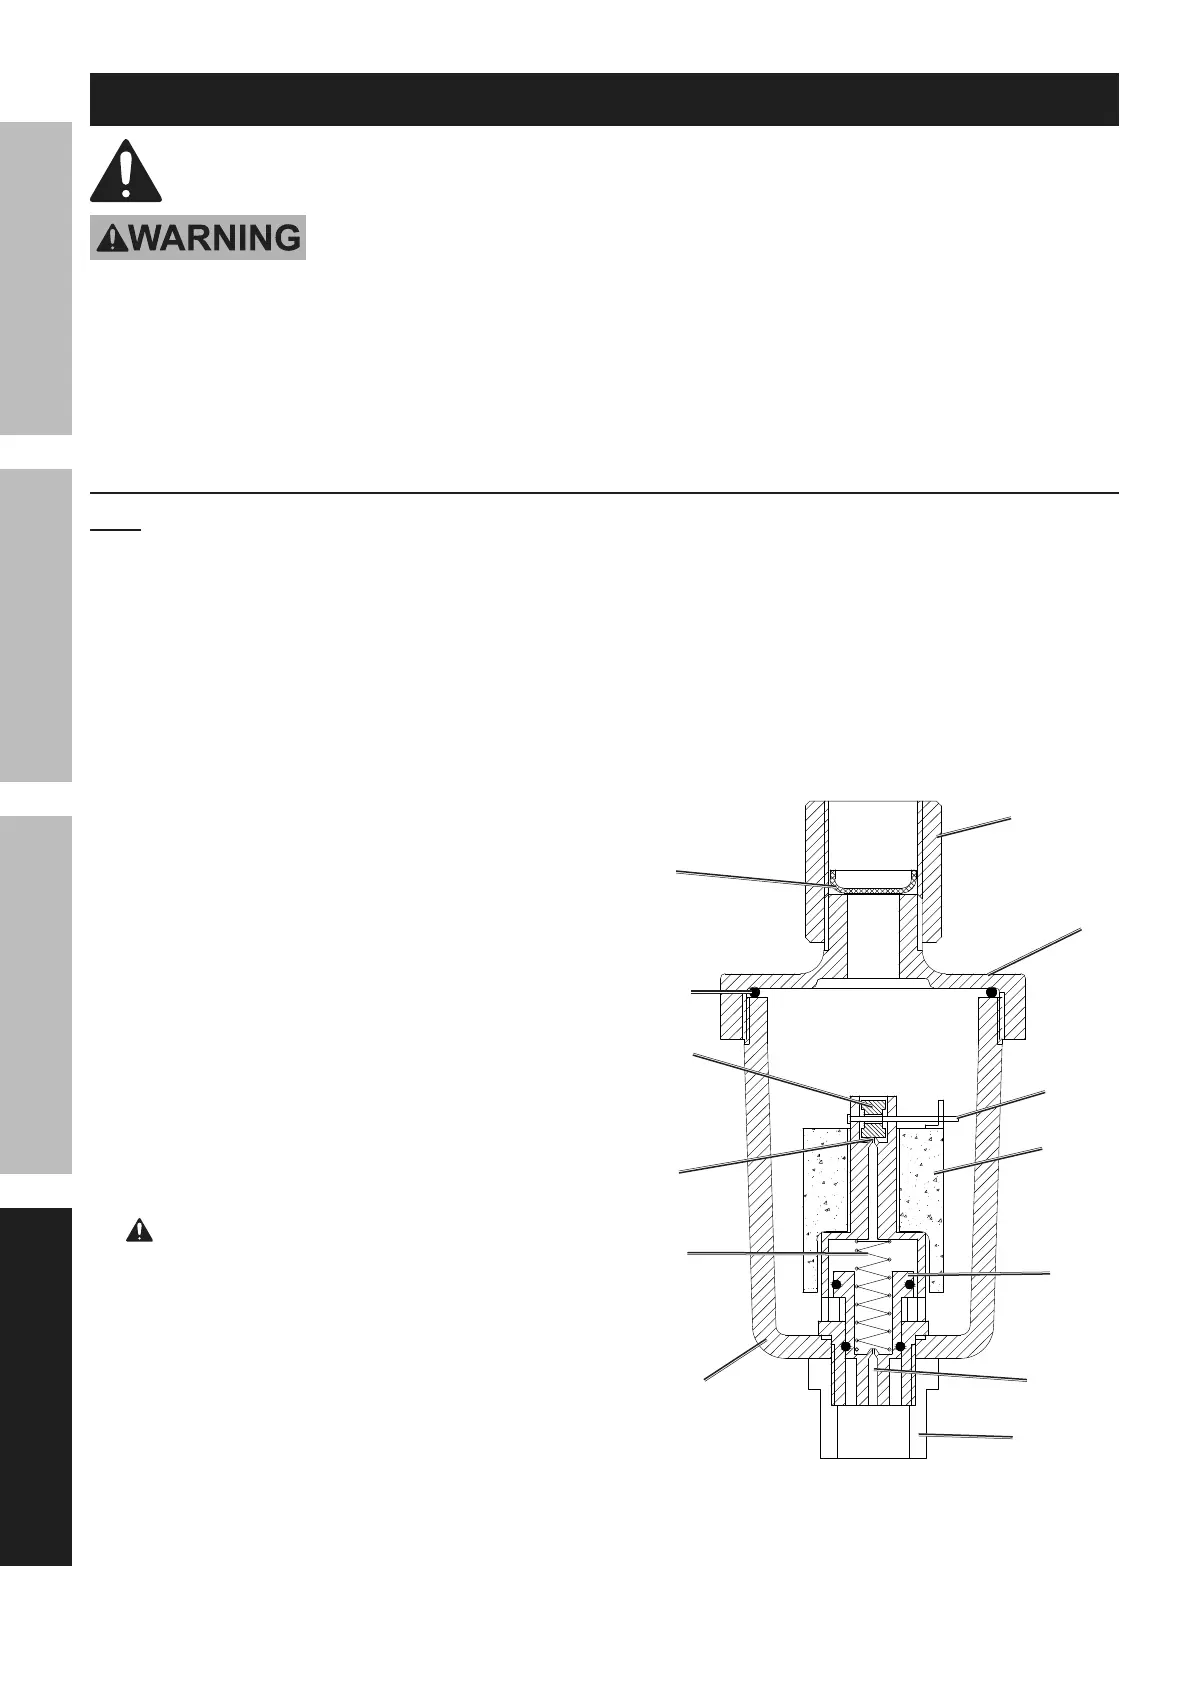
7. Authorized Service Technician ONLY;
Washing the Water Separator:
a. Remove the Water Separator from the
Connector; do not lose the internal Filter.
b. Remove the Lid from the Housing
and pour out any water.
c. Disassemble the Water Separator and
its internal components and clean each
component inside and outside.
d. Reassemble the Water Separator.
Connector
Filter
Lid
Housing
O-Ring
Drainage
Piston
Pressure
Plug
Control
Rod
Float
Spring
Inner
Hole
Drain Pipe
 Loading...