Page 9For technical questions, please call 1-888-866-5797.Item 40211
SAFETYOPERATIONMAINTENANCE INSTALLATION
Operating Instructions
Read the ENTIRE IMPORTANT SAFETY INFORMATION section at the beginning of this
manual including all text under subheadings therein before set up or use of this product.
Air Dryer Set Up
1. Route the power cord from the Air Dryer to
the grounded wall outlet, along a safe path
without creating a tripping hazard or exposing
the power cord to possible damage.
2. Using the Air Dryer without the bypass valve:
a. Open both shutoff valves.
b. Close the bypass valve.
c. Turn on the air compressor and Air Dryer.
3. Using the bypass valve without the Air Dryer:
a. Turn off the Air dryer and air compressor.
b. Close both shutoff valves.
c. Open the bypass valve.
d. Turn on the air compressor.
General Operation
Note: Determine whether the Air Dryer is to be used
or to bypass the Air Dryer. Follow the instructions
under ″Air Dryer Set Up″ on page 9.
Follow the instructions below
when using the Air Dryer:
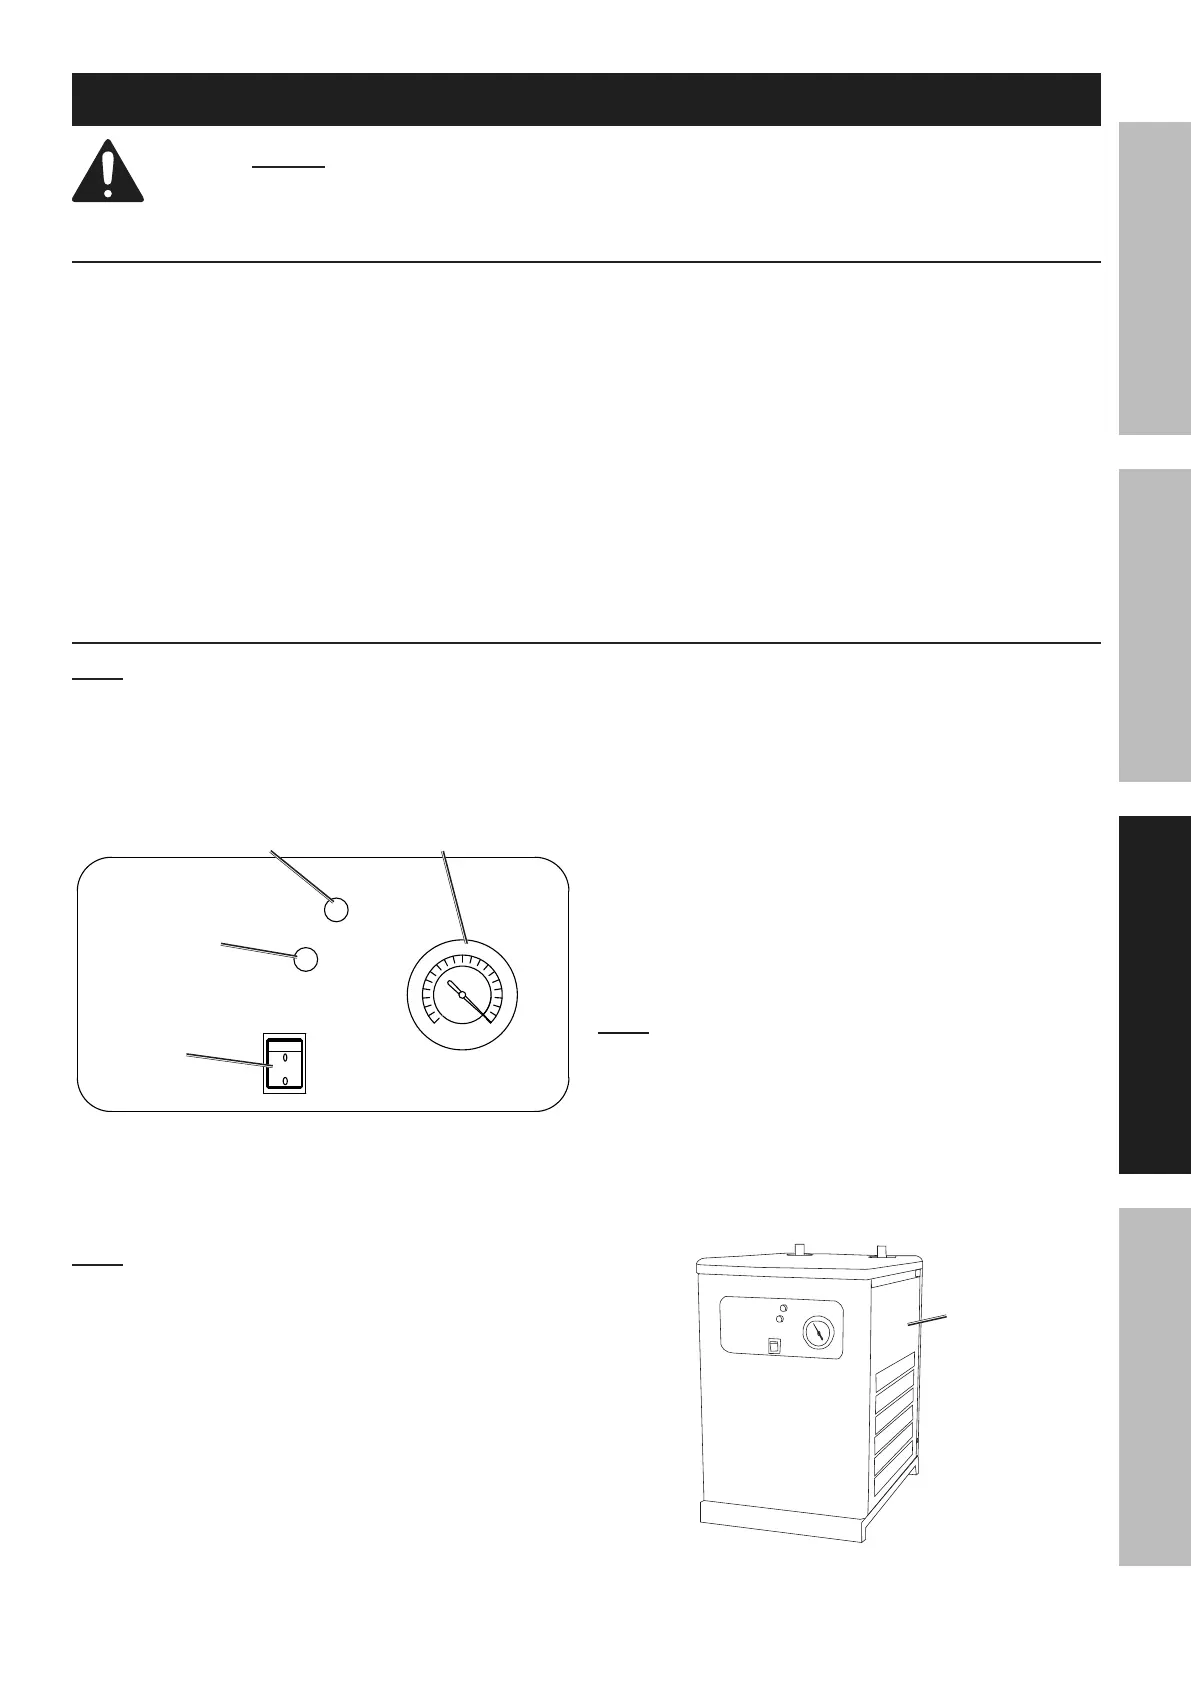
Temperature
Gauge
Error
Indicator
Power
Indicator
Power
Switch
1. Power up the air compressor.
2. Press the Power Switch on the front control
panel to power up the Air Dryer.
Note: If the Error Indicator is on, turn off the Air
Dryer and let the unit cool. After the unit has cooled,
turn on the Air Dryer. If the Error Indicator is still lit,
take the unit to an authorized service technician.
During normal operation, the Gauge should always
be in a range between 32 - 39 PSI (2 - 8° C).
3. After the Air Dryer has warmed up, if you do not
hear the fan running, there is likely not enough
air pressure to activate the pressure switch.
a. Turn off the Air Dryer and the air compressor.
b. Close the shutoff valve for the Air Inlet.
c. Turn the Air Dryer back on and allow it to
build up pressure for a few minutes.
d. Open the shutoff valve for the Air Inlet.
e. Turn on the air compressor and
let the air in slowly at first.
4. During operation, dry air will pass from the
Air Dryer to the tool or application.
5. When finished, stop the air compressor
first. Continue to run the Air Dryer until all
compressed air runs through the system.
6. Turn off the Air Dryer.
Note: If the Air Dryer stops and the Error Indicator is
lit, the unit is running at too high of a temperature or
pressure. Let the unit cool. Unplug the Air Dryer. Open
the Right Side Panel and push the reset button on the
Pressure Switch (See the ″Parts List″ on page 11,
and the ″Assembly Diagram″ on page 12). Replace
the Right Side Panel. Plug the unit in and restart. If
the Error Indicator stays lit, or comes on continually,
take the unit to an authorized service technician.
Right
Panel
Front
 Loading...