SAFETY OPERATION MAINTENANCESETUP
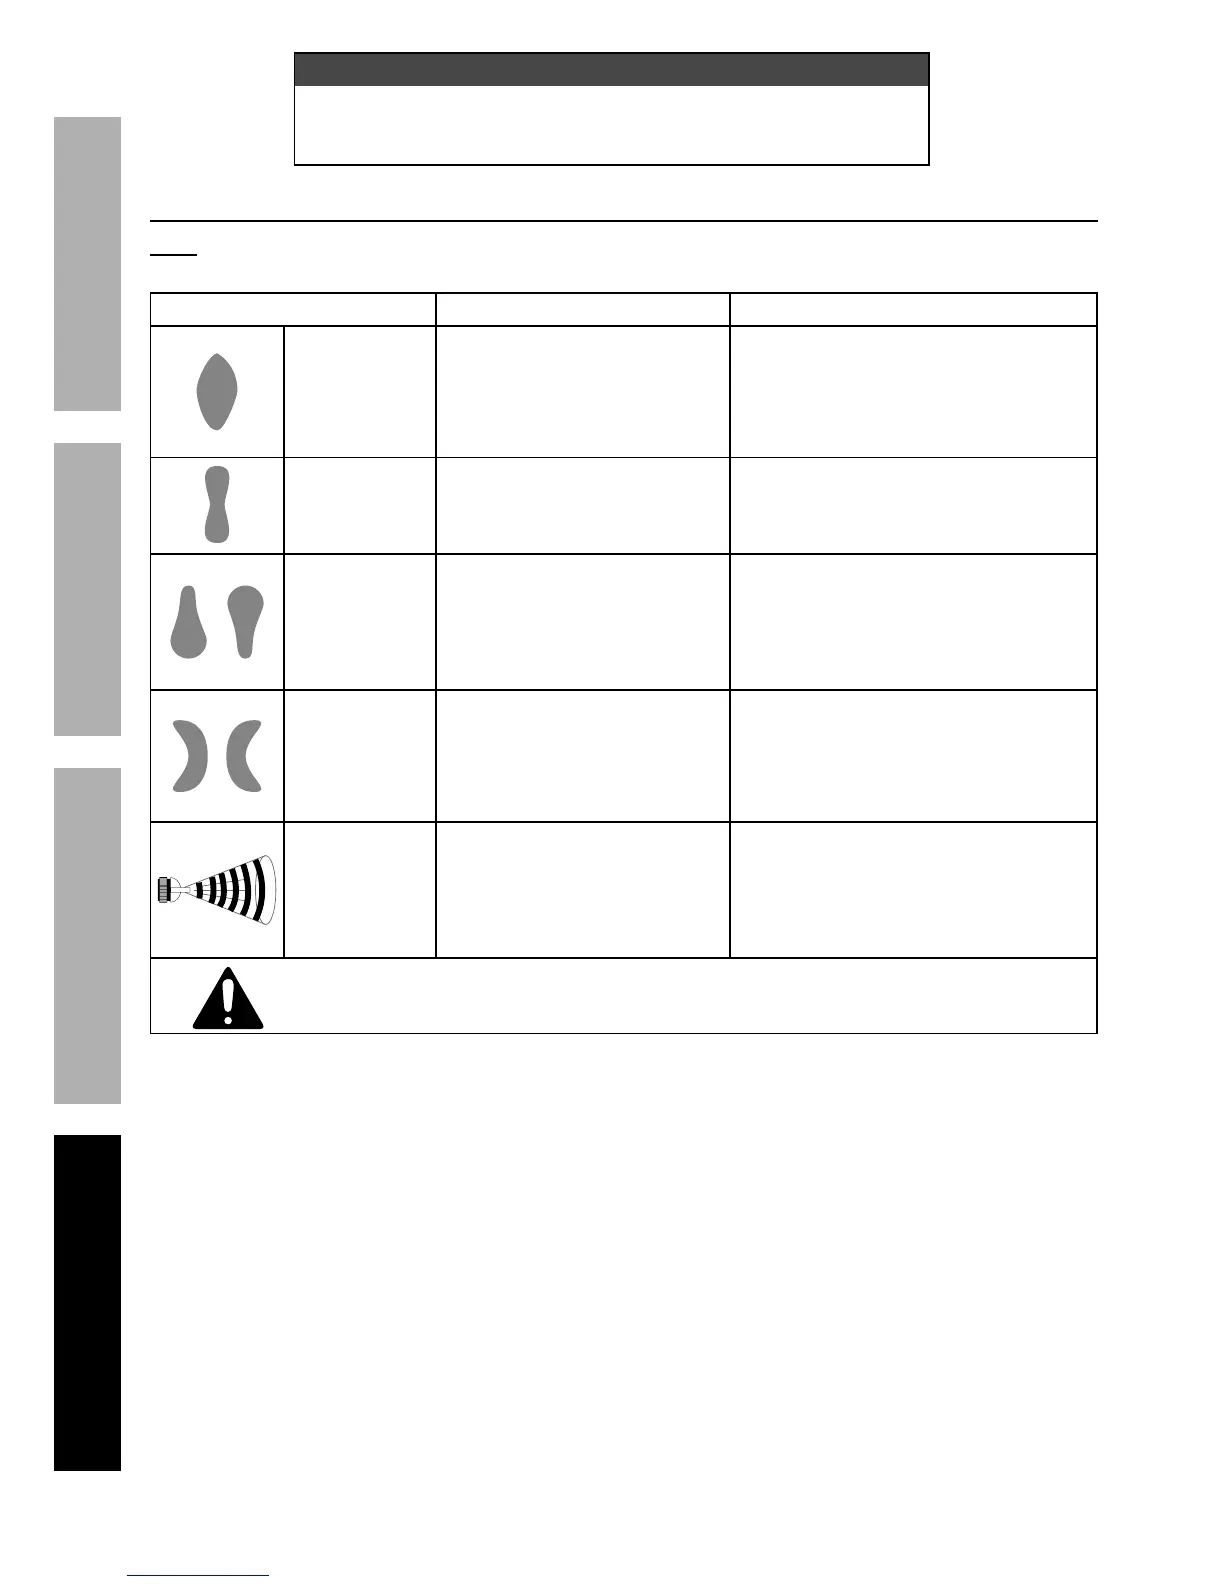
Troubleshooting - Spray Pattern Diagnosis
Note: The drawings on the left below resemble symptoms of spray pattern problems.
Refer to the accompanying possible causes and likely solutions to the right.
Problem Possible Causes Likely Solutions
Heavy center
pattern
1. Pattern Knob partially closed.
2. The paint is too thick.
3. The air pressure is too low.
1. Open Pattern Knob more.
2. Thin paint according to the
manufacturer’s instructions.
3. Increase air pressure within
the Operating Air Pressure.
Light center
pattern
1. High air pressure.
2. Fluid Knob not open enough.
3. Pattern Knob open too far.
1. Reduce air pressure.
2. Open Fluid Knob.
3. Partially close Pattern Knob.
Heavy top/
bottom pattern
1. Nozzle plugged.
2. Nozzle loose or dirty seal.
3. Dried paint on Fluid Tip.
4. Damaged Fluid Needle.
1. Clean Nozzle.
2. Clean and tighten Nozzle and seal.
3. Use a nonmetallic point
to clean Fluid Tip.
4. Replace Fluid Needle and Fluid Tip.
Pattern on right
or left only
1. Dirt on one side of Fluid Tip.
2. Holes on one side of
Nozzle are plugged.
3. Damaged Fluid Needle.
1. Use a nonmetallic point
to clean Fluid Tip.
2. Use a nonmetallic point
to clean Nozzle.
3. Replace Fluid Needle and Fluid Tip.
Jerky or
Fluttering Spray
1. Loose or damaged Nozzle.
2. Paint level low.
3. Obstruction in Fluid Inlet.
4. Dry or loose Fluid
Needle Packing Nut.
1. Tighten or replace.
2. Refill paint Cup.
3. Backflush with solvent.
4. Lubricate or tighten Packing Nut.
Follow all safety precautions whenever diagnosing or servicing the tool.
Disconnect air supply before service.