Wi-Fi Extender Installation Guide
Your kit should include:
• Device Model Number WF-802G
• Device Model Number WF-802GW
• Yellow Ethernet Cable
Note: once you get started, you will have two minutes to complete Steps 1 – 3.
Step 1
Near your high-speed internet modem, find an electrical power outlet that is not
controlled by a wall switch. Plug Device Model Number WF-802G into that outlet.
Step 2
Plug one end of the yellow Ethernet cable into the Ethernet port on the bottom of
Device Model Number WF-802G. Plug the other end of the yellow Ethernet cable into
any one of the Ethernet ports on your high-speed internet modem.
Step 3
Find another, nearby, electrical power outlet that is not controlled by a wall switch.
Plug Device Model Number WF-802GW into that outlet.
Step 4
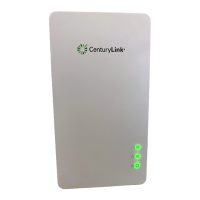
Device WF-802GW should begin to auto-pair with Device WF-802G. The LED next to
the house icon should be blinking green during auto-pairing on both
devices. Auto-pairing can take up to 4 minutes. When auto-pairing is completed, the
LED should be solid green on both devices.
Step 5
Unplug Device WF-802GW and move it to a room where you would like extended
Wi-Fi coverage. Plug Device Model Number WF-802GW into an electrical power
outlet that is not controlled by a wall switch. Your setup should look similar to the
pictures on page 2, and you are ready to enjoy extended Wi-Fi coverage.
Additional help is available if needed at
www.centurylink.com/chat