©2016 Cequent™ Performance Products, Inc. - Printed in Mexico Sheet 5 of 18 76112NP 11-10-16 Rev. B
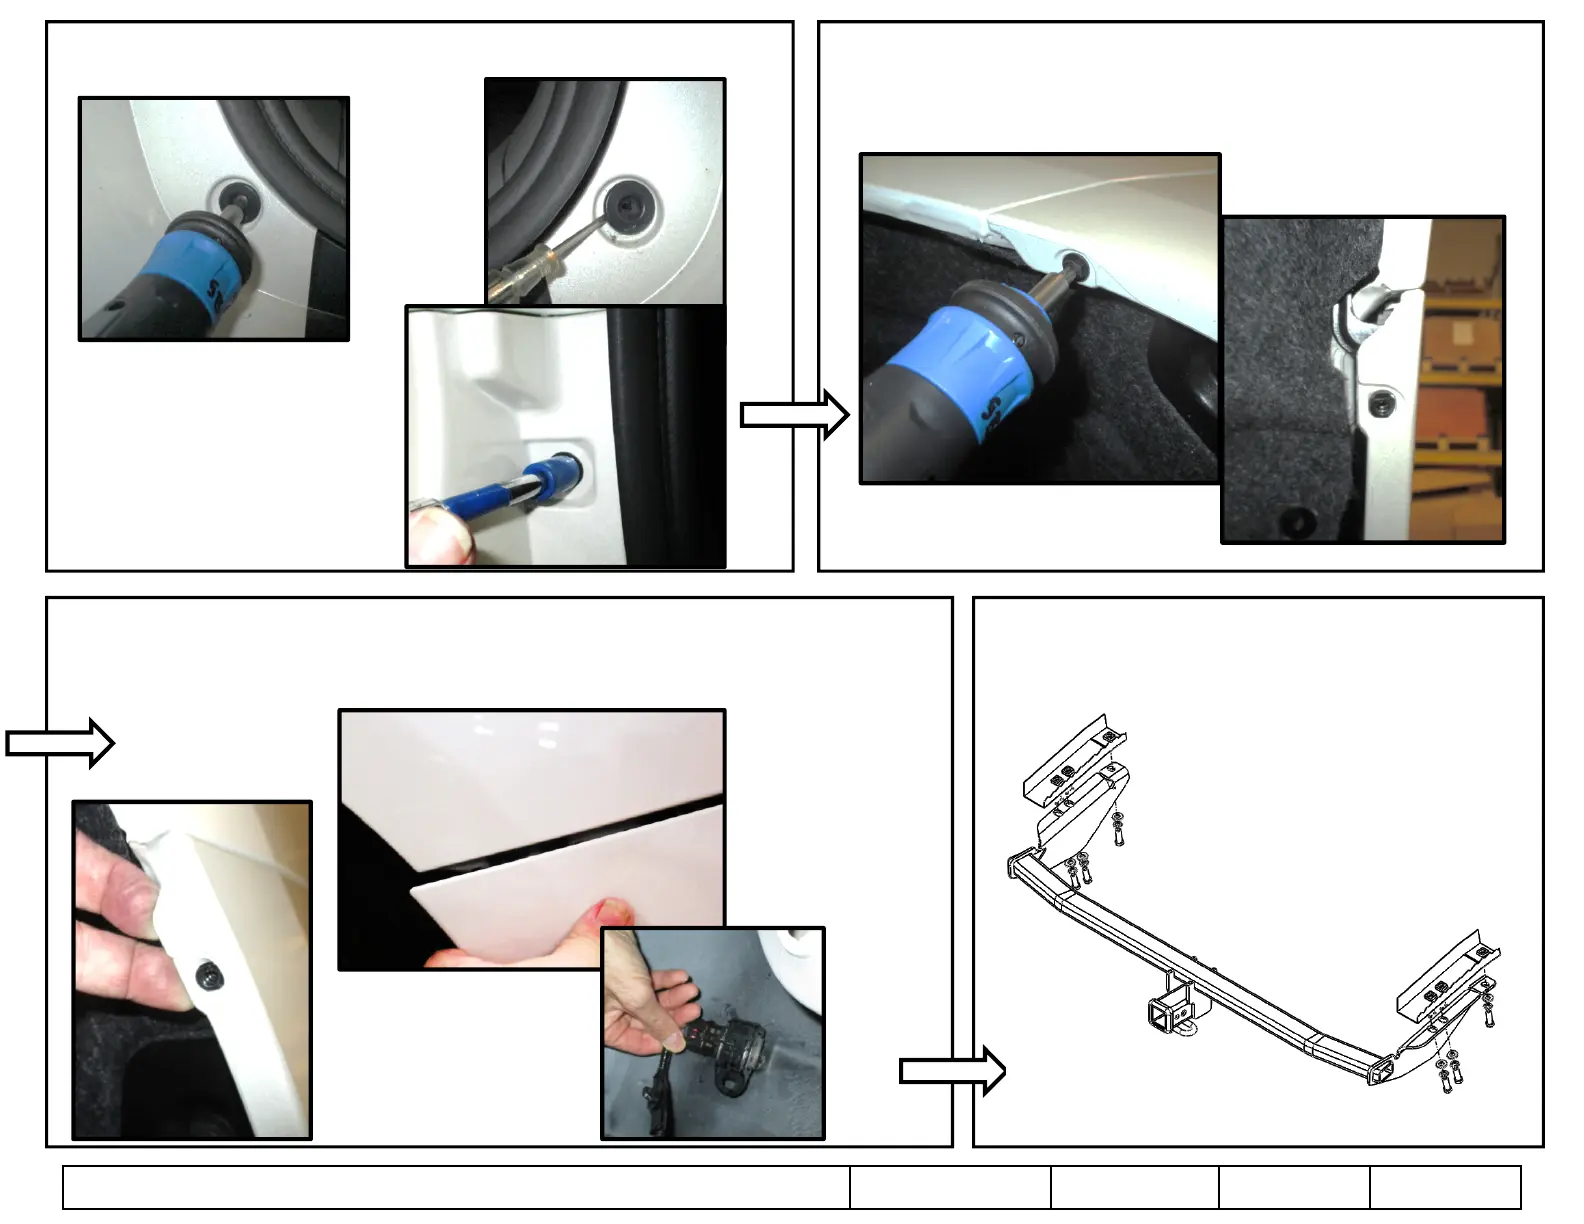
5. Open rear hatch: Open rear hatch on vehicle and remove 2 plastic rivet (1
each side) and 2 small bolt (1 each side).
6. Remove screw from wheel well: Remove (1) Philip screw each side, located
inside fascia at the lower attaching points between rear fascia and rear side
panel of vehicle.
7. Remove lower rear fascia: Gently pull up from the rear wheel well panel each side, unclipping the
tabs inside , while working around to rear. If present disconnect any wiring harness at the fascia, and
put the fascia cover aside. Carefully set the bumper aside.
8. Raise hitch: Raise hitch into position and install hex bolts,
lock washers and flat washers into existing weldnuts in frame,
as shown above. Push hitch toward driver’s side and tighten
fasteners.
 Loading...