EasyManua.ls Logo

Chad Valley CV MY FIRST TRAMPOLINE AND ENCLOSURE User Manual

Chad Valley CV MY FIRST TRAMPOLINE AND ENCLOSURE
15 pages
To Next Page IconTo Next Page
Page #1 background imageLoading...
Page #1 background image
CV MY FIRST TRAMPOLINE AND ENCLOSURE
Assembly & User Instructions - Please keep for future reference
167/8314
These instructions contain important information which will help you get the best from your product
and ensure safe and correct assembly, use and maintenance.
If you need help or have damaged or missing parts, call the Customer Helpline: (+44) 0330 0904 420
Important -Please read these instructions fully before assembly or use.
Tips: It will take 2 adults
around 30 minutes to
assemble.
Age: 3-6 yrs.
Maximum user
weight: 25 kg
Important
Assembly Size: Dia122 x H184cm
Question and Answer IconNeed help?

Do you have a question about the Chad Valley CV MY FIRST TRAMPOLINE AND ENCLOSURE and is the answer not in the manual?

Chad Valley CV MY FIRST TRAMPOLINE AND ENCLOSURE Specifications

General IconGeneral
BrandChad Valley
ModelCV MY FIRST TRAMPOLINE AND ENCLOSURE
CategoryAccessories
LanguageEnglish

Summary

Safety Information

Safe Play Conditions

Conditions necessary for safe play, including site preparation and environment.

Safe Use Conditions

Guidelines for safe usage of the trampoline by users, including supervision and actions.

Enclosure Netting and Mat Safety

Safe usage conditions for the trampoline enclosure netting and mat.

Assembly Instructions

Step 1: Connecting Top Rails

Connect the top rail sections together as shown.

Step 2: Attaching Leg Bases

Insert leg bases into the sockets of the top rails.

Step 3: Securing Frame with Legs

Connect clamp parts and enclosure leg bases to the frame legs.

Step 4: Placing the Mat

Position the trampoline mat in the center of the assembled frame.

Step 5: Attaching Bungee Cords

Connect the mat to the frame using bungee cords.

Step 6: Installing Frame Pad

Cover the trampoline frame with the frame pad and tie straps.

Step 7: Connecting Enclosure Poles

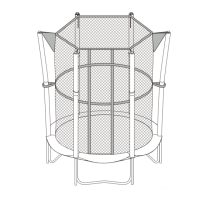
Connect the six enclosure poles to the trampoline frame.

Step 8: Looping Enclosure Netting

Loop the enclosure netting through the enclosure poles.

Step 9: Securing Enclosure Poles

Connect upper enclosure poles to the frame.

Step 10: Hooking Enclosure Top

Pull up the enclosure net and hook its top to the enclosure poles.

Step 11: Fastening Net Bottom

Thread cord through the mat and net to fasten the enclosure bottom.

Step 12: Securing Enclosure

Fasten the velcro and buckles on the enclosure netting during use.

Learning Trampoline Skills

Basic Bounces Guide

Instructions and illustrations for basic trampoline bounces.

Care and Maintenance

General Care and Inspection

General advice on trampoline design, materials, and regular inspections.

Regular Inspection Points

Specific items to check regularly for safety and wear, including bolts and frame.

Windy Conditions and Storage

Guidance on securing or storing the trampoline in windy weather.

Related product manuals