OPENING THE SAFE USING THE OVERRIDE KEY
Use the Manual override key to open the safe.
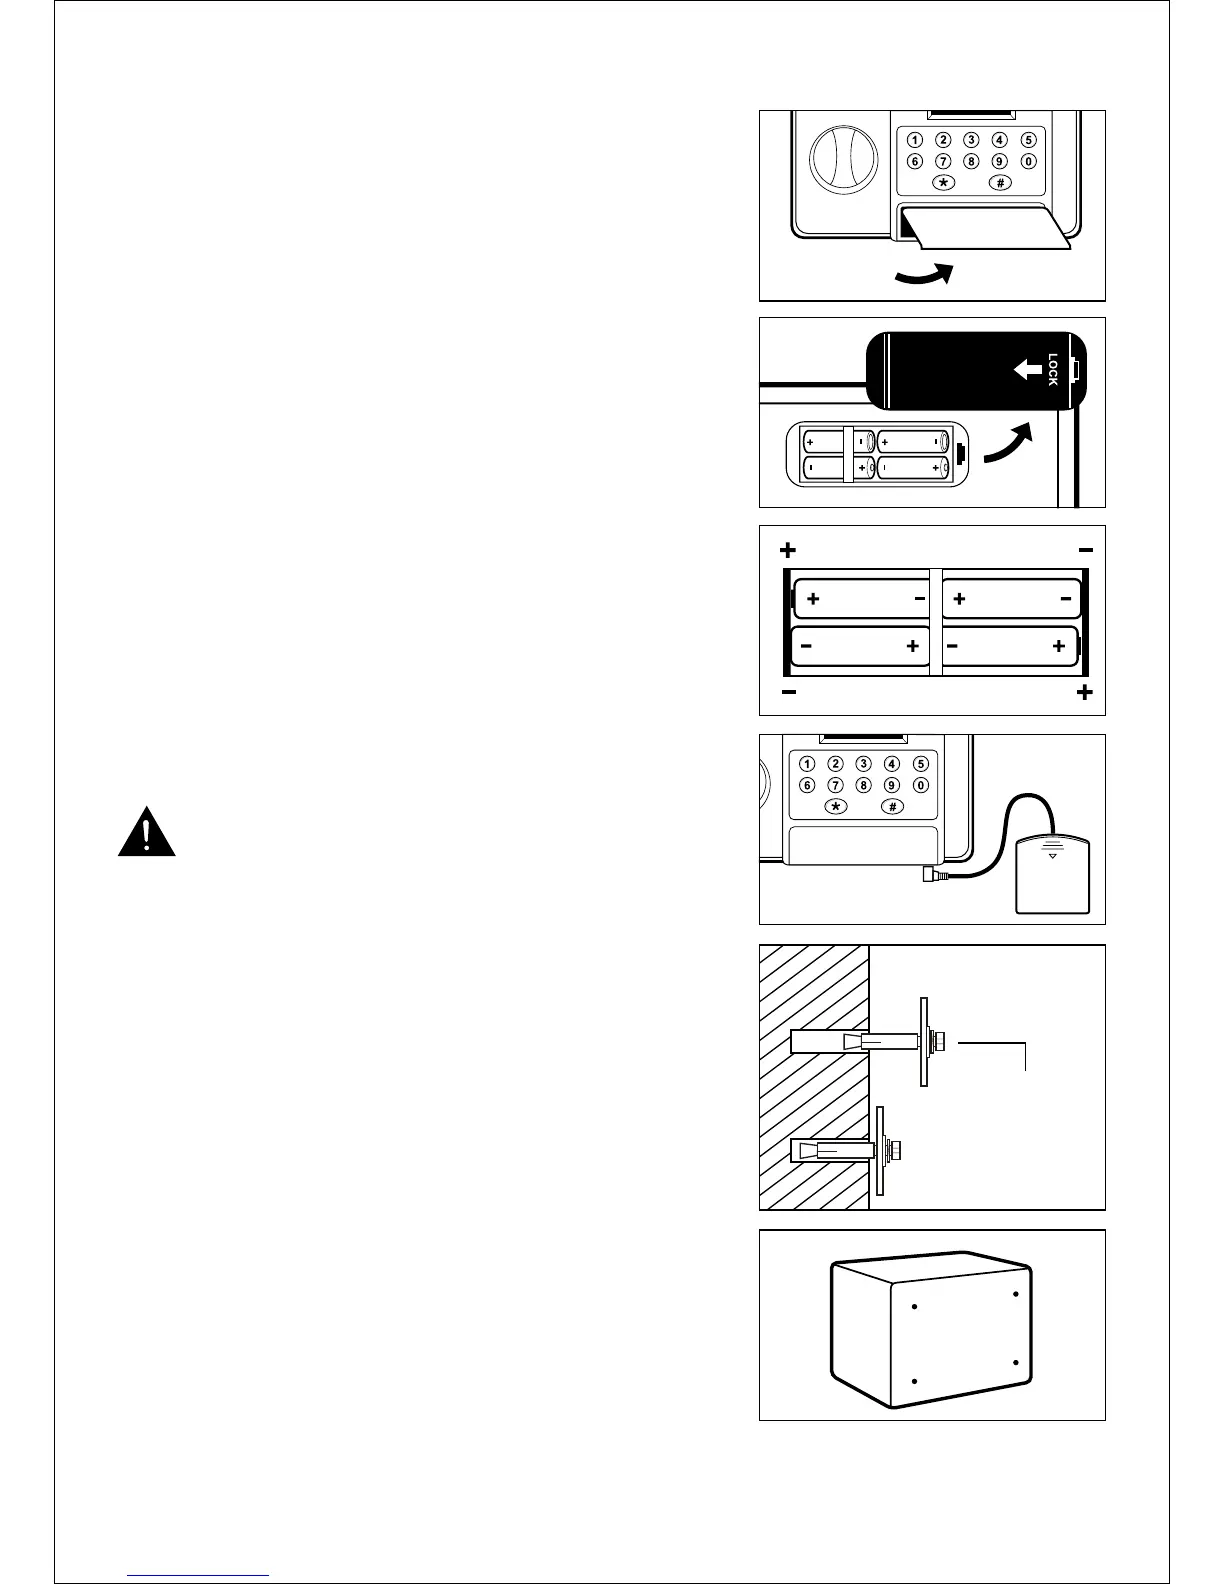
Remove the plastic key lock cover (dia 3)•
Insert the override key; turn it anti-clockwise, at the same time •
turn the locking knob clockwise and pull open the safe.
BATTERY REPLACEMENT
The digital safe uses four ‘AA’ type batteries (supplied).
Remove the battery cover on the rear of the door (dia 4). Push •
the catch in and pull out the cover.
Install the 4x ‘AA’ batteries supplied (dia.4). Ensure correct •
polarity.
Replace the battery cover.•
The unit will beep, and the display will show “o” travelling from •
one side to the other followed by “ALLrEADY”. The unit is now
ready to be programmed.
Keep the safe door open until you have set the PIN code.•
Press #•
If the voltage of batteries is low, the LCD will show “Lo-bAtt”. •
The batteries must be replaced.
BATTERY PACK
Ifyourbatteriesareat,andyouareunabletondtheoverride
keys, you can use the Battery Pack to power the keyboard.
Fit four 1.5V ‘AA’ batteries in the battery pack. Plug the jack plug
of the pack into the battery backup socket on the panel of the
keypad. (dia.5).
The battery life is approximately one year.
Make a note of the battery replacement date; they should
last approximately one year.
However, we recommend checking the batteries every 6
months just to make sure.
If power is removed from the safe the set PIN code may
reset. If this happens use the factory default Pin codes.
SECURING YOUR SAFE
ADVICE: WE STRONGLY RECOMMEND THAT YOU SECURE
YOUR SAFE TO A WALL OR FLOOR FOR SECURITY
REASONS.
Youmaywishtosecureyoursafetoaxedpartofthehouse(i.e.
stone wall or wooden beam).
This can be achieved by using 2 of the 4 rawlbolts supplied in the
back of the safe or using the 4 rawlbolts in the base of the safe.
Use the holes in the safe to mark where you need to drill. Loosely
attach the rawlbolts onto the safe with the nuts and washers
provided. Hold the safe over the drilled holes and locate the
rawlbolts into these holes (Dia 6). Tighten the nuts from the inside
ofthesafetosecurermly.
Note : The rawlbolts are packed inside the safe
-3-
Dia.3
Dia.4
Dia.5
Dia.6
Back of safe
Wall
Nut & Washer
on the inside of
the safe
Dia.7